
01 · What it is and doesWhat it is and doesWhat it is and doesWhat it is and doesWhat it is and doesWhat it is and doesWhat it is and doesQué es y qué hace
What is Catholic Publisher?What is Catholic Publisher?What is Catholic Publisher?What is Catholic Publisher?What is Catholic Publisher?What is Catholic Publisher?What is Catholic Publisher?¿Qué es Catholic Publisher?
Catholic Publisher is a free Windows application for creating bulletins, worship aids, or any kind of booklet. Put text, bilingual articles, pictures, and tables on the page, then export a PDF or print your finished work.Catholic Publisher is a free Windows application for creating bulletins, worship aids, or any kind of booklet. Put text, bilingual articles, pictures, and tables on the page, then export a PDF or print your finished work.Catholic Publisher is a free Windows application for creating bulletins, worship aids, or any kind of booklet. Put text, bilingual articles, pictures, and tables on the page, then export a PDF or print your finished work.Catholic Publisher is a free Windows application for creating bulletins, worship aids, or any kind of booklet. Put text, bilingual articles, pictures, and tables on the page, then export a PDF or print your finished work.Catholic Publisher is a free Windows application for creating bulletins, worship aids, or any kind of booklet. Put text, bilingual articles, pictures, and tables on the page, then export a PDF or print your finished work.Catholic Publisher is a free Windows application for creating bulletins, worship aids, or any kind of booklet. Put text, bilingual articles, pictures, and tables on the page, then export a PDF or print your finished work.Catholic Publisher is a free Windows application for creating bulletins, worship aids, or any kind of booklet. Put text, bilingual articles, pictures, and tables on the page, then export a PDF or print your finished work.Catholic Publisher es una aplicación gratuita para Windows que permite crear boletines, ayudas para el culto o cualquier tipo de folleto. Coloque texto, artículos bilingües, imágenes y tablas en la página; después exporte un PDF o imprima su trabajo.
02 · The CPUB lifecycleThe CPUB lifecycleThe CPUB lifecycleThe CPUB lifecycleThe CPUB lifecycleThe CPUB lifecycleThe CPUB lifecycleEl ciclo de vida del CPUB
The life of a CPUBThe life of a CPUBThe life of a CPUBThe life of a CPUBThe life of a CPUBThe life of a CPUBThe life of a CPUBEl ciclo de vida de un CPUB
Start with the sampleStart with the sampleStart with the sampleStart with the sampleStart with the sampleStart with the sampleStart with the sampleComience con la muestra
A normal launch opens an empty workspace. Learn with the supplied sample, create a new blank publication, or open a bulletin you already started.
Choose a document mode and create a file
Elija un modo de documento y cree un archivo
Scegli il tipo di documento e crea un file
Choisir un mode de document et créer un fichier
Dokumentmodus wählen und eine Datei erstellen
Escolher um modo de documento e criar um ficheiro
Wybierz tryb dokumentu i utwórz plik
Pumili ng mode ng dokumento at gumawa ng file
No-fold
Sin pliegue
Senza piega
Sans pli
Ungefaltet
Sem dobra
Bez składania
Walang tiklop

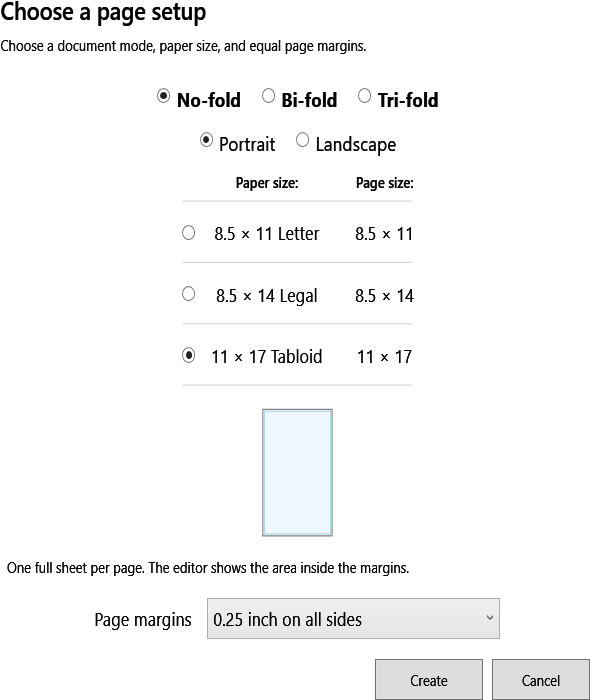
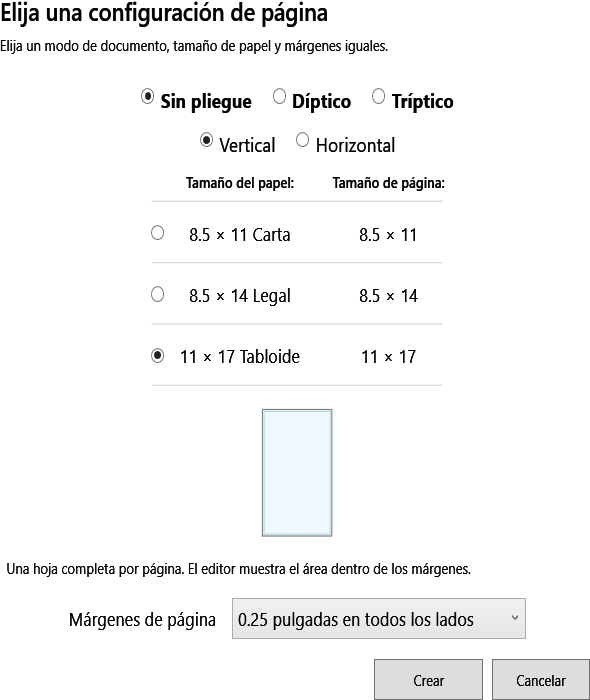
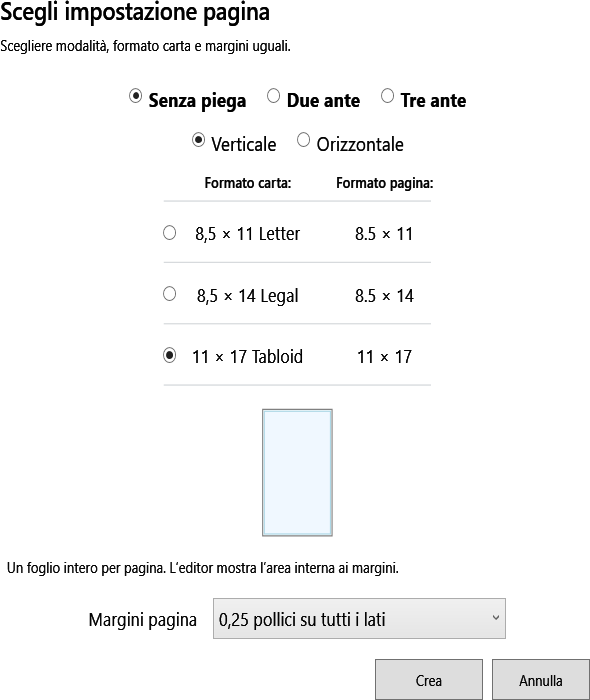
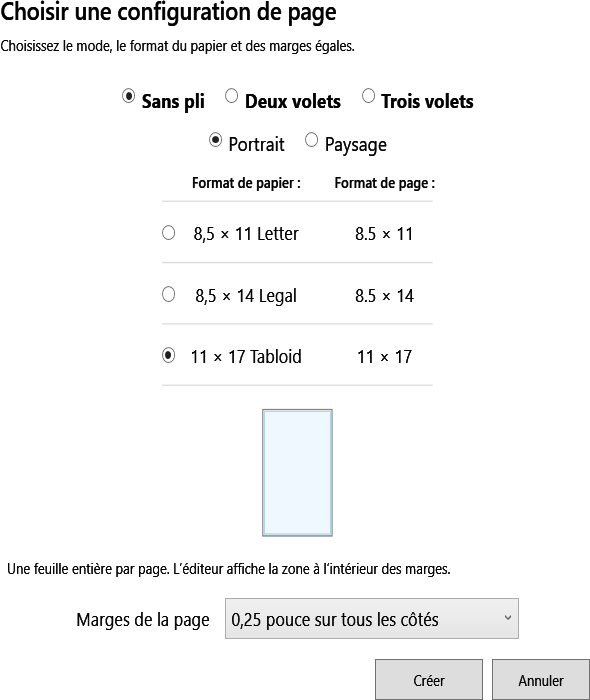
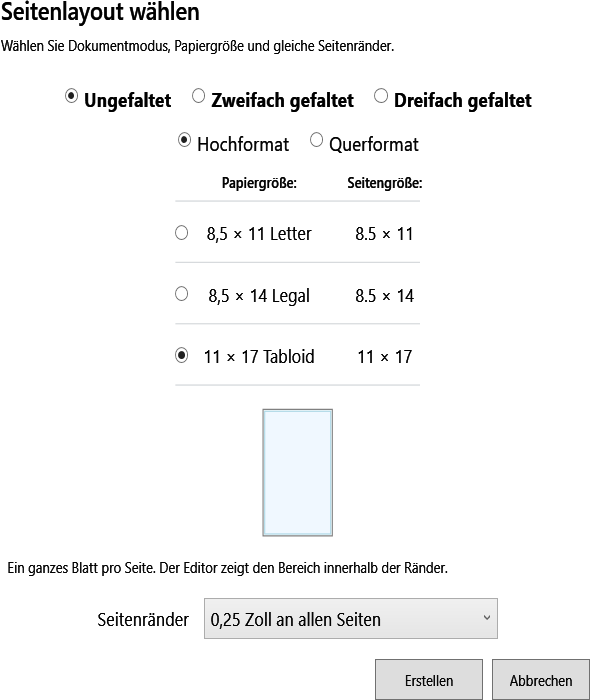
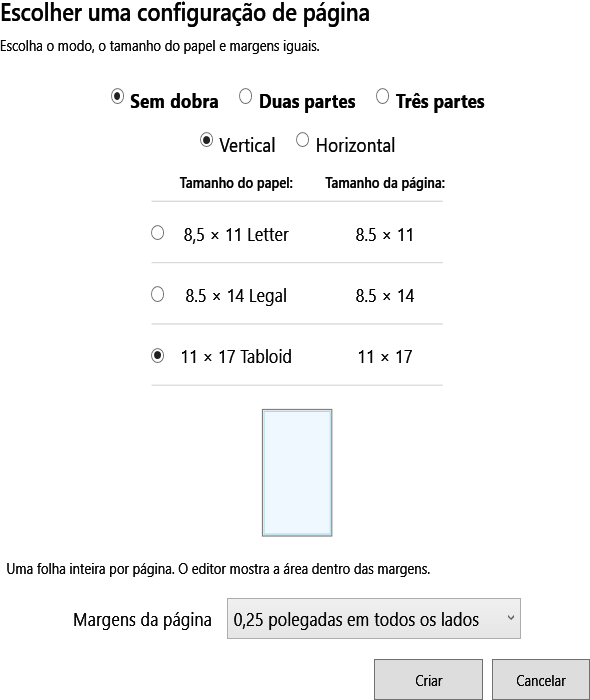
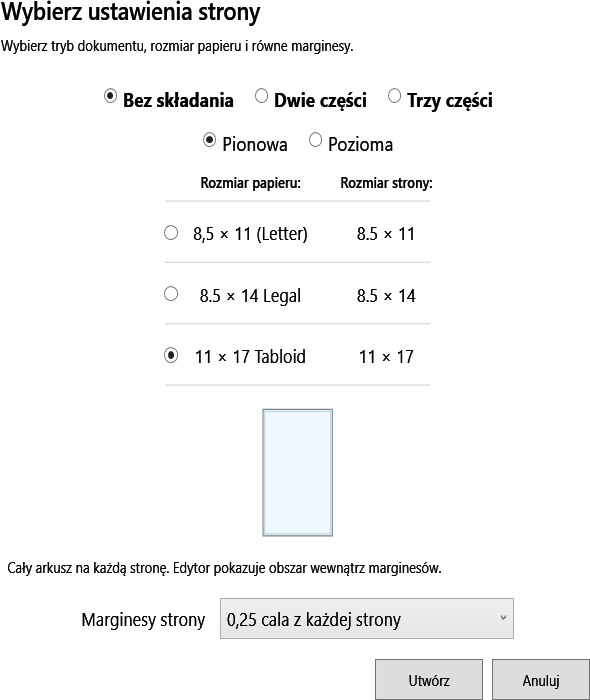
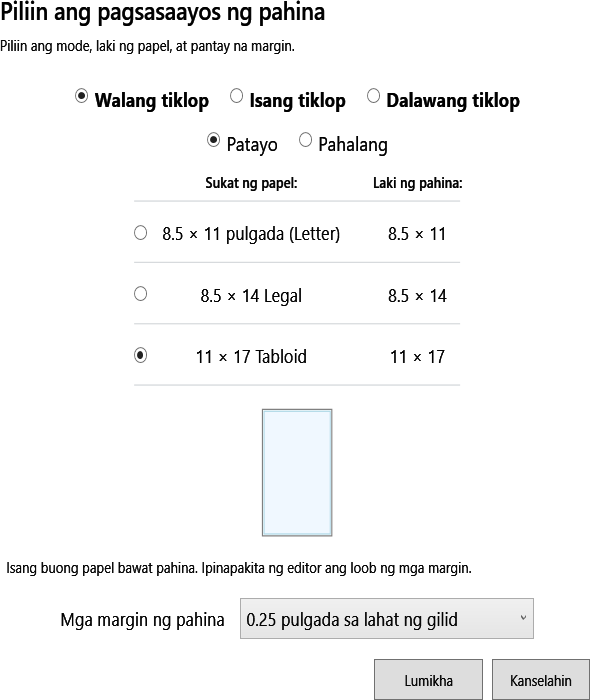
Normal unfolded pages: one full sheet per page, with no fold. Choose portrait for letters and handouts, or landscape for wider layouts. Suitable for ordinary documents and full-page worship aids.
Páginas normales sin plegar: una hoja completa por página. Elija orientación vertical para cartas y hojas informativas, u horizontal para diseños más anchos. Útil para documentos comunes y subsidios litúrgicos de página completa.
Pagine normali non piegate: un foglio intero per pagina. Scegli l’orientamento verticale per lettere e volantini, oppure orizzontale per impaginazioni più larghe. Adatto a documenti comuni e sussidi liturgici a pagina intera.
Pages ordinaires non pliées : une feuille entière par page. Choisissez le portrait pour les lettres et les feuilles d’information, ou le paysage pour les compositions plus larges. Convient aux documents courants et aux supports liturgiques pleine page.
Normale ungefaltete Seiten: ein ganzes Blatt pro Seite. Wählen Sie Hochformat für Briefe und Handzettel oder Querformat für breitere Layouts. Geeignet für gewöhnliche Dokumente und ganzseitige Gottesdiensthilfen.
Páginas normais sem dobras: uma folha inteira por página. Escolha a orientação vertical para cartas e folhas informativas, ou horizontal para composições mais largas. Adequado para documentos comuns e guias litúrgicos de página inteira.
Zwykłe strony bez składania: jeden pełny arkusz na stronę. Wybierz orientację pionową dla listów i ulotek lub poziomą dla szerszych układów. Odpowiednie dla zwykłych dokumentów i całostronicowych pomocy liturgicznych.
Karaniwang mga pahinang hindi nakatiklop: isang buong papel bawat pahina. Piliin ang patayo para sa mga liham at handout, o pahiga para sa mas malalapad na layout. Para sa karaniwang dokumento at buong-pahinang gabay sa pagsamba.
Bi-fold
Díptico
Due ante
Deux volets
Zweifach gefaltet
Duas partes
Dwie części
Isang tiklop
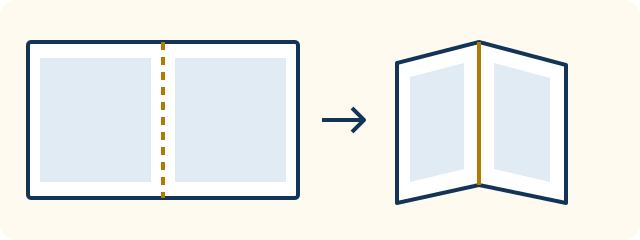
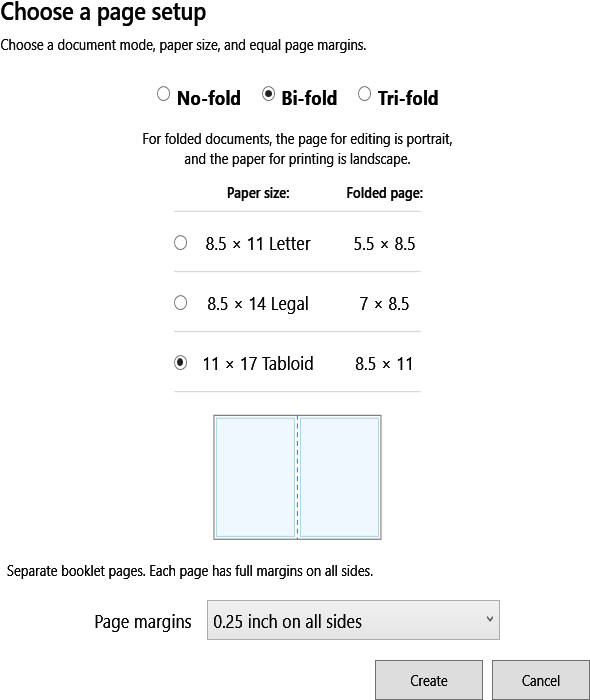
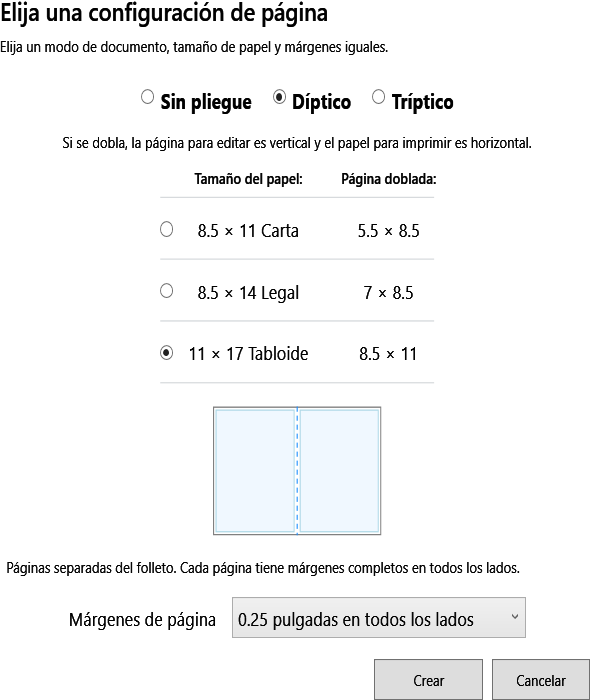
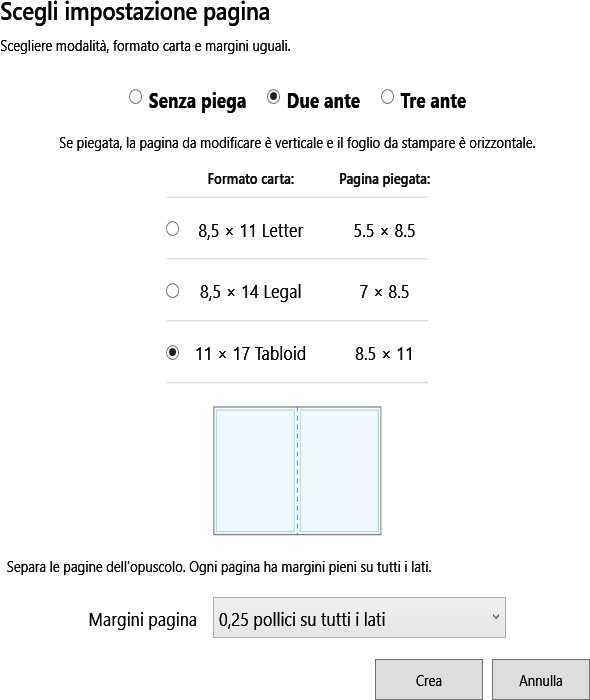
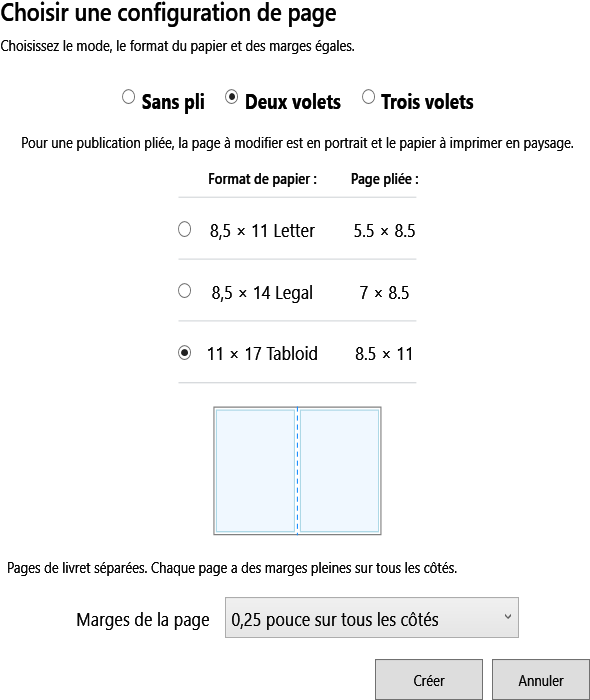
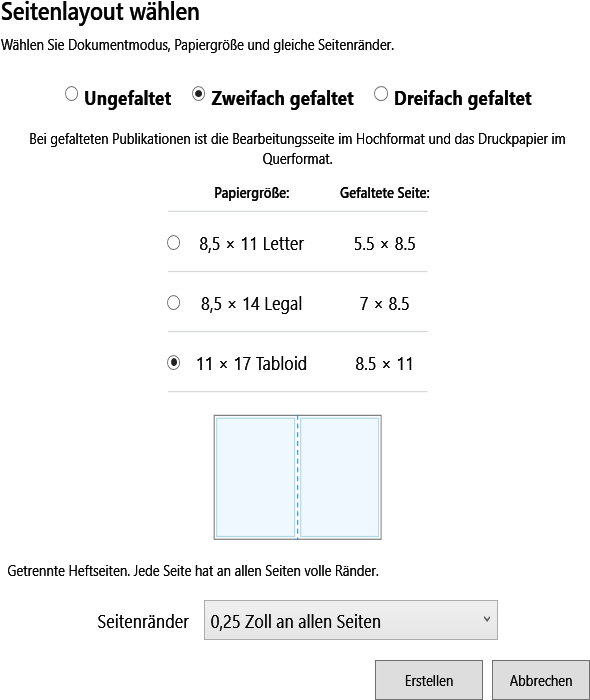
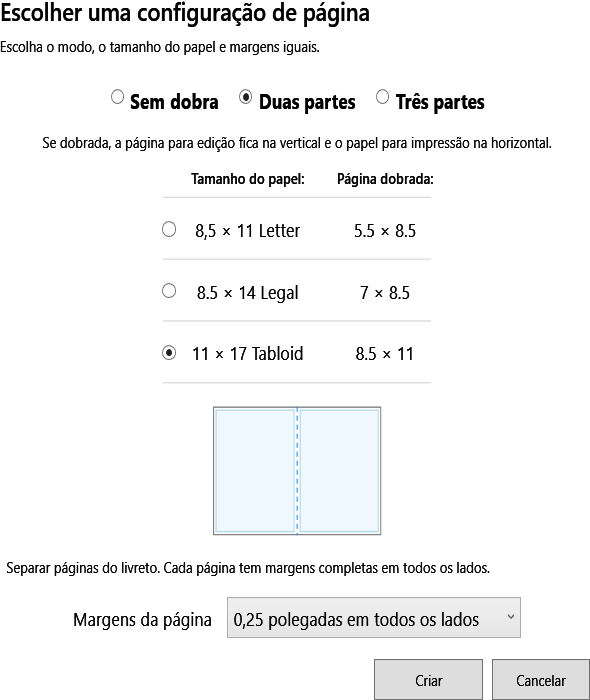
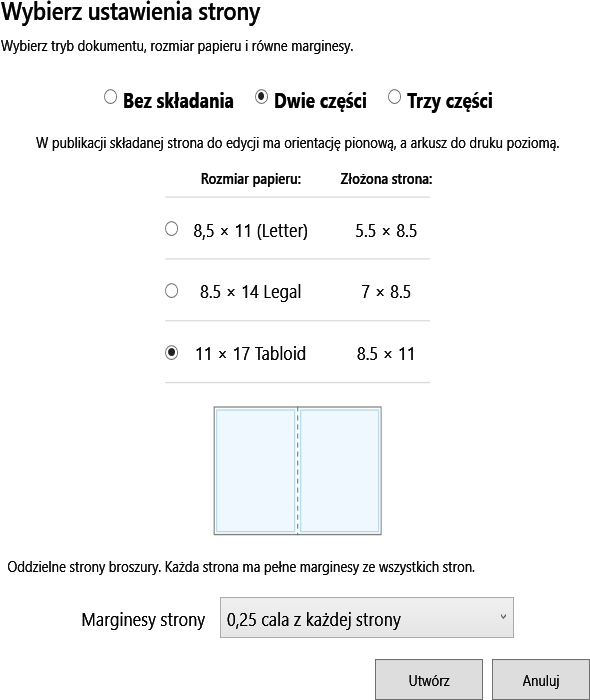
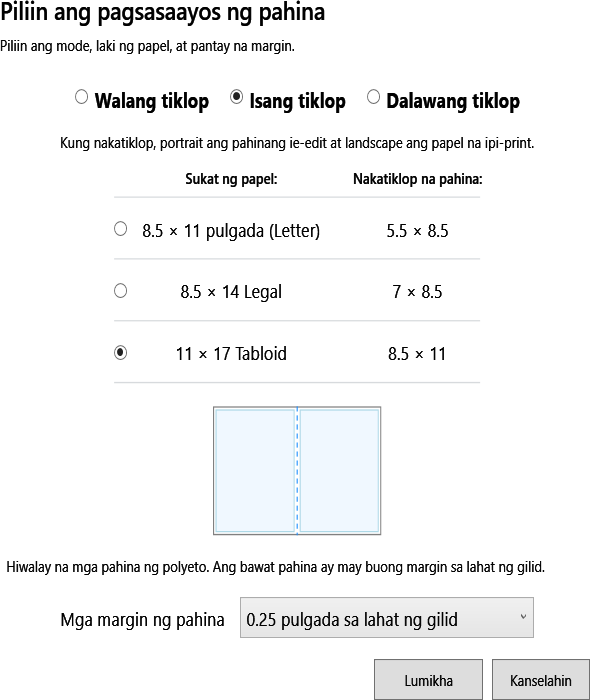
Fold a sheet once down the middle. Each side contains two pages; printing both sides gives four pages per sheet. Use this for weekly bulletins and booklet-style worship aids. The diagrams show the fold, not the print page order.
Doble la hoja una vez por la mitad. Cada cara contiene dos páginas; al imprimir ambas caras hay cuatro páginas por hoja. Úselo para boletines semanales y subsidios litúrgicos en cuadernillo. Los diagramas muestran el pliegue, no el orden de impresión.
Piega il foglio una volta a metà. Ogni lato contiene due pagine; stampando fronte e retro si ottengono quattro pagine per foglio. Ideale per bollettini settimanali e sussidi in forma di opuscolo. I diagrammi mostrano la piega, non l’ordine di stampa.
Pliez la feuille une fois en deux. Chaque face contient deux pages ; en recto verso, une feuille contient quatre pages. Idéal pour les bulletins hebdomadaires et les livrets liturgiques. Les schémas montrent le pli, pas l’ordre d’impression.
Falten Sie das Blatt einmal in der Mitte. Jede Seite des Blatts enthält zwei Dokumentseiten; beidseitig bedruckt ergibt das vier Seiten pro Blatt. Geeignet für wöchentliche Pfarrbriefe und Gottesdiensthefte. Die Abbildungen zeigen den Falz, nicht die Druckreihenfolge.
Dobre a folha uma vez ao meio. Cada face contém duas páginas; imprimindo frente e verso obtém quatro páginas por folha. Ideal para boletins semanais e guias em formato de livreto. Os diagramas mostram a dobra, não a ordem de impressão.
Złóż arkusz raz na pół. Każda strona arkusza zawiera dwie strony dokumentu, więc druk dwustronny daje cztery strony na arkusz. Przydatne do biuletynów i książeczek liturgicznych. Rysunki pokazują zgięcie, nie kolejność drukowania.
Itiklop ang papel nang isang beses sa gitna. May dalawang pahina sa bawat panig; apat na pahina bawat papel kapag naka-print sa magkabilang panig. Para sa lingguhang bulletin at buklet na gabay sa pagsamba. Ipinapakita ng mga larawan ang tiklop, hindi ang ayos ng pag-print.
Tri-fold
Tríptico
Tre ante
Trois volets
Dreifach gefaltet
Três partes
Trzy części
Dalawang tiklop
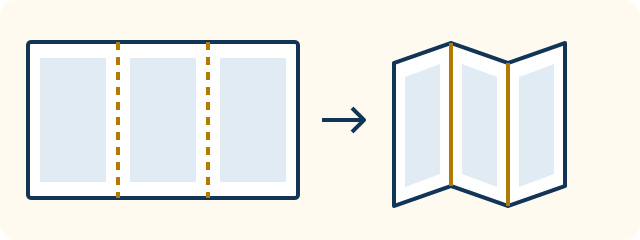
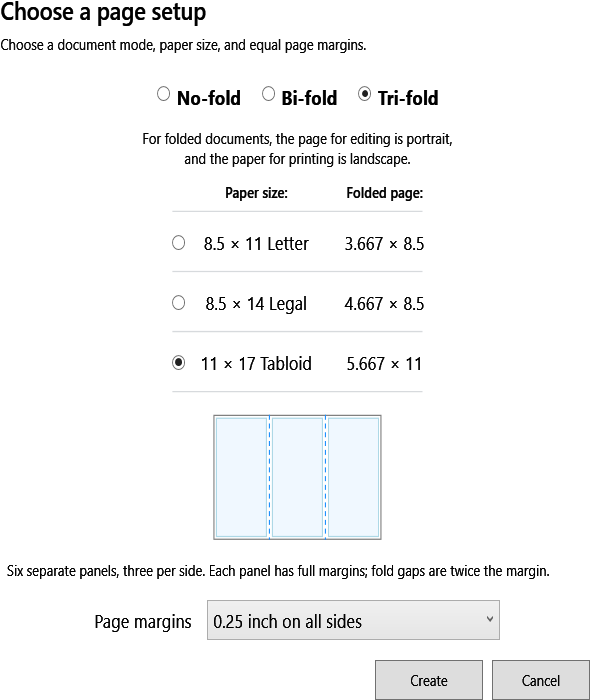
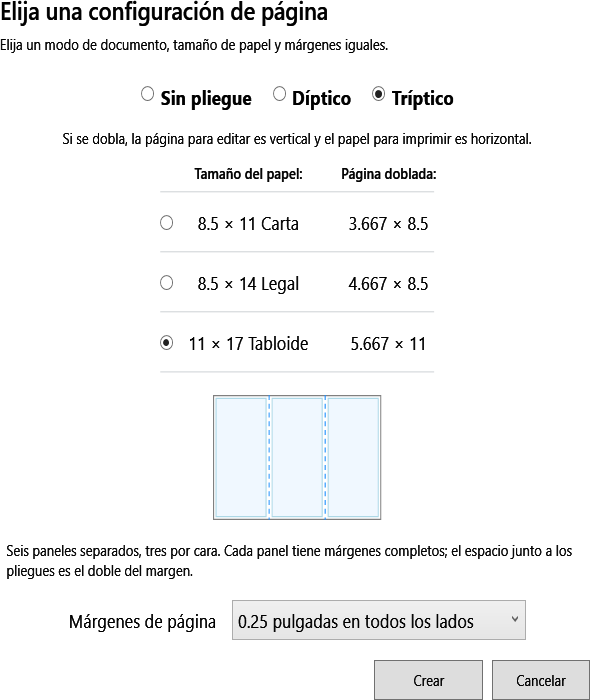
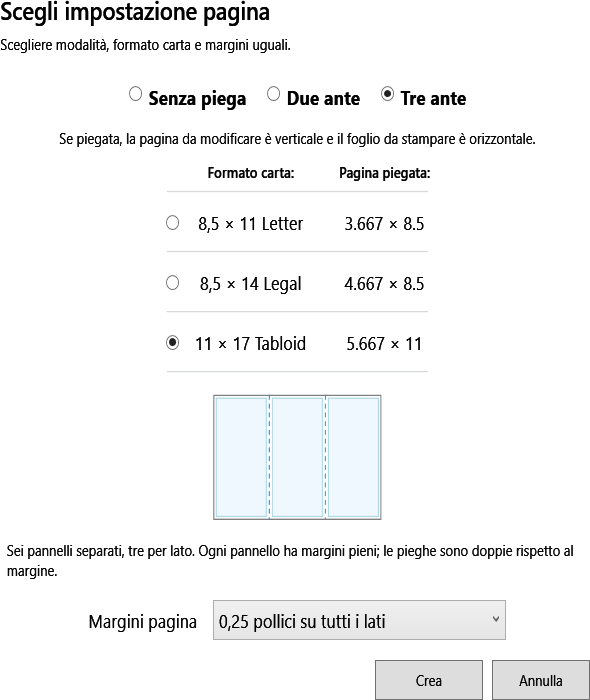
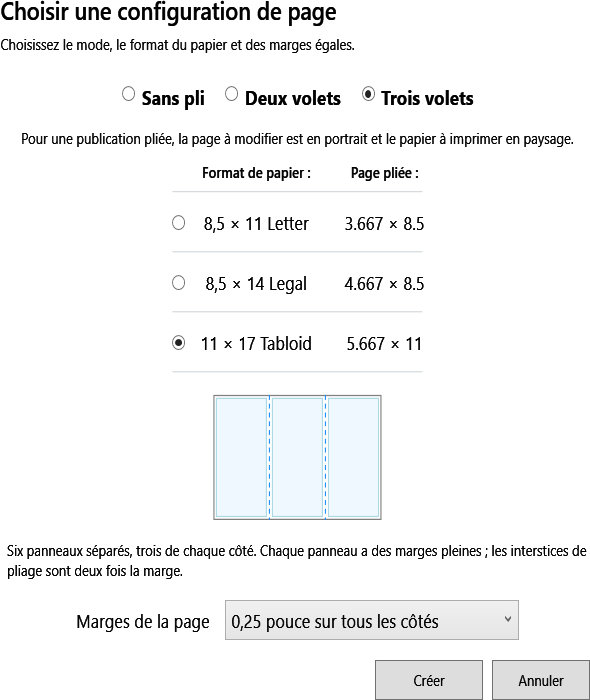
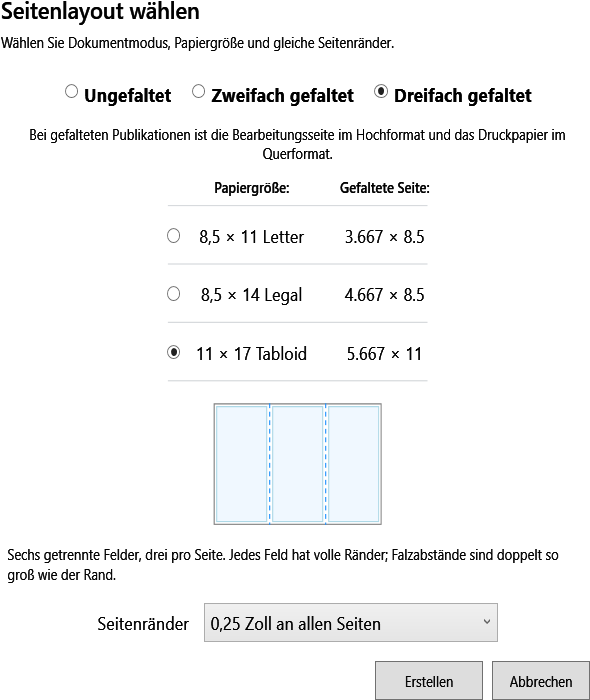
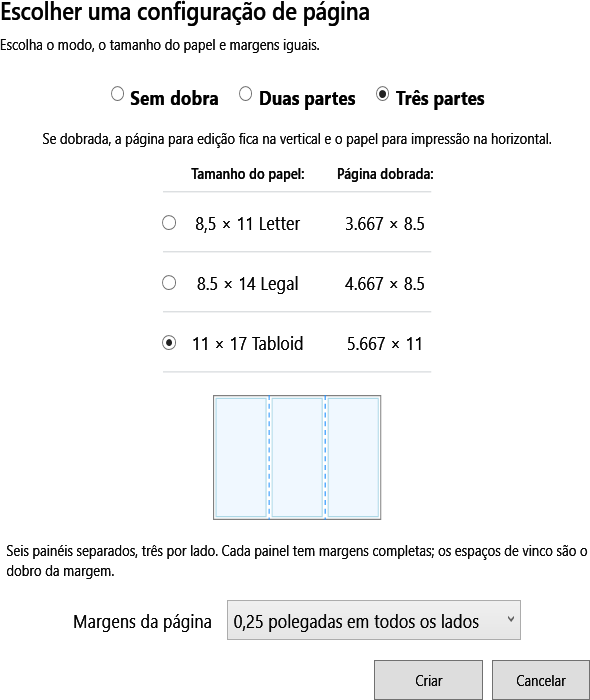
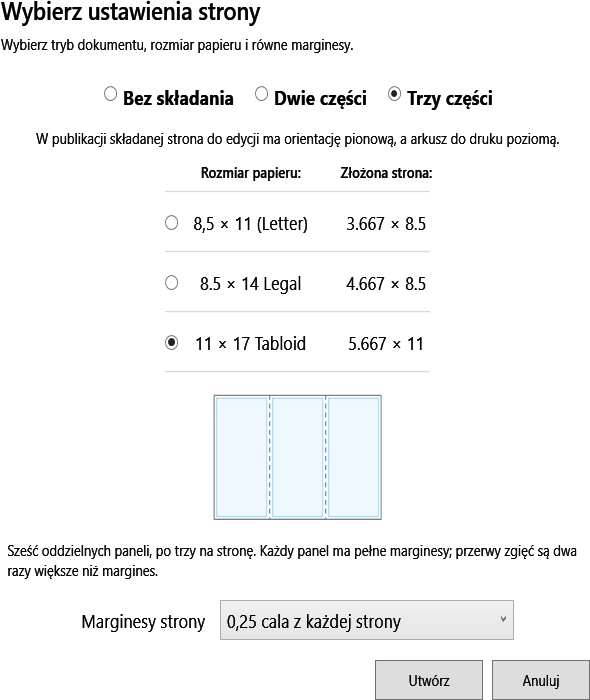
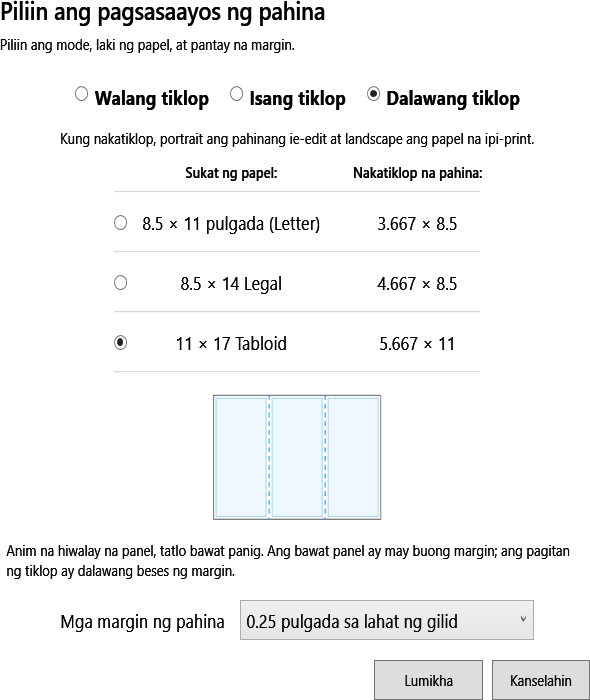
Fold a landscape sheet twice to make three panels. Each side has three panels, giving six panels on a double-sided sheet. Use this for brochures and compact worship aids. The app arranges tri-fold output; do not also enable booklet layout in the printer.
Doble una hoja horizontal dos veces para formar tres paneles. Cada cara tiene tres paneles: seis en una hoja impresa por ambos lados. Úselo para folletos y subsidios litúrgicos compactos. La aplicación distribuye la impresión del tríptico; no active también la opción de folleto en la impresora.
Piega due volte un foglio orizzontale per ottenere tre ante. Ogni lato ha tre pannelli: sei su un foglio stampato fronte e retro. Ideale per brochure e sussidi compatti. L’app dispone i pannelli per la stampa; non attivare anche la stampa opuscolo nella stampante.
Pliez deux fois une feuille en paysage pour obtenir trois volets. Chaque face comporte trois panneaux, soit six en recto verso. Idéal pour les brochures et les supports liturgiques compacts. L’application dispose les panneaux pour l’impression ; n’activez pas aussi le mode livret de l’imprimante.
Falten Sie ein Blatt im Querformat zweimal, sodass drei Abschnitte entstehen. Jede Blattseite enthält drei Felder, also sechs bei beidseitigem Druck. Geeignet für Faltblätter und kompakte Gottesdiensthilfen. Die App ordnet die Druckfelder an; aktivieren Sie nicht zusätzlich den Broschürendruck im Drucker.
Dobre duas vezes uma folha horizontal para criar três painéis. Cada face tem três painéis, ou seis numa folha impressa dos dois lados. Ideal para brochuras e guias compactos. A aplicação organiza a impressão do tríptico; não ative também o modo de livreto na impressora.
Złóż poziomy arkusz dwukrotnie, aby utworzyć trzy panele. Każda strona arkusza ma trzy panele, czyli sześć przy druku dwustronnym. Przydatne do broszur i kompaktowych pomocy liturgicznych. Aplikacja układa panele do druku; nie włączaj dodatkowo trybu broszury w drukarce.
Itiklop nang dalawang beses ang pahigang papel upang magkaroon ng tatlong panel. May tatlong panel bawat panig, o anim kapag naka-print sa magkabilang panig. Para sa brochure at maliit na gabay sa pagsamba. Inaayos ng app ang tri-fold para sa pag-print; huwag ding paganahin ang booklet layout sa printer.
Illustrations: sheet and folds, not print order.
Ilustraciones: hoja y pliegues, no orden de impresión.
Illustrazioni: foglio e pieghe, non ordine di stampa.
Illustrations : feuille et plis, pas ordre d’impression.
Abbildungen: Blatt und Falze, nicht Druckreihenfolge.
Ilustrações: folha e dobras, não ordem de impressão.
Rysunki: arkusz i zgięcia, nie kolejność drukowania.
Mga larawan: papel at tiklop, hindi ayos ng pag-print.
Create a new publication
Crear una publicación nueva
Crea una nuova pubblicazione
Créer une publication
Neue Publikation erstellen
Criar uma publicação
Utwórz nową publikację
Gumawa ng bagong publikasyon
Open File > New publication, or press Ctrl+N. Choose No-fold, Bi-fold, or Tri-fold at the top of the dialog. For No-fold, also choose Portrait or Landscape.
Abra Archivo > Nueva publicación o presione Ctrl+N. Elija el modo sin plegar, díptico o tríptico en la parte superior del cuadro de diálogo. Para el modo sin plegar, elija también orientación vertical u horizontal.
Apri File > Nuova pubblicazione oppure premi Ctrl+N. Scegli il formato senza pieghe, a due ante o a tre ante nella parte superiore della finestra. Per il formato senza pieghe scegli anche verticale o orizzontale.
Ouvrez Fichier > Nouvelle publication ou appuyez sur Ctrl+N. Choisissez le mode sans pli, à deux volets ou à trois volets en haut de la boîte de dialogue. Pour le mode sans pli, choisissez aussi portrait ou paysage.
Öffnen Sie Datei > Neue Publikation oder drücken Sie Strg+N. Wählen Sie oben im Dialog ungefaltete Seiten, Bi-fold oder Tri-fold. Bei ungefalteten Seiten wählen Sie außerdem Hochformat oder Querformat.
Abra Ficheiro > Nova publicação ou prima Ctrl+N. Escolha o modo sem dobras, díptico ou tríptico no topo da caixa de diálogo. No modo sem dobras, escolha também vertical ou horizontal.
Otwórz Plik > Nowa publikacja lub naciśnij Ctrl+N. U góry okna wybierz dokument bez składania, składany na pół lub na trzy części. Dla dokumentu bez składania wybierz także orientację pionową lub poziomą.
Buksan ang File > New publication o pindutin ang Ctrl+N. Piliin sa itaas ng dialog ang hindi nakatiklop, tiklop sa kalahati, o tiklop sa tatlong bahagi. Para sa hindi nakatiklop, piliin din ang patayo o pahiga.
Choose the actual paper you will use: 8.5 × 11 Letter, 8.5 × 14 Legal, or 11 × 17 Tabloid. Set equal margins from 0.25 to 1 inch in 0.125-inch steps. The preview shows the usable area inside the margins; folded modes use margins for each page or panel.
Elija el papel que utilizará: Carta de 8.5 × 11, Legal de 8.5 × 14 o Tabloide de 11 × 17 pulgadas. Configure márgenes iguales de 0.25 a 1 pulgada en pasos de 0.125. La vista previa muestra el área útil dentro de los márgenes; los modos plegados aplican márgenes a cada página o panel.
Scegli la carta da utilizzare: Letter 8,5 × 11, Legal 8,5 × 14 o Tabloid 11 × 17 pollici. Imposta margini uguali da 0,25 a 1 pollice, con incrementi di 0,125. L’anteprima mostra l’area utilizzabile entro i margini; nei formati piegati i margini si applicano a ogni pagina o pannello.
Choisissez le papier utilisé : Letter 8,5 × 11, Legal 8,5 × 14 ou Tabloid 11 × 17 pouces. Réglez des marges égales de 0,25 à 1 pouce, par pas de 0,125. L’aperçu montre la zone utilisable à l’intérieur des marges ; les modes pliés appliquent les marges à chaque page ou panneau.
Wählen Sie das verwendete Papier: 8,5 × 11 Letter, 8,5 × 14 Legal oder 11 × 17 Tabloid (Zoll). Stellen Sie gleiche Ränder von 0,25 bis 1 Zoll in Schritten von 0,125 ein. Die Vorschau zeigt die nutzbare Fläche innerhalb der Ränder; gefaltete Formate haben Ränder für jede Seite oder jedes Feld.
Escolha o papel utilizado: Letter de 8,5 × 11, Legal de 8,5 × 14 ou Tabloid de 11 × 17 polegadas. Defina margens iguais de 0,25 a 1 polegada em passos de 0,125. A pré-visualização mostra a área útil dentro das margens; nos formatos dobrados as margens aplicam-se a cada página ou painel.
Wybierz używany papier: Letter 8,5 × 11, Legal 8,5 × 14 lub Tabloid 11 × 17 cali. Ustaw jednakowe marginesy od 0,25 do 1 cala, co 0,125 cala. Podgląd pokazuje obszar wewnątrz marginesów; w trybach składanych marginesy dotyczą każdej strony lub panelu.
Piliin ang gagamiting papel: 8.5 × 11 Letter, 8.5 × 14 Legal, o 11 × 17 Tabloid. Itakda ang pantay na margin mula 0.25 hanggang 1 pulgada, sa mga hakbang na 0.125. Ipinapakita ng preview ang magagamit na lugar sa loob ng mga margin; bawat pahina o panel ang may margin sa mga nakatiklop na mode.
Click Create, then choose a folder and name for the .cpub file and save. A new blank publication opens with one page for No-fold, four for Bi-fold, or six for Tri-fold. Add your text and images; add more pages as needed.
Haga clic en Crear, elija una carpeta y un nombre para el archivo .cpub y guárdelo. La publicación nueva abre con una página sin plegar, cuatro en díptico o seis en tríptico. Añada texto, imágenes y más páginas según necesite.
Fai clic su Crea, scegli una cartella e un nome per il file .cpub e salva. La pubblicazione vuota si apre con una pagina senza pieghe, quattro a due ante o sei a tre ante. Aggiungi testi, immagini e altre pagine secondo necessità.
Cliquez sur Créer, choisissez un dossier et un nom pour le fichier .cpub, puis enregistrez. La publication vide comporte une page sans pli, quatre à deux volets ou six à trois volets. Ajoutez du texte, des images et des pages selon vos besoins.
Klicken Sie auf Erstellen, wählen Sie einen Ordner und Dateinamen für die .cpub-Datei und speichern Sie. Die leere Publikation beginnt mit einer ungefalteten Seite, vier Seiten bei Bi-fold oder sechs bei Tri-fold. Fügen Sie Texte, Bilder und bei Bedarf weitere Seiten hinzu.
Clique em Criar, escolha uma pasta e um nome para o ficheiro .cpub e guarde. A publicação vazia abre com uma página sem dobras, quatro em díptico ou seis em tríptico. Adicione texto, imagens e mais páginas conforme necessário.
Kliknij Utwórz, wybierz folder i nazwę pliku .cpub, a następnie zapisz. Pusta publikacja ma jedną stronę bez składania, cztery przy składaniu na pół lub sześć przy składaniu na trzy części. Dodaj tekst, obrazy i kolejne strony w razie potrzeby.
I-click ang Create, pumili ng folder at pangalan para sa .cpub file, at i-save. Bubukas ang blangkong publikasyon na may isang pahina kung hindi nakatiklop, apat kung tiklop sa kalahati, o anim kung tiklop sa tatlong bahagi. Magdagdag ng teksto, larawan, at mga pahina kung kailangan.
Change the mode later
Cambiar el modo después
Cambia formato in seguito
Changer de mode ensuite
Modus später ändern
Alterar o modo mais tarde
Zmień tryb później
Baguhin ang mode sa ibang pagkakataon
To change an open publication, click a blank part of the page so no object is selected. Use the document-mode, paper-size, and margin controls in the right-hand panel. Portrait/Landscape is available in No-fold. Check every page after a change: the available space changes, so text and objects may need adjustment. Save the file and test-print one copy before printing the full quantity.
Para cambiar una publicación abierta, haga clic en una zona vacía de la página para deseleccionar los objetos. Use los controles de modo, papel y márgenes del panel derecho. La orientación vertical u horizontal está disponible sin plegar. Revise todas las páginas después del cambio: el espacio disponible cambia y puede ser necesario ajustar texto y objetos. Guarde y haga una impresión de prueba antes de imprimir todas las copias.
Per cambiare una pubblicazione aperta, fai clic su un’area vuota della pagina per deselezionare gli oggetti. Usa i controlli di formato, carta e margini nel pannello destro. Verticale e orizzontale sono disponibili nel formato senza pieghe. Controlla ogni pagina dopo il cambio: lo spazio varia e potrebbe essere necessario adattare testi e oggetti. Salva e stampa una copia di prova prima di stampare tutte le copie.
Pour modifier une publication ouverte, cliquez dans une zone vide de la page afin de désélectionner les objets. Utilisez les commandes de mode, de papier et de marges dans le panneau droit. Portrait et paysage sont disponibles sans pli. Vérifiez chaque page après un changement : l’espace varie et les textes ou objets peuvent nécessiter un ajustement. Enregistrez et imprimez un exemplaire d’essai avant le tirage complet.
Um eine geöffnete Publikation umzustellen, klicken Sie auf eine leere Stelle der Seite, sodass kein Objekt ausgewählt ist. Verwenden Sie die Modus-, Papier- und Rand-Einstellungen rechts. Hochformat und Querformat stehen für ungefaltete Seiten zur Verfügung. Prüfen Sie nach jeder Änderung alle Seiten: Die Fläche ändert sich und Texte oder Objekte müssen möglicherweise angepasst werden. Speichern Sie und drucken Sie ein Probeexemplar vor der gesamten Auflage.
Para alterar uma publicação aberta, clique numa zona vazia da página para desmarcar os objetos. Use os controlos de modo, papel e margens no painel direito. Vertical e horizontal estão disponíveis sem dobras. Reveja cada página após a alteração: o espaço muda e pode ser necessário ajustar texto e objetos. Guarde e imprima uma cópia de teste antes de imprimir a tiragem completa.
Aby zmienić otwartą publikację, kliknij puste miejsce strony, aby odznaczyć obiekty. Użyj ustawień trybu, papieru i marginesów w prawym panelu. Orientacja pionowa i pozioma jest dostępna bez składania. Po zmianie sprawdź każdą stronę: dostępna przestrzeń się zmienia, więc tekst i obiekty mogą wymagać poprawienia. Zapisz i wydrukuj jeden egzemplarz próbny przed całym nakładem.
Upang baguhin ang bukas na publikasyon, i-click ang bakanteng bahagi ng pahina upang walang napiling object. Gamitin ang mga kontrol para sa mode, papel, at margin sa kanang panel. Magagamit ang patayo at pahiga kung hindi nakatiklop. Suriin ang bawat pahina pagkatapos magbago: nag-iiba ang espasyo kaya maaaring kailangang ayusin ang teksto at mga object. I-save at mag-print muna ng isang pagsubok bago ang lahat ng kopya.
For Bi-fold, Folded Page size leaves booklet arrangement to the printer; enable its booklet setting. Paper size lets the app arrange the sheet; print that output in landscape without enabling booklet arrangement again. Tri-fold always uses app-arranged sheets. No-fold prints full pages in the chosen orientation. Print-color choices do not change the full-color PDF export.En díptico, Tamaño de página plegada deja la distribución a la impresora: active su modo folleto. Tamaño del papel permite que la aplicación distribuya la hoja: imprima en horizontal sin activar otra vez el modo folleto. Los trípticos siempre usan hojas distribuidas por la aplicación. Sin plegar se imprimen páginas completas en la orientación elegida. Las opciones de color de impresión no cambian el PDF a todo color.Per due ante, Dimensioni pagina piegata lascia l’impaginazione alla stampante: attiva la sua modalità opuscolo. Dimensioni carta lascia all’app la disposizione del foglio: stampa in orizzontale senza attivare nuovamente la modalità opuscolo. Tre ante usa sempre fogli disposti dall’app. Senza pieghe stampa pagine intere nell’orientamento scelto. Le opzioni colore di stampa non modificano l’esportazione PDF a colori.Pour deux volets, Taille de page pliée laisse la disposition à l’imprimante : activez son mode livret. Taille du papier confie la disposition à l’application : imprimez en paysage sans activer de nouveau le mode livret. Trois volets utilise toujours des feuilles disposées par l’application. Sans pli imprime des pages entières dans l’orientation choisie. Les choix de couleur d’impression ne modifient pas le PDF couleur.Bei Bi-fold überlässt Gefaltete Seitengröße die Anordnung dem Drucker: Aktivieren Sie dessen Broschürenmodus. Papiergröße lässt die App das Blatt anordnen: Drucken Sie im Querformat ohne zusätzlichen Broschürenmodus. Tri-fold verwendet immer von der App angeordnete Blätter. Ungefaltet druckt ganze Seiten in der gewählten Ausrichtung. Die Druckfarbauswahl ändert den farbigen PDF-Export nicht.Em díptico, Tamanho da página dobrada deixa a disposição à impressora: ative o modo de livreto. Tamanho do papel deixa a aplicação organizar a folha: imprima na horizontal sem ativar novamente o modo de livreto. O tríptico usa sempre folhas organizadas pela aplicação. Sem dobras imprime páginas inteiras na orientação escolhida. As opções de cor de impressão não alteram o PDF a cores.Przy składaniu na pół Rozmiar złożonej strony pozostawia układ drukarce: włącz jej tryb broszury. Rozmiar papieru pozwala aplikacji ułożyć arkusz: drukuj poziomo bez ponownego włączania broszury. Składanie na trzy zawsze używa arkuszy ułożonych przez aplikację. Bez składania drukuje pełne strony w wybranej orientacji. Ustawienia koloru druku nie zmieniają kolorowego eksportu PDF.Sa Bi-fold, ipinauubaya ng Folded Page size ang ayos sa printer: paganahin ang booklet mode nito. Sa Paper size, ang app ang nag-aayos ng papel: mag-print nang pahiga nang hindi muling pinapagana ang booklet mode. Laging app ang nag-aayos ng Tri-fold. Buong pahina sa napiling oryentasyon ang ini-print sa No-fold. Hindi binabago ng pagpili ng kulay sa pag-print ang buong-kulay na PDF export.
Catholic Publisher saves your work in files ending in .cpub, such as Bulletin 2026-09-13.cpub. Open this file whenever you want to keep working on your publication.Catholic Publisher saves your work in files ending in .cpub, such as Bulletin 2026-09-13.cpub. Open this file whenever you want to keep working on your publication.Catholic Publisher saves your work in files ending in .cpub, such as Bulletin 2026-09-13.cpub. Open this file whenever you want to keep working on your publication.Catholic Publisher saves your work in files ending in .cpub, such as Bulletin 2026-09-13.cpub. Open this file whenever you want to keep working on your publication.Catholic Publisher saves your work in files ending in .cpub, such as Bulletin 2026-09-13.cpub. Open this file whenever you want to keep working on your publication.Catholic Publisher saves your work in files ending in .cpub, such as Bulletin 2026-09-13.cpub. Open this file whenever you want to keep working on your publication.Catholic Publisher saves your work in files ending in .cpub, such as Bulletin 2026-09-13.cpub. Open this file whenever you want to keep working on your publication.Catholic Publisher guarda su trabajo en archivos que terminan en .cpub, como Bulletin 2026-09-13.cpub. Abra este archivo cuando quiera seguir trabajando en su publicación.
CPUB is an open file format. Inside, it is a ZIP file containing XML documents and your pictures. Everything stays together in one file.CPUB is an open file format. Inside, it is a ZIP file containing XML documents and your pictures. Everything stays together in one file.CPUB is an open file format. Inside, it is a ZIP file containing XML documents and your pictures. Everything stays together in one file.CPUB is an open file format. Inside, it is a ZIP file containing XML documents and your pictures. Everything stays together in one file.CPUB is an open file format. Inside, it is a ZIP file containing XML documents and your pictures. Everything stays together in one file.CPUB is an open file format. Inside, it is a ZIP file containing XML documents and your pictures. Everything stays together in one file.CPUB is an open file format. Inside, it is a ZIP file containing XML documents and your pictures. Everything stays together in one file.CPUB es un formato de archivo abierto. Por dentro, es un archivo ZIP que contiene documentos XML y sus imágenes. Todo queda junto en un solo archivo.
An eight-page bulletin can easily be around 40 MB. That is normal when it contains large pictures, because the pictures are saved inside the file. The size depends on the images you use.An eight-page bulletin can easily be around 40 MB. That is normal when it contains large pictures, because the pictures are saved inside the file. The size depends on the images you use.An eight-page bulletin can easily be around 40 MB. That is normal when it contains large pictures, because the pictures are saved inside the file. The size depends on the images you use.An eight-page bulletin can easily be around 40 MB. That is normal when it contains large pictures, because the pictures are saved inside the file. The size depends on the images you use.An eight-page bulletin can easily be around 40 MB. That is normal when it contains large pictures, because the pictures are saved inside the file. The size depends on the images you use.An eight-page bulletin can easily be around 40 MB. That is normal when it contains large pictures, because the pictures are saved inside the file. The size depends on the images you use.An eight-page bulletin can easily be around 40 MB. That is normal when it contains large pictures, because the pictures are saved inside the file. The size depends on the images you use.Un boletín de ocho páginas puede ocupar alrededor de 40 MB. Es normal cuando contiene imágenes grandes, porque se guardan dentro del archivo. El tamaño depende de las imágenes que use.
When your publication is ready, export a PDF to share or print. Keep the .cpub file too—you will need it to make changes in Catholic Publisher.When your publication is ready, export a PDF to share or print. Keep the .cpub file too—you will need it to make changes in Catholic Publisher.When your publication is ready, export a PDF to share or print. Keep the .cpub file too—you will need it to make changes in Catholic Publisher.When your publication is ready, export a PDF to share or print. Keep the .cpub file too—you will need it to make changes in Catholic Publisher.When your publication is ready, export a PDF to share or print. Keep the .cpub file too—you will need it to make changes in Catholic Publisher.When your publication is ready, export a PDF to share or print. Keep the .cpub file too—you will need it to make changes in Catholic Publisher.When your publication is ready, export a PDF to share or print. Keep the .cpub file too—you will need it to make changes in Catholic Publisher.Cuando su publicación esté lista, exporte un PDF para compartirlo o imprimirlo. Conserve también el archivo .cpub: lo necesitará para hacer cambios en Catholic Publisher.
Explore the eight sample pagesExplore the eight sample pagesExplore the eight sample pagesExplore the eight sample pagesExplore the eight sample pagesExplore the eight sample pagesExplore the eight sample pagesExplore las ocho páginas de muestra
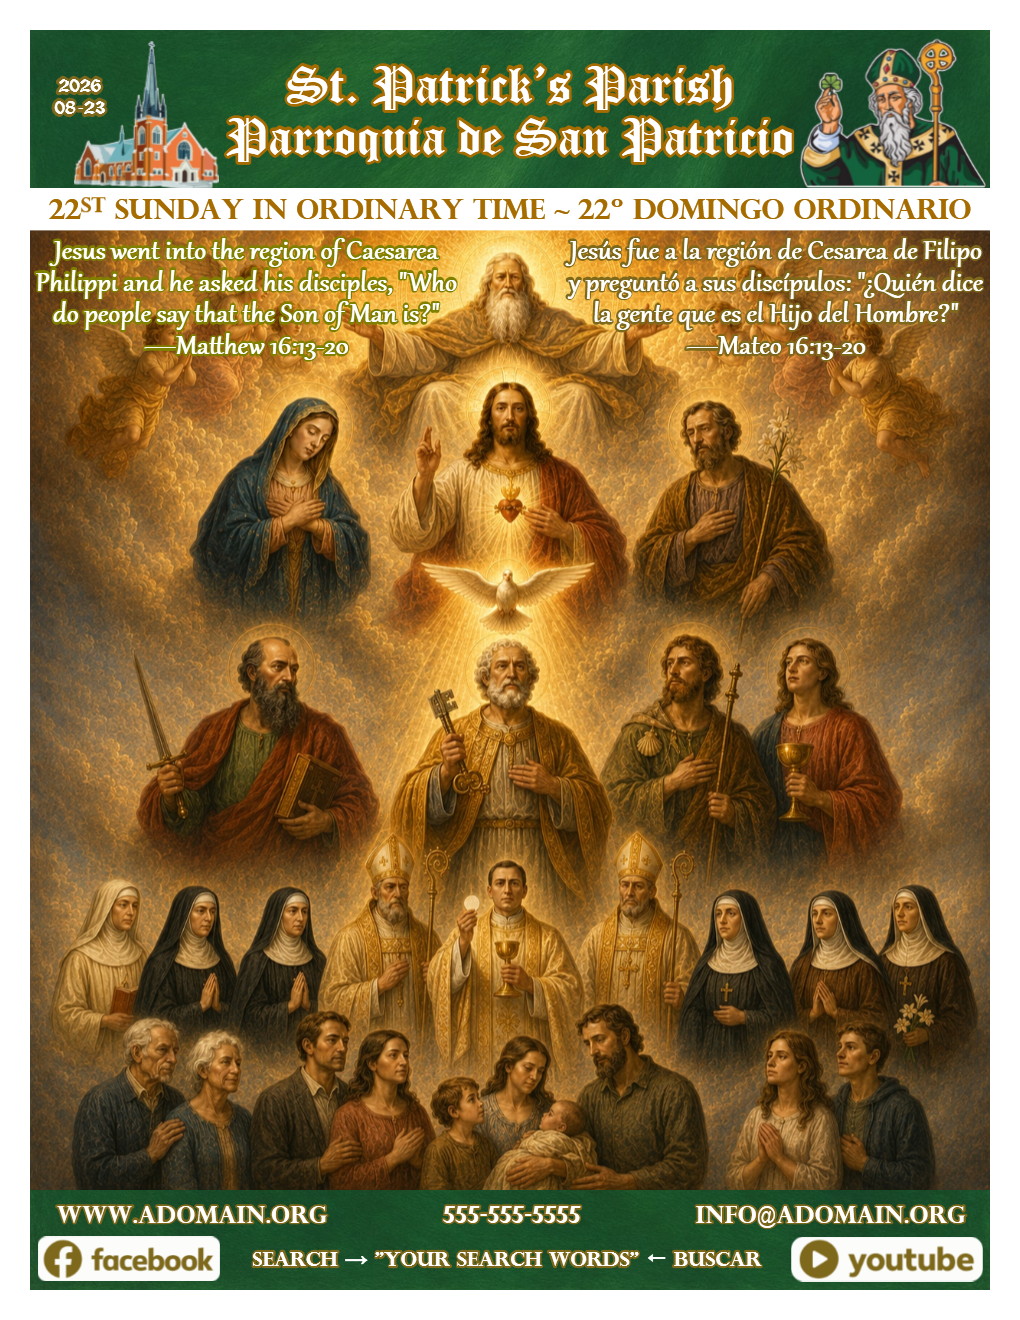
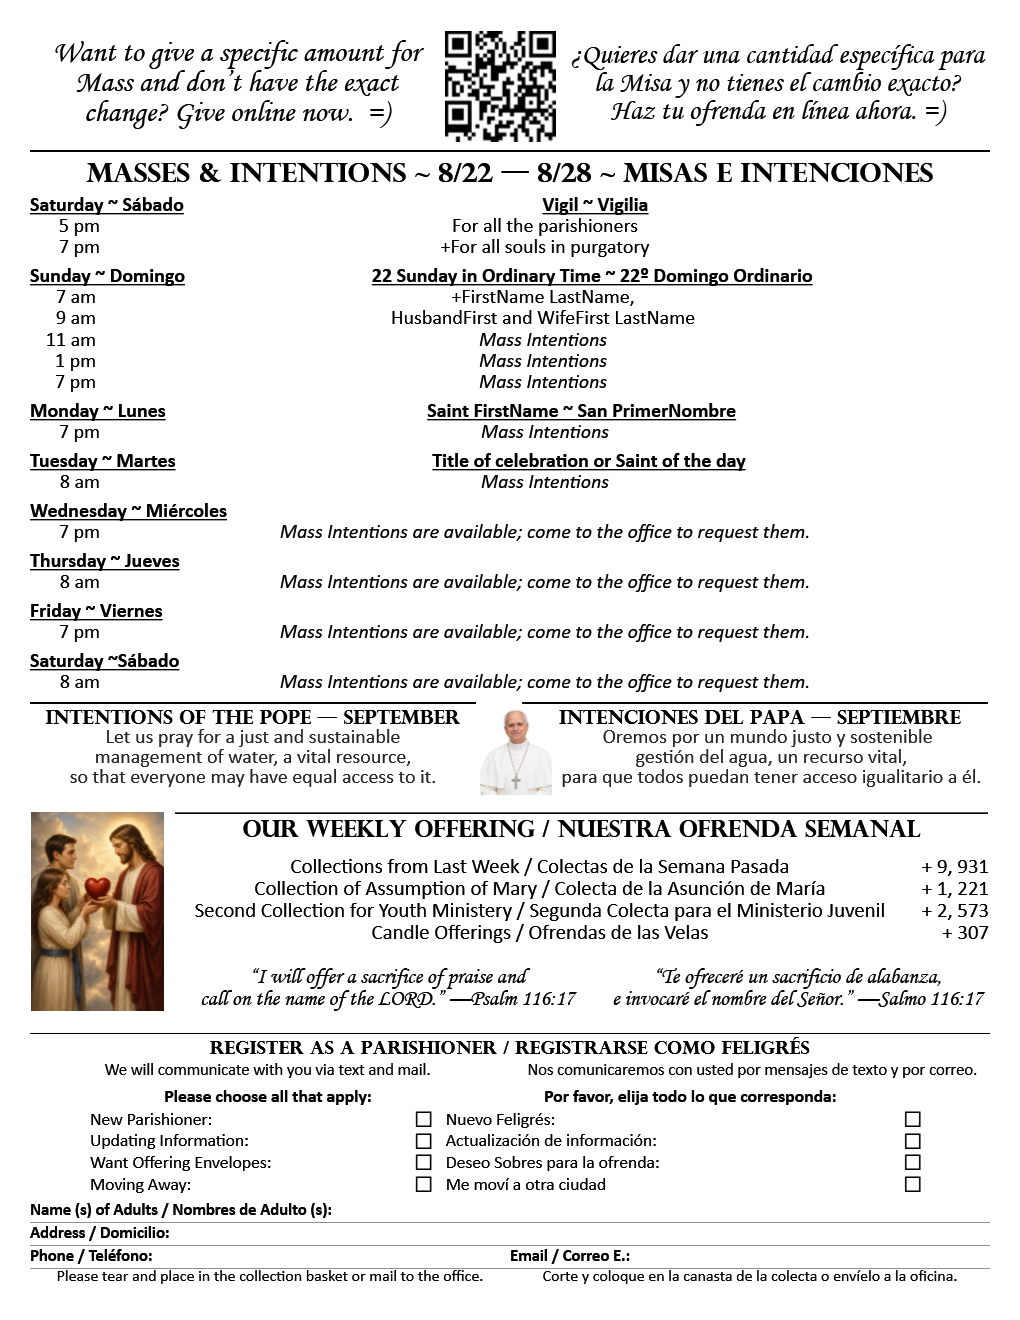
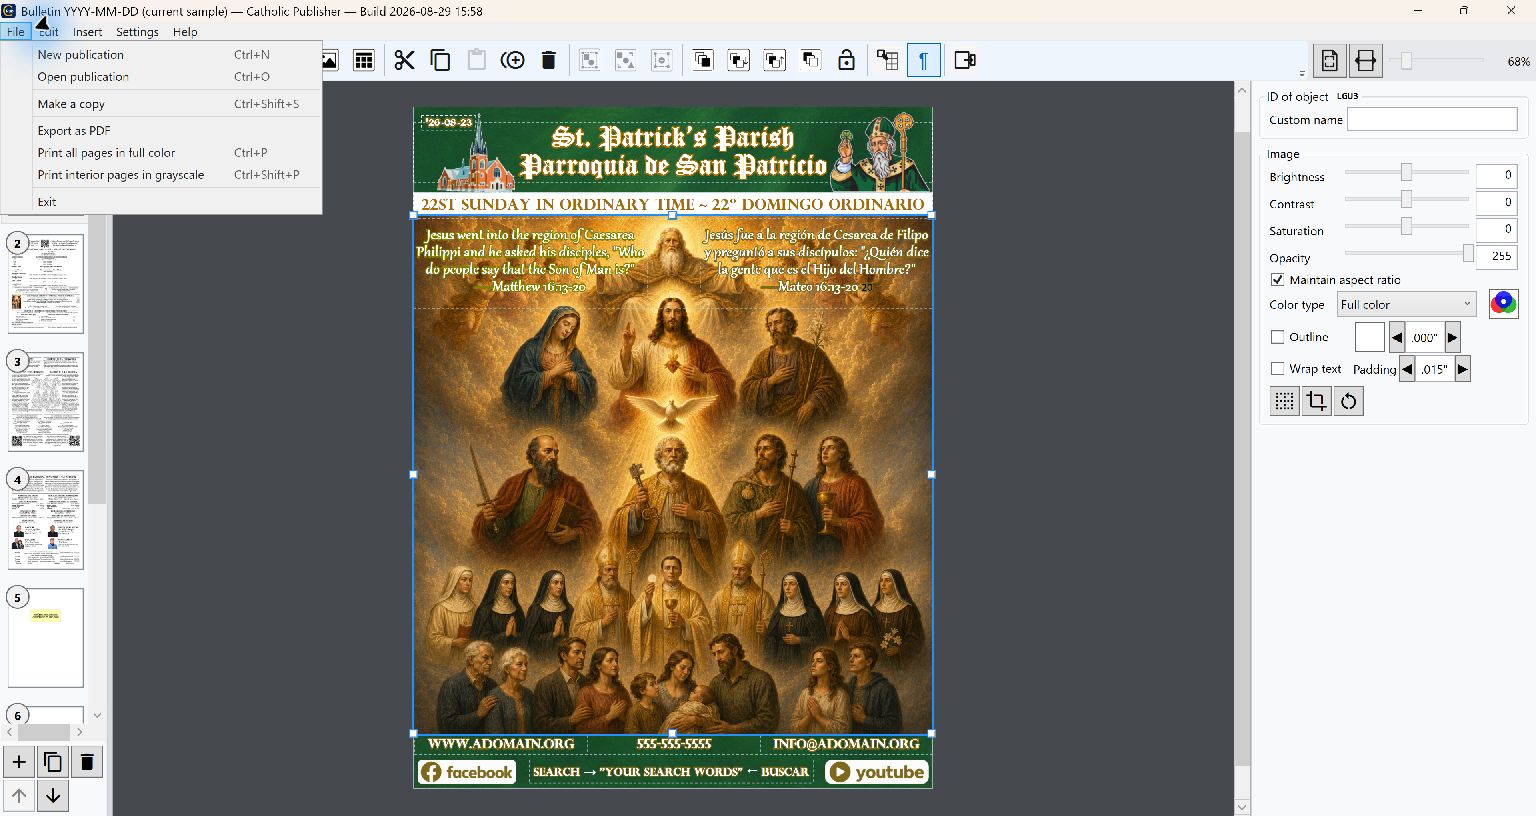
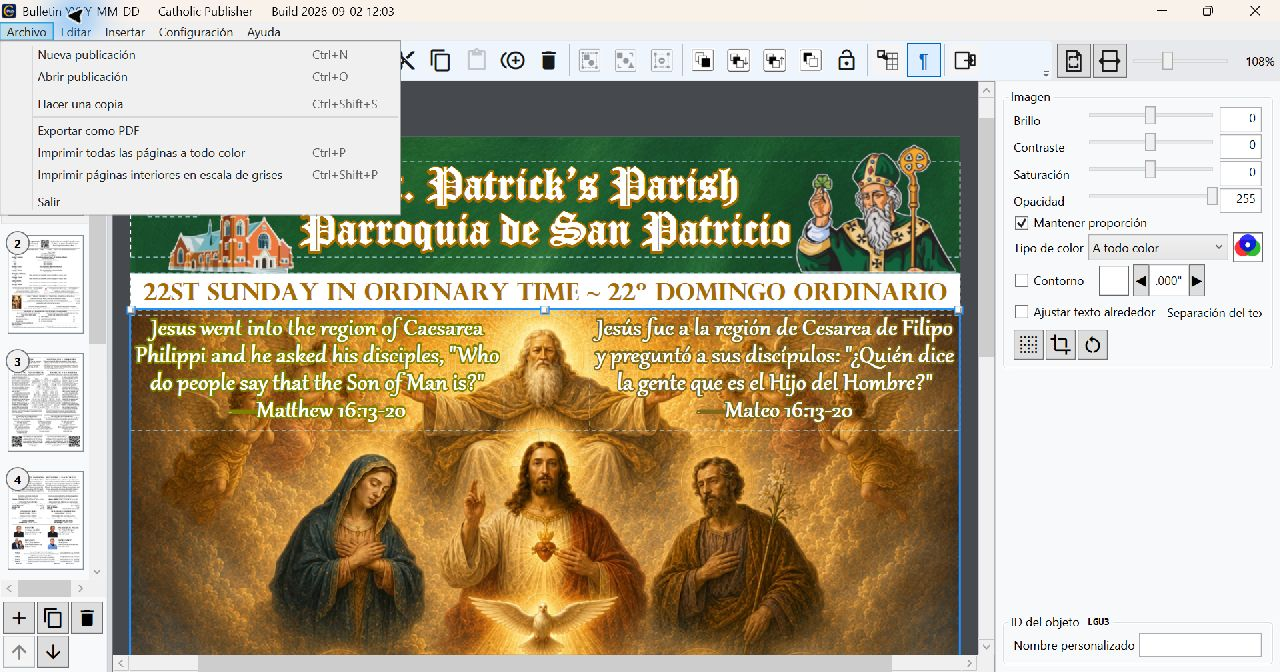
The sample is an eight-page teaching publication: four finished parish pages, three simple starter pages, and a Sponsors page designed as the back cover. It appears here as screenshots only; no private or editable sample file is offered for download on this website.
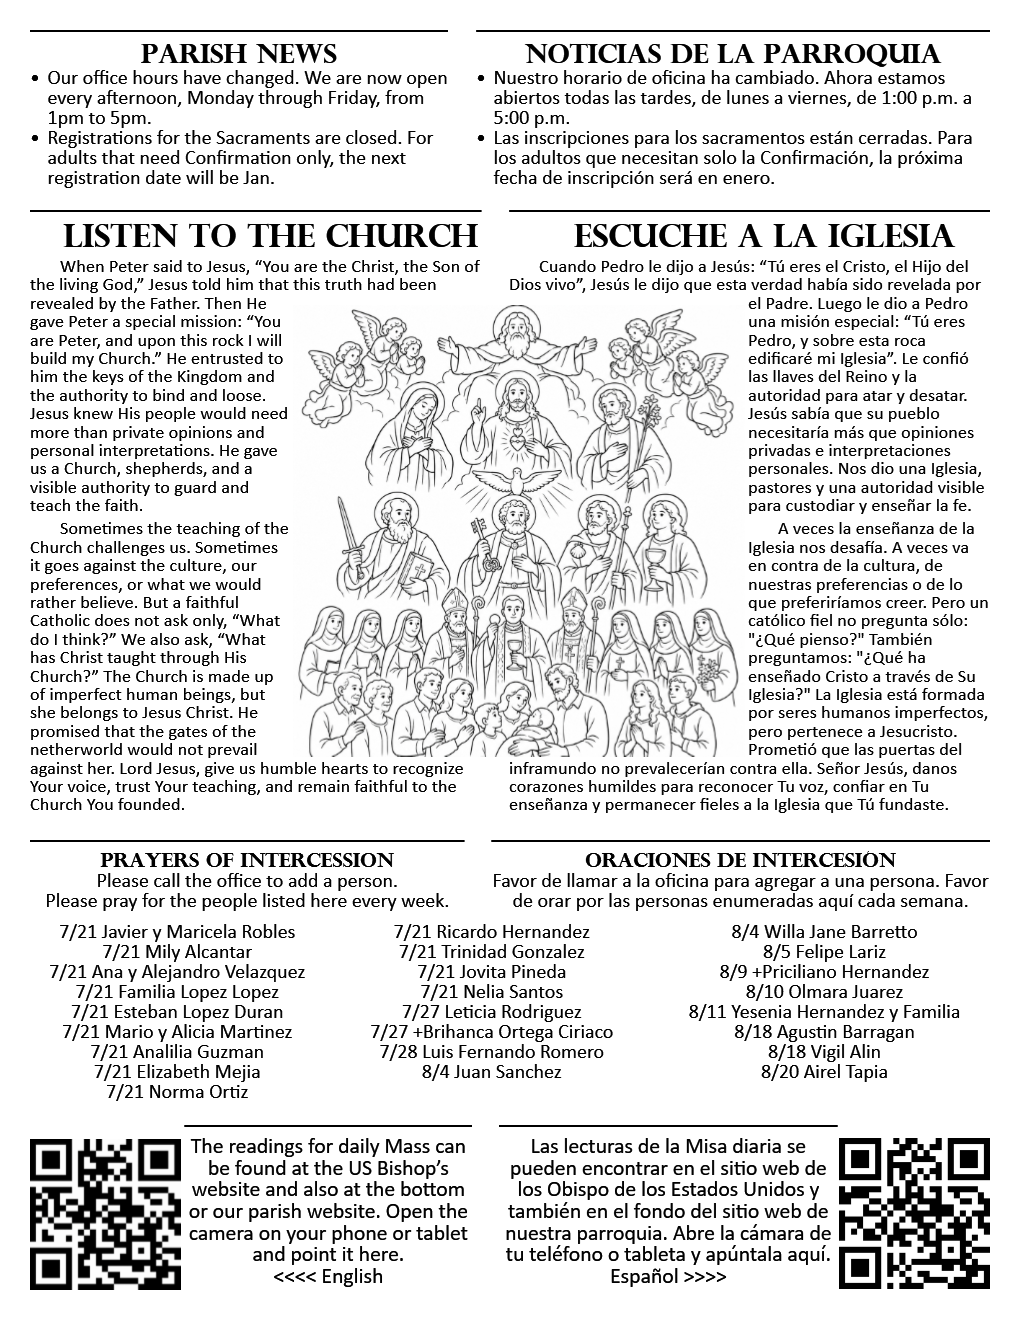
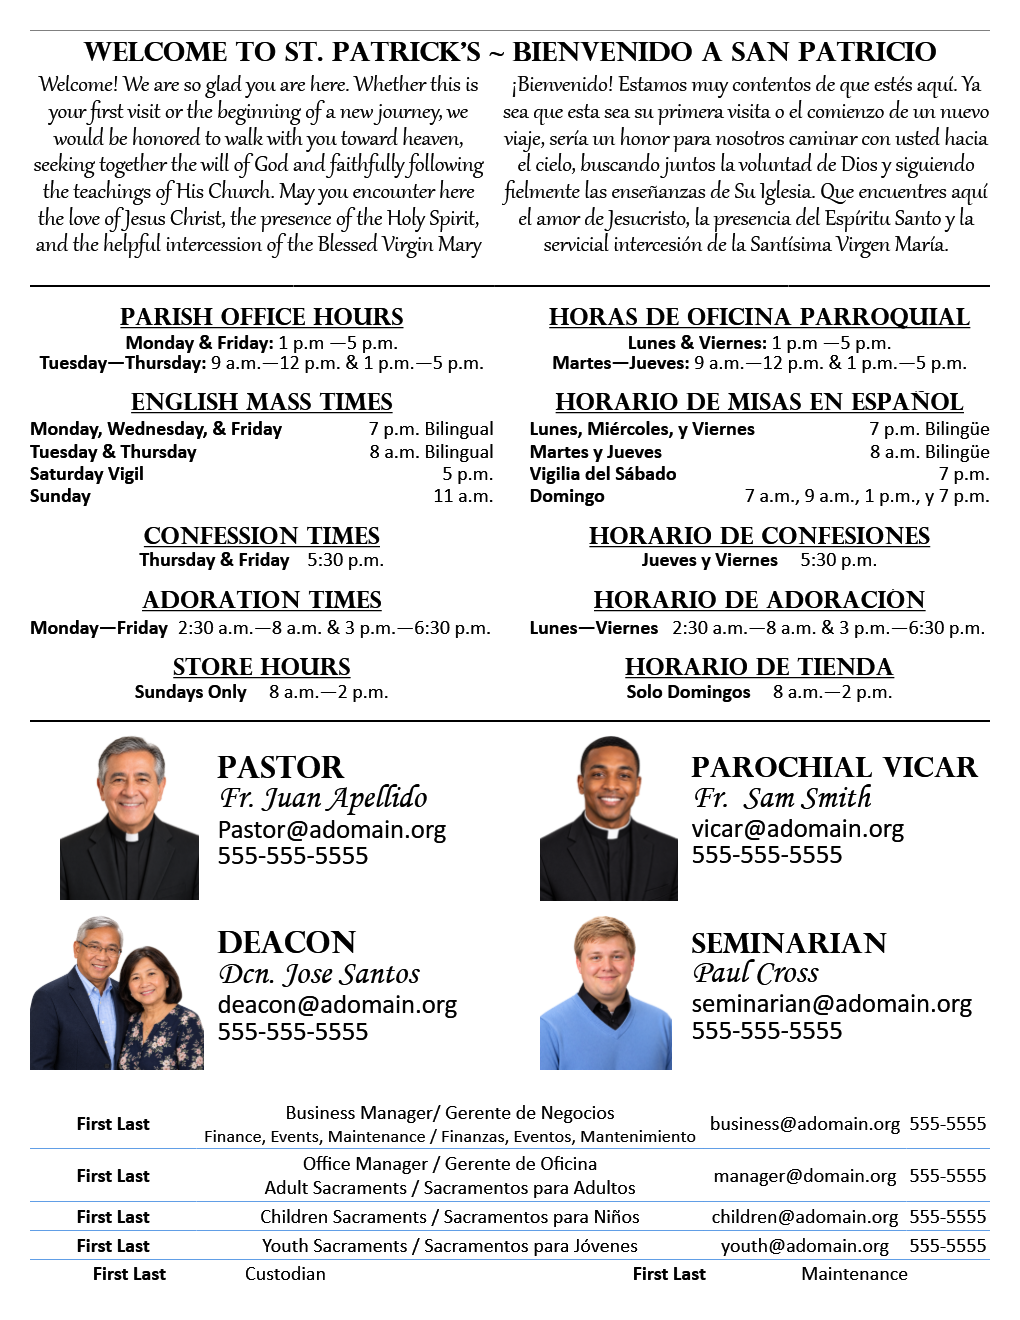
Choose the paper and folded page sizeChoose the paper and folded page sizeChoose the paper and folded page sizeChoose the paper and folded page sizeChoose the paper and folded page sizeChoose the paper and folded page sizeChoose the paper and folded page sizeElija el papel y el tamaño de la página doblada
In New publication, choose the paper you will fold. The finished page is half that sheet. Choose the margins, then name and save the new CPUB. These settings apply throughout the publication.In New publication, choose the paper you will fold. The finished page is half that sheet. Choose the margins, then name and save the new CPUB. These settings apply throughout the publication.In New publication, choose the paper you will fold. The finished page is half that sheet. Choose the margins, then name and save the new CPUB. These settings apply throughout the publication.In New publication, choose the paper you will fold. The finished page is half that sheet. Choose the margins, then name and save the new CPUB. These settings apply throughout the publication.In New publication, choose the paper you will fold. The finished page is half that sheet. Choose the margins, then name and save the new CPUB. These settings apply throughout the publication.In New publication, choose the paper you will fold. The finished page is half that sheet. Choose the margins, then name and save the new CPUB. These settings apply throughout the publication.In New publication, choose the paper you will fold. The finished page is half that sheet. Choose the margins, then name and save the new CPUB. These settings apply throughout the publication.En Nueva publicación, elija el papel que doblará. La página terminada ocupa la mitad de esa hoja. Elija los márgenes y luego asigne un nombre y guarde el nuevo CPUB. Estas opciones se aplican a toda la publicación.
Keep your work safeKeep your work safeKeep your work safeKeep your work safeKeep your work safeKeep your work safeKeep your work safeProteja su trabajo
A named publication saves automatically after each change; there is no manual Save command. Make a copy is the Save As equivalent. Catholic Publisher validates each save before replacing the previous file and keeps limited local recovery copies for interruptions.A named publication saves automatically after each change; there is no manual Save command. Make a copy is the Save As equivalent. Catholic Publisher validates each save before replacing the previous file and keeps limited local recovery copies for interruptions.A named publication saves automatically after each change; there is no manual Save command. Make a copy is the Save As equivalent. Catholic Publisher validates each save before replacing the previous file and keeps limited local recovery copies for interruptions.A named publication saves automatically after each change; there is no manual Save command. Make a copy is the Save As equivalent. Catholic Publisher validates each save before replacing the previous file and keeps limited local recovery copies for interruptions.A named publication saves automatically after each change; there is no manual Save command. Make a copy is the Save As equivalent. Catholic Publisher validates each save before replacing the previous file and keeps limited local recovery copies for interruptions.A named publication saves automatically after each change; there is no manual Save command. Make a copy is the Save As equivalent. Catholic Publisher validates each save before replacing the previous file and keeps limited local recovery copies for interruptions.A named publication saves automatically after each change; there is no manual Save command. Make a copy is the Save As equivalent. Catholic Publisher validates each save before replacing the previous file and keeps limited local recovery copies for interruptions.Una publicación con nombre se guarda automáticamente después de cada cambio; no hay un comando Guardar manual. Hacer una copia equivale a Guardar como. Catholic Publisher valida cada guardado antes de reemplazar el archivo anterior y conserva copias locales de recuperación limitadas para interrupciones.
Only one person may edit a shared CPUB at a time. While the publication is open, Catholic Publisher manages this by storing a hidden lock file in the same folder.Only one person may edit a shared CPUB at a time. While the publication is open, Catholic Publisher manages this by storing a hidden lock file in the same folder.Only one person may edit a shared CPUB at a time. While the publication is open, Catholic Publisher manages this by storing a hidden lock file in the same folder.Only one person may edit a shared CPUB at a time. While the publication is open, Catholic Publisher manages this by storing a hidden lock file in the same folder.Only one person may edit a shared CPUB at a time. While the publication is open, Catholic Publisher manages this by storing a hidden lock file in the same folder.Only one person may edit a shared CPUB at a time. While the publication is open, Catholic Publisher manages this by storing a hidden lock file in the same folder.Only one person may edit a shared CPUB at a time. While the publication is open, Catholic Publisher manages this by storing a hidden lock file in the same folder.Solo una persona puede editar un CPUB compartido a la vez. Mientras la publicación está abierta, Catholic Publisher lo controla guardando un archivo de bloqueo oculto en la misma carpeta.
Keep dated CPUB copies and an independent backup, and allow OneDrive or another synchronized folder to finish syncing before another computer opens the file.Keep dated CPUB copies and an independent backup, and allow OneDrive or another synchronized folder to finish syncing before another computer opens the file.Keep dated CPUB copies and an independent backup, and allow OneDrive or another synchronized folder to finish syncing before another computer opens the file.Keep dated CPUB copies and an independent backup, and allow OneDrive or another synchronized folder to finish syncing before another computer opens the file.Keep dated CPUB copies and an independent backup, and allow OneDrive or another synchronized folder to finish syncing before another computer opens the file.Keep dated CPUB copies and an independent backup, and allow OneDrive or another synchronized folder to finish syncing before another computer opens the file.Keep dated CPUB copies and an independent backup, and allow OneDrive or another synchronized folder to finish syncing before another computer opens the file.Conserve copias fechadas del CPUB y una copia de seguridad independiente, y permita que OneDrive u otra carpeta sincronizada termine de sincronizar antes de abrir el archivo en otra computadora.
Prepare the next bulletinPrepare the next bulletinPrepare the next bulletinPrepare the next bulletinPrepare the next bulletinPrepare the next bulletinPrepare the next bulletinPrepare el próximo boletín
- 1
Open the previous bulletin
Choose File > Open publication and select last week’s editable
.cpub. - 2
Make next week’s copy
Choose File > Make a copy (Ctrl+Shift+S). This replaces Save As: Catholic Publisher duplicates the publication and switches the window to the new file.
- 3
Name it for the Sunday
Use
Bulletin YYYY-MM-DD.cpub, such asBulletin 2026-09-13.cpub. The date-first pattern sorts correctly in File Explorer. - 4
Update weekly content
Change dates, liturgical titles, intentions, announcements, reflections, bilingual text, schedules, artwork, and advertisements. Reorder pages if needed.
- 5
Let autosave work
Each change schedules a save after a brief pause. There is no manual Save command.
- 6
Export and inspect the PDF
Choose File > Export as PDF. Review all eight pages, text flow, links, QR codes, and page order.
- 7
Print or publish
Print every page in color, or keep only the first and last pages in color for lower-cost production. Upload the reviewed PDF to the parish website.
- 8
Keep the editable source
Retain the dated
.cpuband a backup. Open that source—not the PDF—when corrections are needed.
Review, export, and printReview, export, and printReview, export, and printReview, export, and printReview, export, and printReview, export, and printReview, export, and printRevise, exporte e imprima
- Confirm the Sunday date, Mass times, names, and contact details.Confirm the Sunday date, Mass times, names, and contact details.Confirm the Sunday date, Mass times, names, and contact details.Confirm the Sunday date, Mass times, names, and contact details.Confirm the Sunday date, Mass times, names, and contact details.Confirm the Sunday date, Mass times, names, and contact details.Confirm the Sunday date, Mass times, names, and contact details.Confirme la fecha del domingo, los horarios de Misa, los nombres y los datos de contacto.
- Review both languages and look for red overflow outlines on every page.Review both languages and look for red overflow outlines on every page.Review both languages and look for red overflow outlines on every page.Review both languages and look for red overflow outlines on every page.Review both languages and look for red overflow outlines on every page.Review both languages and look for red overflow outlines on every page.Review both languages and look for red overflow outlines on every page.Revise ambos idiomas y busque contornos rojos de desbordamiento en cada página.
- Check the page order, cover artwork, advertisements, links, and QR codes.Check the page order, cover artwork, advertisements, links, and QR codes.Check the page order, cover artwork, advertisements, links, and QR codes.Check the page order, cover artwork, advertisements, links, and QR codes.Check the page order, cover artwork, advertisements, links, and QR codes.Check the page order, cover artwork, advertisements, links, and QR codes.Check the page order, cover artwork, advertisements, links, and QR codes.Revise el orden de las páginas, la portada, los anuncios, los enlaces y los códigos QR.
- Open the exported PDF and inspect every page before sharing or printing.Open the exported PDF and inspect every page before sharing or printing.Open the exported PDF and inspect every page before sharing or printing.Open the exported PDF and inspect every page before sharing or printing.Open the exported PDF and inspect every page before sharing or printing.Open the exported PDF and inspect every page before sharing or printing.Open the exported PDF and inspect every page before sharing or printing.Abra el PDF exportado y revise cada página antes de compartirlo o imprimirlo.
Web and sharing
Export as PDF
Choose File > Export as PDF. Catholic Publisher creates a full-color PDF in the publication’s selected folded page size, saves it beside the publication by default, and opens it after export. English and Spanish text is selectable and searchable in logical reading order, while images are compressed to a practical web size without changing the .cpub.Choose File > Export as PDF. Catholic Publisher creates a full-color PDF in the publication’s selected folded page size, saves it beside the publication by default, and opens it after export. English and Spanish text is selectable and searchable in logical reading order, while images are compressed to a practical web size without changing the .cpub.Choose File > Export as PDF. Catholic Publisher creates a full-color PDF in the publication’s selected folded page size, saves it beside the publication by default, and opens it after export. English and Spanish text is selectable and searchable in logical reading order, while images are compressed to a practical web size without changing the .cpub.Choose File > Export as PDF. Catholic Publisher creates a full-color PDF in the publication’s selected folded page size, saves it beside the publication by default, and opens it after export. English and Spanish text is selectable and searchable in logical reading order, while images are compressed to a practical web size without changing the .cpub.Choose File > Export as PDF. Catholic Publisher creates a full-color PDF in the publication’s selected folded page size, saves it beside the publication by default, and opens it after export. English and Spanish text is selectable and searchable in logical reading order, while images are compressed to a practical web size without changing the .cpub.Choose File > Export as PDF. Catholic Publisher creates a full-color PDF in the publication’s selected folded page size, saves it beside the publication by default, and opens it after export. English and Spanish text is selectable and searchable in logical reading order, while images are compressed to a practical web size without changing the .cpub.Choose File > Export as PDF. Catholic Publisher creates a full-color PDF in the publication’s selected folded page size, saves it beside the publication by default, and opens it after export. English and Spanish text is selectable and searchable in logical reading order, while images are compressed to a practical web size without changing the .cpub.Elija Archivo > Exportar como PDF. Catholic Publisher crea un PDF a todo color con el tamaño de página doblada elegido para la publicación, lo guarda inicialmente junto a la publicación y lo abre después de exportarlo. El texto en inglés y español se puede seleccionar y buscar en orden lógico de lectura, mientras que las imágenes se comprimen a un tamaño práctico para la web sin cambiar el .cpub.
Parish printing
Two direct print modes
Print all pages in full color keeps every page in color. Print interior pages in grayscale keeps page 1 and the last page in color while converting only the interior pages to true grayscale for lower-cost printing.
The toolbar printer follows Default Settings > General and Text > Print interior pages in grayscale for cheaper printing. This is enabled by default; clear it when the toolbar should print every page in full color.The toolbar printer follows Default Settings > General and Text > Print interior pages in grayscale for cheaper printing. This is enabled by default; clear it when the toolbar should print every page in full color.The toolbar printer follows Default Settings > General and Text > Print interior pages in grayscale for cheaper printing. This is enabled by default; clear it when the toolbar should print every page in full color.The toolbar printer follows Default Settings > General and Text > Print interior pages in grayscale for cheaper printing. This is enabled by default; clear it when the toolbar should print every page in full color.The toolbar printer follows Default Settings > General and Text > Print interior pages in grayscale for cheaper printing. This is enabled by default; clear it when the toolbar should print every page in full color.The toolbar printer follows Default Settings > General and Text > Print interior pages in grayscale for cheaper printing. This is enabled by default; clear it when the toolbar should print every page in full color.The toolbar printer follows Default Settings > General and Text > Print interior pages in grayscale for cheaper printing. This is enabled by default; clear it when the toolbar should print every page in full color.El botón de impresora de la barra sigue Configuración predeterminada > General y texto > Imprimir páginas interiores en escala de grises para ahorrar. Esta opción está activada inicialmente; desactívela cuando el botón deba imprimir todas las páginas a todo color.
Printing renders at 300 DPI and sends pages at 100% physical size. The Windows dialog still lets you choose a printer, page range, copies, and printer-specific Preferences. Printing does not change the CPUB.
A missing requested Windows font blocks PDF export instead of silently changing the layout. If a present font cannot legally be embedded, Catholic Publisher creates a visually faithful 300-DPI flattened PDF and tells you that it used the fallback.
Print as a bookletPrint as a bookletPrint as a bookletPrint as a bookletPrint as a bookletPrint as a bookletPrint as a bookletImprimir como folleto
Booklet printing places two pages side by side on each side of a sheet and arranges them so they read in order after folding. For example, 8.5 × 11-inch bulletin pages print on 11 × 17-inch paper, which folds into a letter-size booklet. A smaller booklet uses 5.5 × 8.5-inch pages on 8.5 × 11-inch paper. Your printer must support the selected sheet size.Booklet printing places two pages side by side on each side of a sheet and arranges them so they read in order after folding. For example, 8.5 × 11-inch bulletin pages print on 11 × 17-inch paper, which folds into a letter-size booklet. A smaller booklet uses 5.5 × 8.5-inch pages on 8.5 × 11-inch paper. Your printer must support the selected sheet size.Booklet printing places two pages side by side on each side of a sheet and arranges them so they read in order after folding. For example, 8.5 × 11-inch bulletin pages print on 11 × 17-inch paper, which folds into a letter-size booklet. A smaller booklet uses 5.5 × 8.5-inch pages on 8.5 × 11-inch paper. Your printer must support the selected sheet size.Booklet printing places two pages side by side on each side of a sheet and arranges them so they read in order after folding. For example, 8.5 × 11-inch bulletin pages print on 11 × 17-inch paper, which folds into a letter-size booklet. A smaller booklet uses 5.5 × 8.5-inch pages on 8.5 × 11-inch paper. Your printer must support the selected sheet size.Booklet printing places two pages side by side on each side of a sheet and arranges them so they read in order after folding. For example, 8.5 × 11-inch bulletin pages print on 11 × 17-inch paper, which folds into a letter-size booklet. A smaller booklet uses 5.5 × 8.5-inch pages on 8.5 × 11-inch paper. Your printer must support the selected sheet size.Booklet printing places two pages side by side on each side of a sheet and arranges them so they read in order after folding. For example, 8.5 × 11-inch bulletin pages print on 11 × 17-inch paper, which folds into a letter-size booklet. A smaller booklet uses 5.5 × 8.5-inch pages on 8.5 × 11-inch paper. Your printer must support the selected sheet size.Booklet printing places two pages side by side on each side of a sheet and arranges them so they read in order after folding. For example, 8.5 × 11-inch bulletin pages print on 11 × 17-inch paper, which folds into a letter-size booklet. A smaller booklet uses 5.5 × 8.5-inch pages on 8.5 × 11-inch paper. Your printer must support the selected sheet size.La impresión de folletos coloca dos páginas lado a lado en cada cara de una hoja y las ordena para que se lean correctamente después de doblarla. Por ejemplo, las páginas de 8.5 × 11 pulgadas se imprimen en papel de 11 × 17 pulgadas, que se dobla para formar un folleto tamaño carta. Un folleto más pequeño usa páginas de 5.5 × 8.5 pulgadas en papel de 8.5 × 11 pulgadas. La impresora debe admitir el tamaño de papel elegido.
Select the matching paper size in the printer or PDF booklet settings. Each sheet is printed on both sides and folded in half to produce four finished pages.Select the matching paper size in the printer or PDF booklet settings. Each sheet is printed on both sides and folded in half to produce four finished pages.Select the matching paper size in the printer or PDF booklet settings. Each sheet is printed on both sides and folded in half to produce four finished pages.Select the matching paper size in the printer or PDF booklet settings. Each sheet is printed on both sides and folded in half to produce four finished pages.Select the matching paper size in the printer or PDF booklet settings. Each sheet is printed on both sides and folded in half to produce four finished pages.Select the matching paper size in the printer or PDF booklet settings. Each sheet is printed on both sides and folded in half to produce four finished pages.Select the matching paper size in the printer or PDF booklet settings. Each sheet is printed on both sides and folded in half to produce four finished pages.Seleccione el tamaño de papel correspondiente en las opciones de folleto de la impresora o del programa PDF. Cada hoja se imprime por ambas caras y se dobla por la mitad para formar cuatro páginas terminadas.
Use your office printer’s booklet settingUse your office printer’s booklet settingUse your office printer’s booklet settingUse your office printer’s booklet settingUse your office printer’s booklet settingUse your office printer’s booklet settingUse your office printer’s booklet settingUse la opción de folleto de su impresora
Many office printers and copiers offer Booklet or Booklet printing in their printer Properties or Preferences. Select that setting, choose the larger paper size, and follow the printer’s options for two-sided printing and binding. The printer arranges the pages for you. Keep the CPUB pages in normal reading order.Many office printers and copiers offer Booklet or Booklet printing in their printer Properties or Preferences. Select that setting, choose the larger paper size, and follow the printer’s options for two-sided printing and binding. The printer arranges the pages for you. Keep the CPUB pages in normal reading order.Many office printers and copiers offer Booklet or Booklet printing in their printer Properties or Preferences. Select that setting, choose the larger paper size, and follow the printer’s options for two-sided printing and binding. The printer arranges the pages for you. Keep the CPUB pages in normal reading order.Many office printers and copiers offer Booklet or Booklet printing in their printer Properties or Preferences. Select that setting, choose the larger paper size, and follow the printer’s options for two-sided printing and binding. The printer arranges the pages for you. Keep the CPUB pages in normal reading order.Many office printers and copiers offer Booklet or Booklet printing in their printer Properties or Preferences. Select that setting, choose the larger paper size, and follow the printer’s options for two-sided printing and binding. The printer arranges the pages for you. Keep the CPUB pages in normal reading order.Many office printers and copiers offer Booklet or Booklet printing in their printer Properties or Preferences. Select that setting, choose the larger paper size, and follow the printer’s options for two-sided printing and binding. The printer arranges the pages for you. Keep the CPUB pages in normal reading order.Many office printers and copiers offer Booklet or Booklet printing in their printer Properties or Preferences. Select that setting, choose the larger paper size, and follow the printer’s options for two-sided printing and binding. The printer arranges the pages for you. Keep the CPUB pages in normal reading order.Muchas impresoras y copiadoras de oficina ofrecen Folleto o Impresión de folletos en Propiedades o Preferencias de la impresora. Seleccione esa opción, elija el tamaño de papel más grande y siga las opciones de impresión a doble cara y encuadernación. La impresora ordena las páginas. Mantenga las páginas del CPUB en el orden normal de lectura.
Or use a PDF programOr use a PDF programOr use a PDF programOr use a PDF programOr use a PDF programOr use a PDF programOr use a PDF programO use un programa de PDF
If the printer has no booklet feature, export your publication as a PDF and open it in a PDF program with a Booklet option. In Adobe Acrobat Reader, open Print and choose Booklet under Page Sizing & Handling. Select the printer and paper size, then print both sides, or follow the front-side/back-side procedure for a printer without automatic duplex printing.If the printer has no booklet feature, export your publication as a PDF and open it in a PDF program with a Booklet option. In Adobe Acrobat Reader, open Print and choose Booklet under Page Sizing & Handling. Select the printer and paper size, then print both sides, or follow the front-side/back-side procedure for a printer without automatic duplex printing.If the printer has no booklet feature, export your publication as a PDF and open it in a PDF program with a Booklet option. In Adobe Acrobat Reader, open Print and choose Booklet under Page Sizing & Handling. Select the printer and paper size, then print both sides, or follow the front-side/back-side procedure for a printer without automatic duplex printing.If the printer has no booklet feature, export your publication as a PDF and open it in a PDF program with a Booklet option. In Adobe Acrobat Reader, open Print and choose Booklet under Page Sizing & Handling. Select the printer and paper size, then print both sides, or follow the front-side/back-side procedure for a printer without automatic duplex printing.If the printer has no booklet feature, export your publication as a PDF and open it in a PDF program with a Booklet option. In Adobe Acrobat Reader, open Print and choose Booklet under Page Sizing & Handling. Select the printer and paper size, then print both sides, or follow the front-side/back-side procedure for a printer without automatic duplex printing.If the printer has no booklet feature, export your publication as a PDF and open it in a PDF program with a Booklet option. In Adobe Acrobat Reader, open Print and choose Booklet under Page Sizing & Handling. Select the printer and paper size, then print both sides, or follow the front-side/back-side procedure for a printer without automatic duplex printing.If the printer has no booklet feature, export your publication as a PDF and open it in a PDF program with a Booklet option. In Adobe Acrobat Reader, open Print and choose Booklet under Page Sizing & Handling. Select the printer and paper size, then print both sides, or follow the front-side/back-side procedure for a printer without automatic duplex printing.Si la impresora no ofrece esa función, exporte la publicación como PDF y ábrala en un programa con una opción de Folleto. En Adobe Acrobat Reader, abra Imprimir y elija Folleto en Tamaño y administración de páginas. Seleccione la impresora y el papel; imprima ambas caras o siga el procedimiento de anversos y reversos si la impresora no imprime automáticamente a doble cara.
If you use PDFgear or another PDF reader, look for a Booklet setting in its print dialog or the printer’s Properties. Available features vary by program and version; use a reader with booklet support if that option is missing.If you use PDFgear or another PDF reader, look for a Booklet setting in its print dialog or the printer’s Properties. Available features vary by program and version; use a reader with booklet support if that option is missing.If you use PDFgear or another PDF reader, look for a Booklet setting in its print dialog or the printer’s Properties. Available features vary by program and version; use a reader with booklet support if that option is missing.If you use PDFgear or another PDF reader, look for a Booklet setting in its print dialog or the printer’s Properties. Available features vary by program and version; use a reader with booklet support if that option is missing.If you use PDFgear or another PDF reader, look for a Booklet setting in its print dialog or the printer’s Properties. Available features vary by program and version; use a reader with booklet support if that option is missing.If you use PDFgear or another PDF reader, look for a Booklet setting in its print dialog or the printer’s Properties. Available features vary by program and version; use a reader with booklet support if that option is missing.If you use PDFgear or another PDF reader, look for a Booklet setting in its print dialog or the printer’s Properties. Available features vary by program and version; use a reader with booklet support if that option is missing.Si usa PDFgear u otro lector de PDF, busque Folleto en el diálogo de impresión o en Propiedades de la impresora. Las funciones varían según el programa y la versión; use un lector compatible con folletos si no aparece esa opción.
Check page order, orientation, margins, and front and back covers before printing the full quantity. Let either the PDF program or the printer arrange the booklet—enable booklet layout in only one place. Each folded sheet holds four pages, so a page count divisible by four avoids added blank pages.Check page order, orientation, margins, and front and back covers before printing the full quantity. Let either the PDF program or the printer arrange the booklet—enable booklet layout in only one place. Each folded sheet holds four pages, so a page count divisible by four avoids added blank pages.Check page order, orientation, margins, and front and back covers before printing the full quantity. Let either the PDF program or the printer arrange the booklet—enable booklet layout in only one place. Each folded sheet holds four pages, so a page count divisible by four avoids added blank pages.Check page order, orientation, margins, and front and back covers before printing the full quantity. Let either the PDF program or the printer arrange the booklet—enable booklet layout in only one place. Each folded sheet holds four pages, so a page count divisible by four avoids added blank pages.Check page order, orientation, margins, and front and back covers before printing the full quantity. Let either the PDF program or the printer arrange the booklet—enable booklet layout in only one place. Each folded sheet holds four pages, so a page count divisible by four avoids added blank pages.Check page order, orientation, margins, and front and back covers before printing the full quantity. Let either the PDF program or the printer arrange the booklet—enable booklet layout in only one place. Each folded sheet holds four pages, so a page count divisible by four avoids added blank pages.Check page order, orientation, margins, and front and back covers before printing the full quantity. Let either the PDF program or the printer arrange the booklet—enable booklet layout in only one place. Each folded sheet holds four pages, so a page count divisible by four avoids added blank pages.Revise el orden, la orientación, los márgenes y las portadas antes de imprimir todas las copias. Active la distribución de folleto en un solo lugar: el programa de PDF o la impresora. Cada hoja doblada contiene cuatro páginas; una cantidad de páginas divisible entre cuatro evita páginas en blanco adicionales.
Installing or updating Catholic PublisherInstalling or updating Catholic PublisherInstalling or updating Catholic PublisherInstalling or updating Catholic PublisherInstalling or updating Catholic PublisherInstalling or updating Catholic PublisherInstalling or updating Catholic PublisherInstalar o actualizar Catholic Publisher
Install and updateInstall and updateInstall and updateInstall and updateInstall and updateInstall and updateInstall and updateInstale y actualice
Catholic Publisher is a free Windows desktop application for x64 computers running Windows 10 version 2004 or later, or Windows 11. The installer asks where new publications should begin, creates shortcuts, and registers the .cpub file type with Windows.
Install a newer release: the app checks for updates no more than once per day and always asks before installing. Use Help > Check for updates to check manually. To remove the application, close it and use Windows Settings > Apps > Installed apps; your separately saved CPUB and PDF documents are not application files, but should still be backed up.Install a newer release: the app checks for updates no more than once per day and always asks before installing. Use Help > Check for updates to check manually. To remove the application, close it and use Windows Settings > Apps > Installed apps; your separately saved CPUB and PDF documents are not application files, but should still be backed up.Install a newer release: the app checks for updates no more than once per day and always asks before installing. Use Help > Check for updates to check manually. To remove the application, close it and use Windows Settings > Apps > Installed apps; your separately saved CPUB and PDF documents are not application files, but should still be backed up.Install a newer release: the app checks for updates no more than once per day and always asks before installing. Use Help > Check for updates to check manually. To remove the application, close it and use Windows Settings > Apps > Installed apps; your separately saved CPUB and PDF documents are not application files, but should still be backed up.Install a newer release: the app checks for updates no more than once per day and always asks before installing. Use Help > Check for updates to check manually. To remove the application, close it and use Windows Settings > Apps > Installed apps; your separately saved CPUB and PDF documents are not application files, but should still be backed up.Install a newer release: the app checks for updates no more than once per day and always asks before installing. Use Help > Check for updates to check manually. To remove the application, close it and use Windows Settings > Apps > Installed apps; your separately saved CPUB and PDF documents are not application files, but should still be backed up.Install a newer release: the app checks for updates no more than once per day and always asks before installing. Use Help > Check for updates to check manually. To remove the application, close it and use Windows Settings > Apps > Installed apps; your separately saved CPUB and PDF documents are not application files, but should still be backed up.Instalar una versión más reciente: la aplicación busca actualizaciones como máximo una vez al día y siempre pide permiso antes de instalarlas. Use Ayuda > Buscar actualizaciones para comprobar manualmente. Para quitar la aplicación, ciérrela y use Configuración de Windows > Aplicaciones > Aplicaciones instaladas; sus documentos CPUB y PDF guardados por separado no forman parte de la aplicación, pero aun así deben tener una copia de seguridad.
03 · Interface featuresInterface featuresInterface featuresInterface featuresInterface featuresInterface featuresInterface featuresFunciones de la interfaz
Interface featuresInterface featuresInterface featuresInterface featuresInterface featuresInterface featuresInterface featuresFunciones de la interfaz
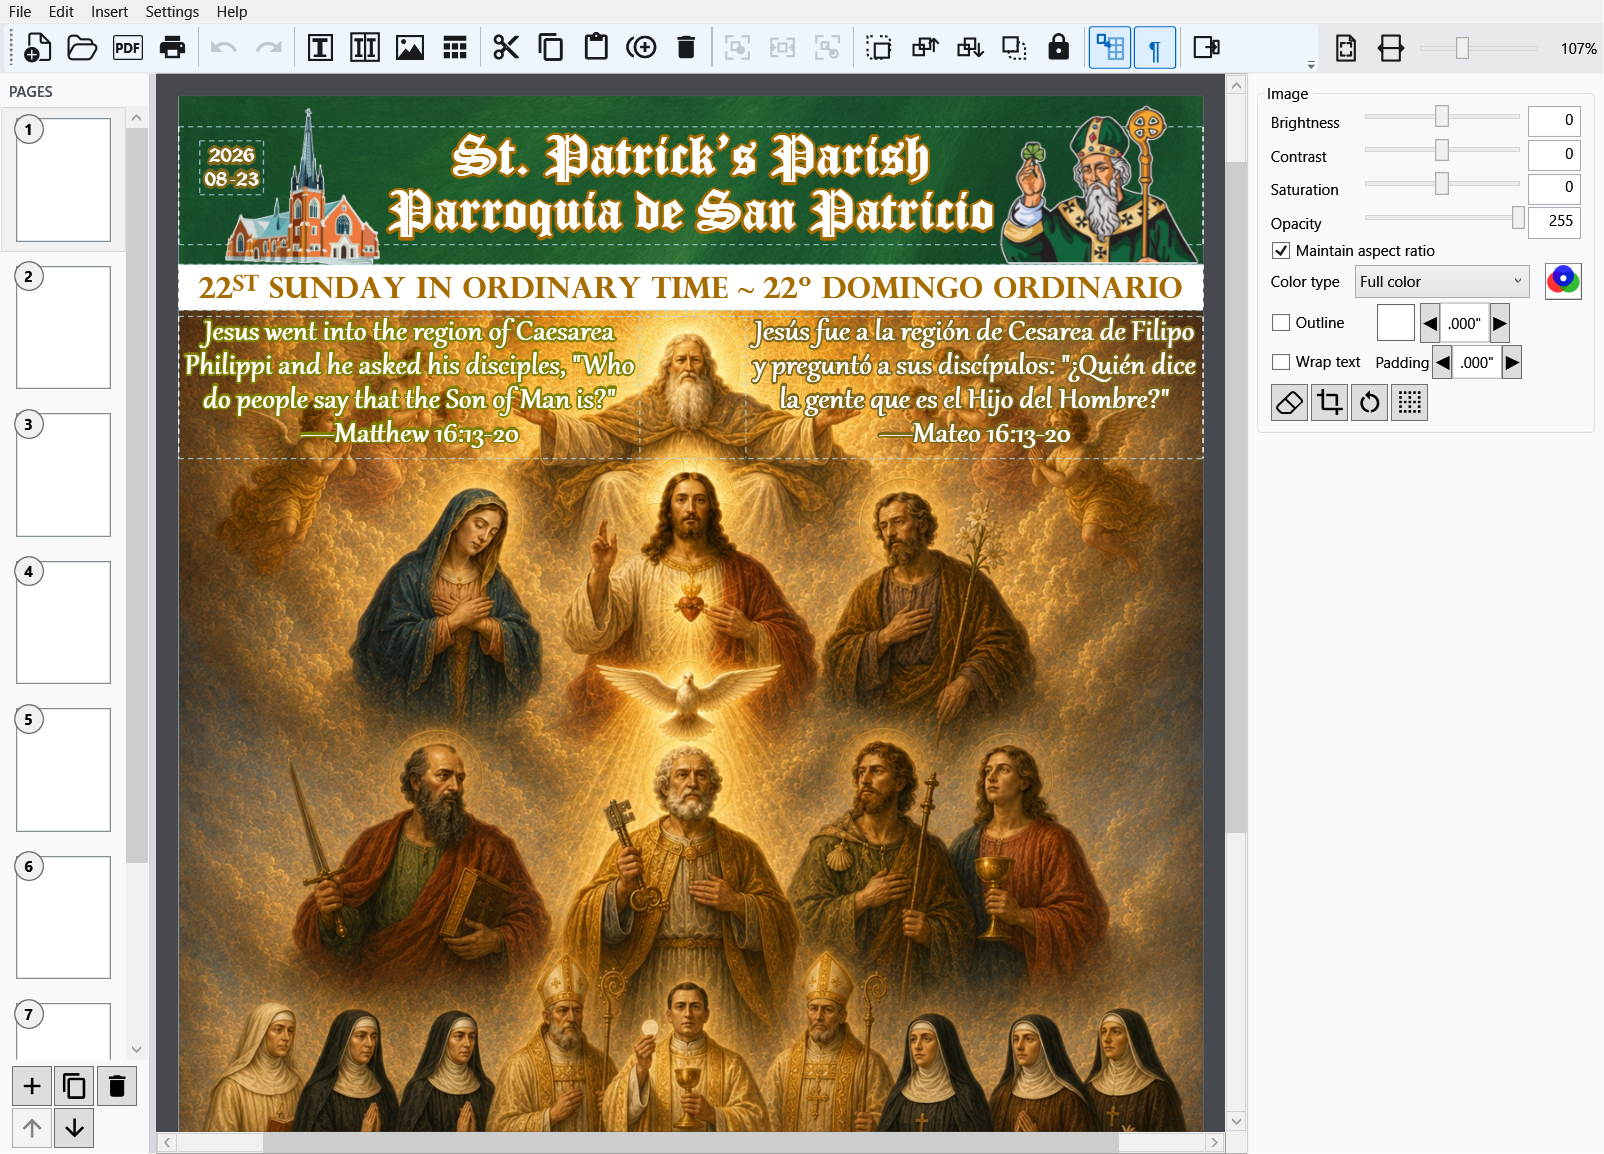
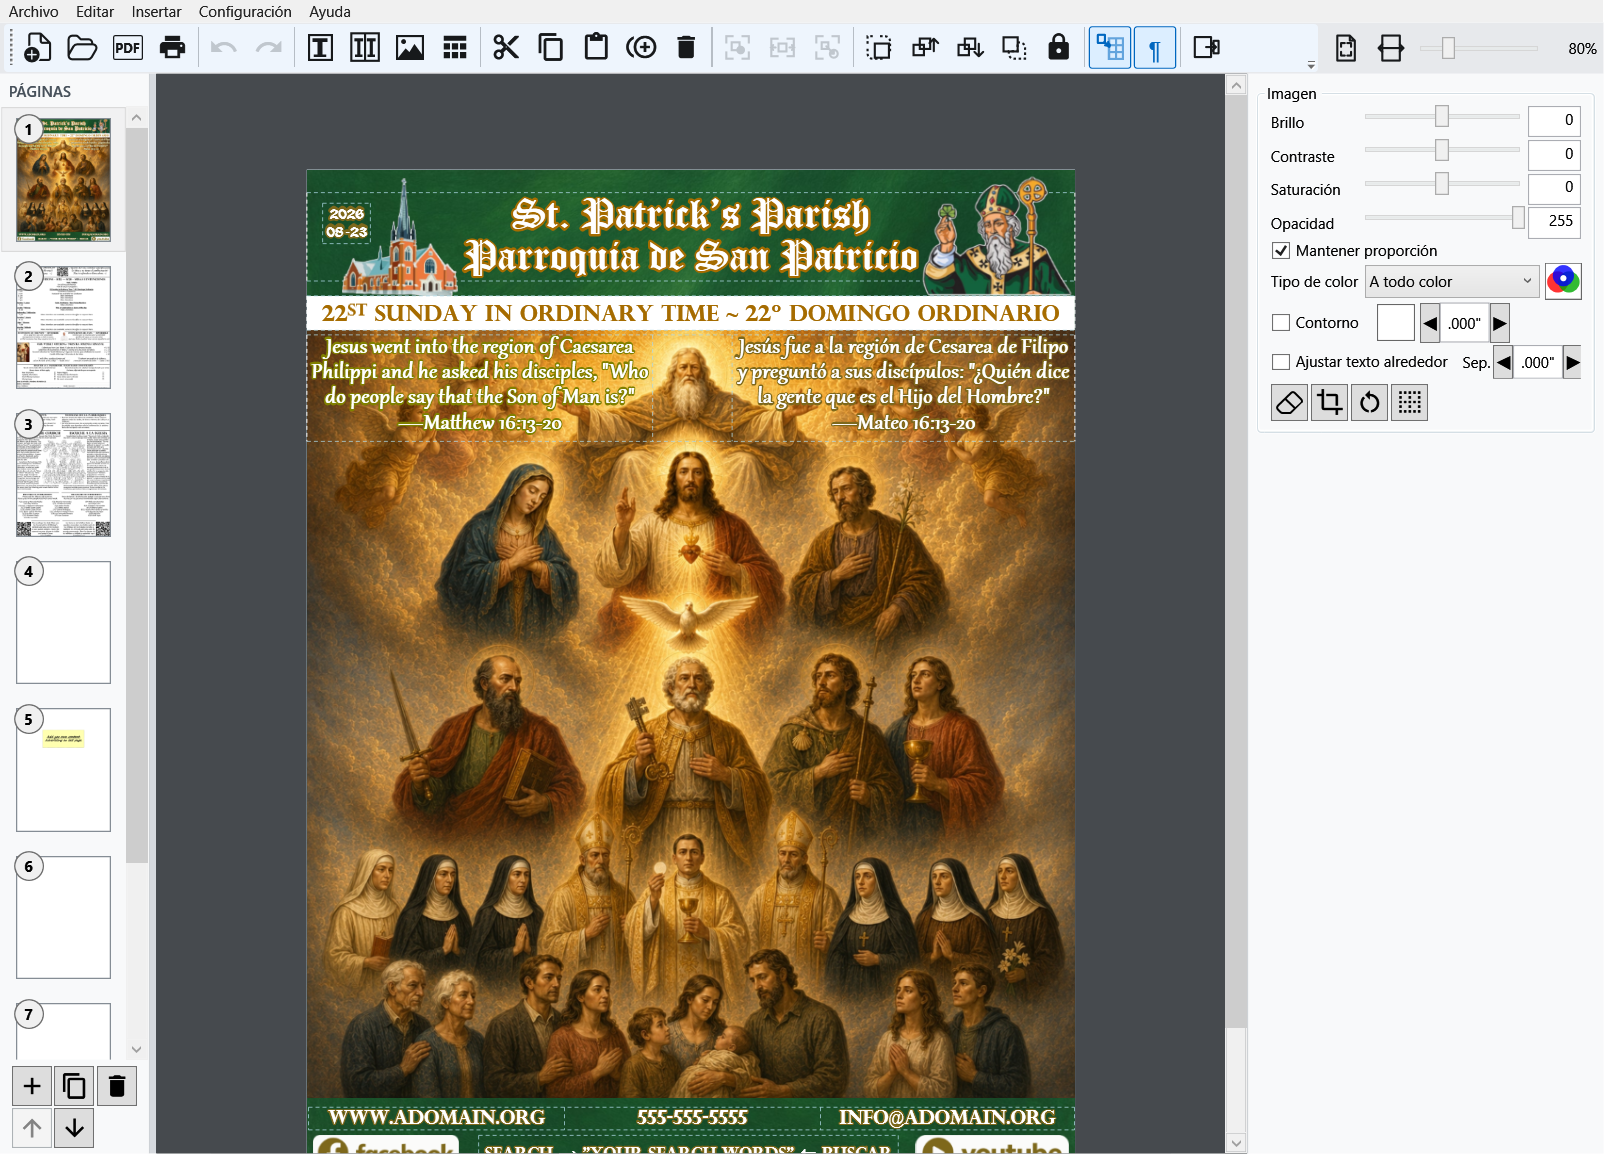
Menu bar
File, Edit, Insert, Settings, and Help contain the complete commands.File, Edit, Insert, Settings, and Help contain the complete commands.File, Edit, Insert, Settings, and Help contain the complete commands.File, Edit, Insert, Settings, and Help contain the complete commands.File, Edit, Insert, Settings, and Help contain the complete commands.File, Edit, Insert, Settings, and Help contain the complete commands.File, Edit, Insert, Settings, and Help contain the complete commands.Los menús Archivo, Editar, Insertar, Configuración y Ayuda contienen todos los comandos.
Toolbar
Frequent document, object, arrangement, lock, view, and zoom controls stay within one click.
Pages panel
Page thumbnails show the current order and provide add, duplicate, delete, and move controls.
Canvas
The white canvas is the editable page inside the physical margins selected for the publication.The white canvas is the editable page inside the physical margins selected for the publication.The white canvas is the editable page inside the physical margins selected for the publication.The white canvas is the editable page inside the physical margins selected for the publication.The white canvas is the editable page inside the physical margins selected for the publication.The white canvas is the editable page inside the physical margins selected for the publication.The white canvas is the editable page inside the physical margins selected for the publication.El lienzo blanco es la página editable dentro de los márgenes físicos elegidos para la publicación.
Properties panel
Its cards change for the selected text box, bilingual box, image, table, cell, or group.
Zoom and status
Use Whole page, Page width, or the 25%–250% slider. Zoom never changes print or PDF output.
See the page at the size you needSee the page at the size you needSee the page at the size you needSee the page at the size you needSee the page at the size you needSee the page at the size you needSee the page at the size you needVea la página al tamaño que necesita
Use Whole page to see the entire page or Page width to fill the available width. Move the zoom slider left to zoom out or right to zoom in, from 25% to 250%. Zoom changes your view, not the printed size. Hold Ctrl and drag empty workspace to pan.Use Whole page to see the entire page or Page width to fill the available width. Move the zoom slider left to zoom out or right to zoom in, from 25% to 250%. Zoom changes your view, not the printed size. Hold Ctrl and drag empty workspace to pan.Use Whole page to see the entire page or Page width to fill the available width. Move the zoom slider left to zoom out or right to zoom in, from 25% to 250%. Zoom changes your view, not the printed size. Hold Ctrl and drag empty workspace to pan.Use Whole page to see the entire page or Page width to fill the available width. Move the zoom slider left to zoom out or right to zoom in, from 25% to 250%. Zoom changes your view, not the printed size. Hold Ctrl and drag empty workspace to pan.Use Whole page to see the entire page or Page width to fill the available width. Move the zoom slider left to zoom out or right to zoom in, from 25% to 250%. Zoom changes your view, not the printed size. Hold Ctrl and drag empty workspace to pan.Use Whole page to see the entire page or Page width to fill the available width. Move the zoom slider left to zoom out or right to zoom in, from 25% to 250%. Zoom changes your view, not the printed size. Hold Ctrl and drag empty workspace to pan.Use Whole page to see the entire page or Page width to fill the available width. Move the zoom slider left to zoom out or right to zoom in, from 25% to 250%. Zoom changes your view, not the printed size. Hold Ctrl and drag empty workspace to pan.Use Página completa para ver toda la página o Ancho de página para ocupar el ancho disponible. Mueva el control de zoom a la izquierda para alejar o a la derecha para acercar, de 25% a 250%. El zoom cambia la vista, no el tamaño impreso. Mantenga Ctrl y arrastre un área vacía para desplazar la vista.
Keep unused items beside the pageKeep unused items beside the pageKeep unused items beside the pageKeep unused items beside the pageKeep unused items beside the pageKeep unused items beside the pageKeep unused items beside the pageGuarde elementos junto a la página
The gray area around the white page is a workspace for items you want to keep for later. Drag an object entirely outside the white printable area to set it aside; it stays in the CPUB. Drag it back when you need it. Anything outside the printable area is excluded from the output; a partly overlapping object can be clipped. The red outline warns you about content beyond the page.The gray area around the white page is a workspace for items you want to keep for later. Drag an object entirely outside the white printable area to set it aside; it stays in the CPUB. Drag it back when you need it. Anything outside the printable area is excluded from the output; a partly overlapping object can be clipped. The red outline warns you about content beyond the page.The gray area around the white page is a workspace for items you want to keep for later. Drag an object entirely outside the white printable area to set it aside; it stays in the CPUB. Drag it back when you need it. Anything outside the printable area is excluded from the output; a partly overlapping object can be clipped. The red outline warns you about content beyond the page.The gray area around the white page is a workspace for items you want to keep for later. Drag an object entirely outside the white printable area to set it aside; it stays in the CPUB. Drag it back when you need it. Anything outside the printable area is excluded from the output; a partly overlapping object can be clipped. The red outline warns you about content beyond the page.The gray area around the white page is a workspace for items you want to keep for later. Drag an object entirely outside the white printable area to set it aside; it stays in the CPUB. Drag it back when you need it. Anything outside the printable area is excluded from the output; a partly overlapping object can be clipped. The red outline warns you about content beyond the page.The gray area around the white page is a workspace for items you want to keep for later. Drag an object entirely outside the white printable area to set it aside; it stays in the CPUB. Drag it back when you need it. Anything outside the printable area is excluded from the output; a partly overlapping object can be clipped. The red outline warns you about content beyond the page.The gray area around the white page is a workspace for items you want to keep for later. Drag an object entirely outside the white printable area to set it aside; it stays in the CPUB. Drag it back when you need it. Anything outside the printable area is excluded from the output; a partly overlapping object can be clipped. The red outline warns you about content beyond the page.El área gris alrededor de la página blanca permite guardar elementos para después. Arrastre un objeto completamente fuera del área blanca imprimible para apartarlo; permanece en el CPUB. Devuélvalo a la página cuando lo necesite. Lo que queda fuera del área imprimible no aparece en la salida; un objeto parcialmente superpuesto puede quedar recortado. El contorno rojo advierte que hay contenido fuera de la página.
Show or hide paragraph marksShow or hide paragraph marksShow or hide paragraph marksShow or hide paragraph marksShow or hide paragraph marksShow or hide paragraph marksShow or hide paragraph marksMostrar u ocultar marcas de párrafo
Use the ¶ toolbar button or Settings > Show paragraph marks to see paragraph endings (¶) and manual line breaks (↵). Turn the guides off for a cleaner editing view. They never print or appear in a PDF.Use the ¶ toolbar button or Settings > Show paragraph marks to see paragraph endings (¶) and manual line breaks (↵). Turn the guides off for a cleaner editing view. They never print or appear in a PDF.Use the ¶ toolbar button or Settings > Show paragraph marks to see paragraph endings (¶) and manual line breaks (↵). Turn the guides off for a cleaner editing view. They never print or appear in a PDF.Use the ¶ toolbar button or Settings > Show paragraph marks to see paragraph endings (¶) and manual line breaks (↵). Turn the guides off for a cleaner editing view. They never print or appear in a PDF.Use the ¶ toolbar button or Settings > Show paragraph marks to see paragraph endings (¶) and manual line breaks (↵). Turn the guides off for a cleaner editing view. They never print or appear in a PDF.Use the ¶ toolbar button or Settings > Show paragraph marks to see paragraph endings (¶) and manual line breaks (↵). Turn the guides off for a cleaner editing view. They never print or appear in a PDF.Use the ¶ toolbar button or Settings > Show paragraph marks to see paragraph endings (¶) and manual line breaks (↵). Turn the guides off for a cleaner editing view. They never print or appear in a PDF.Use el botón ¶ o Configuración > Mostrar marcas de párrafo para ver los finales de párrafo (¶) y los saltos de línea manuales (↵). Desactive las guías para una vista más limpia. Nunca se imprimen ni aparecen en el PDF.
Show locations and sizesShow locations and sizesShow locations and sizesShow locations and sizesShow locations and sizesShow locations and sizesShow locations and sizesMostrar ubicaciones y tamaños
Choose Settings > Show locations and sizes, then select an object. Its Properties panel shows X, Y, Width, and Height in inches so you can enter precise measurements. Hide this card again when you prefer to work visually.Choose Settings > Show locations and sizes, then select an object. Its Properties panel shows X, Y, Width, and Height in inches so you can enter precise measurements. Hide this card again when you prefer to work visually.Choose Settings > Show locations and sizes, then select an object. Its Properties panel shows X, Y, Width, and Height in inches so you can enter precise measurements. Hide this card again when you prefer to work visually.Choose Settings > Show locations and sizes, then select an object. Its Properties panel shows X, Y, Width, and Height in inches so you can enter precise measurements. Hide this card again when you prefer to work visually.Choose Settings > Show locations and sizes, then select an object. Its Properties panel shows X, Y, Width, and Height in inches so you can enter precise measurements. Hide this card again when you prefer to work visually.Choose Settings > Show locations and sizes, then select an object. Its Properties panel shows X, Y, Width, and Height in inches so you can enter precise measurements. Hide this card again when you prefer to work visually.Choose Settings > Show locations and sizes, then select an object. Its Properties panel shows X, Y, Width, and Height in inches so you can enter precise measurements. Hide this card again when you prefer to work visually.Elija Configuración > Mostrar ubicaciones y tamaños y seleccione un objeto. El panel Propiedades muestra X, Y, Ancho y Alto en pulgadas para introducir medidas precisas. Oculte la tarjeta cuando prefiera trabajar visualmente.
Choose your translatorChoose your translatorChoose your translatorChoose your translatorChoose your translatorChoose your translatorChoose your translatorElija su traductor
Choose Settings > Translator to use Google or configure your own OpenAI API key. Google uses the free web translation service; OpenAI requires your key and may incur charges. Translation needs an Internet connection. Right-click while editing text for translation options, then review the result.Choose Settings > Translator to use Google or configure your own OpenAI API key. Google uses the free web translation service; OpenAI requires your key and may incur charges. Translation needs an Internet connection. Right-click while editing text for translation options, then review the result.Choose Settings > Translator to use Google or configure your own OpenAI API key. Google uses the free web translation service; OpenAI requires your key and may incur charges. Translation needs an Internet connection. Right-click while editing text for translation options, then review the result.Choose Settings > Translator to use Google or configure your own OpenAI API key. Google uses the free web translation service; OpenAI requires your key and may incur charges. Translation needs an Internet connection. Right-click while editing text for translation options, then review the result.Choose Settings > Translator to use Google or configure your own OpenAI API key. Google uses the free web translation service; OpenAI requires your key and may incur charges. Translation needs an Internet connection. Right-click while editing text for translation options, then review the result.Choose Settings > Translator to use Google or configure your own OpenAI API key. Google uses the free web translation service; OpenAI requires your key and may incur charges. Translation needs an Internet connection. Right-click while editing text for translation options, then review the result.Choose Settings > Translator to use Google or configure your own OpenAI API key. Google uses the free web translation service; OpenAI requires your key and may incur charges. Translation needs an Internet connection. Right-click while editing text for translation options, then review the result.Elija Configuración > Traductor para usar Google o configurar su propia clave API de OpenAI. Google usa el servicio gratuito de traducción web; OpenAI requiere su clave y puede generar cargos. La traducción necesita conexión a Internet. Haga clic derecho al editar texto para ver las opciones de traducción y revise el resultado.
Translate without leaving the layout
Right-click inside text and choose the desired language. The menu adapts to the current context: a selection, a complete text target, the active bilingual pane, both bilingual panes, or selected table cells.
Google translation uses the configured free web path. OpenAI translation uses your own API key and may incur charges from OpenAI. Source language detection is automatic. Translation is a draft: always review names, liturgical language, Scripture, dates, and local terminology.
Spellcheck and your dictionariesSpellcheck and your dictionariesSpellcheck and your dictionariesSpellcheck and your dictionariesSpellcheck and your dictionariesSpellcheck and your dictionariesSpellcheck and your dictionariesOrtografía y diccionarios
Turn Settings > Underline misspelled words on or off. While editing, right-click an underlined word to choose a correction, Ignore All in This Publication, or Add to Personal Dictionary. English and Spanish are checked together. Spelling marks never print.Turn Settings > Underline misspelled words on or off. While editing, right-click an underlined word to choose a correction, Ignore All in This Publication, or Add to Personal Dictionary. English and Spanish are checked together. Spelling marks never print.Turn Settings > Underline misspelled words on or off. While editing, right-click an underlined word to choose a correction, Ignore All in This Publication, or Add to Personal Dictionary. English and Spanish are checked together. Spelling marks never print.Turn Settings > Underline misspelled words on or off. While editing, right-click an underlined word to choose a correction, Ignore All in This Publication, or Add to Personal Dictionary. English and Spanish are checked together. Spelling marks never print.Turn Settings > Underline misspelled words on or off. While editing, right-click an underlined word to choose a correction, Ignore All in This Publication, or Add to Personal Dictionary. English and Spanish are checked together. Spelling marks never print.Turn Settings > Underline misspelled words on or off. While editing, right-click an underlined word to choose a correction, Ignore All in This Publication, or Add to Personal Dictionary. English and Spanish are checked together. Spelling marks never print.Turn Settings > Underline misspelled words on or off. While editing, right-click an underlined word to choose a correction, Ignore All in This Publication, or Add to Personal Dictionary. English and Spanish are checked together. Spelling marks never print.Active o desactive Configuración > Subrayar palabras mal escritas. Mientras edita, haga clic derecho en una palabra subrayada para elegir una corrección, Ignorar todo en esta publicación o Agregar al diccionario personal. Se revisan juntos el inglés y el español. Las marcas ortográficas nunca se imprimen.
Use Settings > Manage Spelling Dictionaries… to add or remove words. Publication words travel with that CPUB; personal words are available to the current Windows user across publications. This is useful for parish names and local place names.Use Settings > Manage Spelling Dictionaries… to add or remove words. Publication words travel with that CPUB; personal words are available to the current Windows user across publications. This is useful for parish names and local place names.Use Settings > Manage Spelling Dictionaries… to add or remove words. Publication words travel with that CPUB; personal words are available to the current Windows user across publications. This is useful for parish names and local place names.Use Settings > Manage Spelling Dictionaries… to add or remove words. Publication words travel with that CPUB; personal words are available to the current Windows user across publications. This is useful for parish names and local place names.Use Settings > Manage Spelling Dictionaries… to add or remove words. Publication words travel with that CPUB; personal words are available to the current Windows user across publications. This is useful for parish names and local place names.Use Settings > Manage Spelling Dictionaries… to add or remove words. Publication words travel with that CPUB; personal words are available to the current Windows user across publications. This is useful for parish names and local place names.Use Settings > Manage Spelling Dictionaries… to add or remove words. Publication words travel with that CPUB; personal words are available to the current Windows user across publications. This is useful for parish names and local place names.Use Configuración > Administrar diccionarios ortográficos… para agregar o quitar palabras. Las palabras de la publicación viajan con ese CPUB; las personales están disponibles en las publicaciones del usuario actual de Windows. Esto resulta útil para nombres parroquiales y lugares locales.
Settings and defaultsSettings and defaultsSettings and defaultsSettings and defaultsSettings and defaultsSettings and defaultsSettings and defaultsConfiguración y valores predeterminados
The Settings menu contains immediate editor choices and a separate dialog for defaults used when new content is created.
Change the application language
Choose Settings > Default Settings… > General and Text > Application language. The interface language is a personal application preference, not a setting saved in each publication. Changing it saves your work and restarts the app in the chosen language. The app supports English, Spanish (Spain and Americas), Italian, German, French, Portuguese (Portugal and Brazil), Polish, and Filipino (Tagalog).Elija Configuración > Configuración predeterminada… > General y texto > Idioma de la aplicación. El idioma de la interfaz es una preferencia personal, no una configuración guardada en cada publicación. Al cambiarlo, la aplicación guarda su trabajo y se reinicia en el idioma elegido. Admite inglés, español (España y América), italiano, alemán, francés, portugués (Portugal y Brasil), polaco y filipino (tagalo).Scegli Impostazioni > Impostazioni predefinite… > Generale e testo > Lingua dell’applicazione. La lingua dell’interfaccia è una preferenza personale, non un’impostazione salvata in ogni pubblicazione. Cambiandola, l’app salva il lavoro e si riavvia nella lingua scelta. Sono supportati inglese, spagnolo (Spagna e Americhe), italiano, tedesco, francese, portoghese (Portogallo e Brasile), polacco e filippino (tagalog).Choisissez Paramètres > Paramètres par défaut… > Général et texte > Langue de l’application. La langue de l’interface est une préférence personnelle, non un réglage enregistré dans chaque publication. La modification enregistre votre travail et redémarre l’application dans la langue choisie. L’application prend en charge l’anglais, l’espagnol (Espagne et Amériques), l’italien, l’allemand, le français, le portugais (Portugal et Brésil), le polonais et le philippin (tagalog).Wählen Sie Einstellungen > Standardeinstellungen… > Allgemein und Text > Anwendungssprache. Die Oberflächensprache ist eine persönliche Einstellung und wird nicht in jeder Publikation gespeichert. Bei einer Änderung speichert die App Ihre Arbeit und startet in der gewählten Sprache neu. Unterstützt werden Englisch, Spanisch (Spanien und Amerika), Italienisch, Deutsch, Französisch, Portugiesisch (Portugal und Brasilien), Polnisch und Filipino (Tagalog).Escolha Definições > Definições predefinidas… > Geral e texto > Idioma da aplicação. O idioma da interface é uma preferência pessoal, não uma definição guardada em cada publicação. Ao alterá-lo, a aplicação guarda o trabalho e reinicia no idioma escolhido. São suportados inglês, espanhol (Espanha e Américas), italiano, alemão, francês, português (Portugal e Brasil), polaco e filipino (tagalo).Wybierz Ustawienia > Ustawienia domyślne… > Ogólne i tekst > Język aplikacji. Język interfejsu jest osobistą preferencją, a nie ustawieniem zapisanym w każdej publikacji. Zmiana zapisuje pracę i ponownie uruchamia aplikację w wybranym języku. Obsługiwane są angielski, hiszpański (Hiszpania i Ameryki), włoski, niemiecki, francuski, portugalski (Portugalia i Brazylia), polski i filipiński (tagalog).Piliin ang Settings > Default Settings… > General and Text > Application language. Personal na kagustuhan sa app ang wika ng interface, hindi setting na naka-save sa bawat publikasyon. Kapag binago ito, sine-save ng app ang iyong gawain at muling bumubukas sa napiling wika. Sinusuportahan ang Ingles, Espanyol (Espanya at Amerika), Italyano, Aleman, Pranses, Portuges (Portugal at Brazil), Polako, at Filipino (Tagalog).
Use Writing languages beside Underline misspelled words, or Settings > Writing languages, to choose spell-check languages and the languages offered by Translate to. These choices apply to all publications. In the dialog, Save applies changes and Cancel discards them. Changing the interface language does not translate your document.Use Idiomas de escritura junto a Subrayar palabras mal escritas, o Configuración > Idiomas de escritura, para elegir los idiomas de corrección y los que ofrece Traducir a. Se aplican a todas las publicaciones. En el cuadro de diálogo, Guardar aplica los cambios y Cancelar los descarta. Cambiar el idioma de la interfaz no traduce el documento.Usa Lingue di scrittura accanto a Sottolinea parole errate, oppure Impostazioni > Lingue di scrittura, per scegliere le lingue di correzione e quelle disponibili in Traduci in. Le scelte valgono per tutte le pubblicazioni. Nella finestra, Salva applica le modifiche e Annulla le scarta. La lingua dell’interfaccia non traduce il documento.Utilisez Langues de rédaction à côté de Souligner les mots mal orthographiés, ou Paramètres > Langues de rédaction, pour choisir les langues de correction et celles proposées dans Traduire vers. Ces choix concernent toutes les publications. Enregistrer applique les changements et Annuler les abandonne. La langue de l’interface ne traduit pas le document.Mit Schreibsprachen neben Falsch geschriebene Wörter unterstreichen oder Einstellungen > Schreibsprachen wählen Sie die Rechtschreibsprachen und die Sprachen unter Übersetzen in. Die Auswahl gilt für alle Publikationen. Speichern übernimmt Änderungen, Abbrechen verwirft sie. Die Oberflächensprache übersetzt den Dokumentinhalt nicht.Use Idiomas de escrita junto de Sublinhar palavras mal escritas, ou Definições > Idiomas de escrita, para escolher os idiomas de correção e os disponíveis em Traduzir para. Aplicam-se a todas as publicações. Guardar aplica alterações e Cancelar descarta-as. Alterar o idioma da interface não traduz o documento.Użyj Języki pisania obok Podkreślaj błędnie napisane słowa lub Ustawienia > Języki pisania, aby wybrać języki sprawdzania pisowni i dostępne w Tłumacz na. Dotyczą wszystkich publikacji. Zapisz stosuje zmiany, a Anuluj je odrzuca. Język interfejsu nie tłumaczy dokumentu.Gamitin ang Writing languages sa tabi ng Underline misspelled words, o Settings > Writing languages, upang piliin ang mga wika para sa spell-check at Translate to. Para ito sa lahat ng publikasyon. Inilalapat ng Save ang pagbabago at inaalis ito ng Cancel. Hindi isinasalin ng wika ng interface ang nilalaman ng dokumento.
Default Settings…
Opens tabs for General and Text, Text Box, Bilingual Text Box, Table, and Image. Page formatting changes the current publication’s paper size and margins without moving or resizing any object, and can also become the initial setup for future publications.
Show grid
Shows or hides the canvas grid. It is a guide only and never prints or exports.
Snap to grid and guides
Toggles snapping after a move or resize is completed.
Show paragraph marks
Shows nonprinting ¶ and ↵ editing guides.
Show locations and sizes
Shows editable Position and size cards for a single selection.
Translator
Selects Google or configures, changes, or removes your OpenAI API key. The key belongs to the Windows user and is never stored in the .cpub.
Underline misspelled words
Toggles red spelling guides, which never print or export.
Manage Spelling Dictionaries…
Manages publication words that travel in the CPUB and personal words stored for the current Windows user.
Application language
Switches the complete interface between English and Español immediately and saves the choice with the open publication.Switches the complete interface between English and Español immediately and saves the choice with the open publication.Switches the complete interface between English and Español immediately and saves the choice with the open publication.Switches the complete interface between English and Español immediately and saves the choice with the open publication.Switches the complete interface between English and Español immediately and saves the choice with the open publication.Switches the complete interface between English and Español immediately and saves the choice with the open publication.Switches the complete interface between English and Español immediately and saves the choice with the open publication.Cambia inmediatamente toda la interfaz entre English y Español y guarda la selección en la publicación abierta.
General and Text
This tab sets the default publications folder; grid, snapping, paragraph-mark, geometry-panel, and toolbar-print behavior; spelling underlining; translator choice and OpenAI key status; default rich-text and paragraph formatting; and the publication’s page format. While a document is open, choose another paper size or margin here and save for This publication only to switch formats without moving or resizing its objects. The toolbar’s single printer icon follows Print interior pages in grayscale for cheaper printing, which is enabled by default.This tab sets the default publications folder; grid, snapping, paragraph-mark, geometry-panel, and toolbar-print behavior; spelling underlining; translator choice and OpenAI key status; default rich-text and paragraph formatting; and the publication’s page format. While a document is open, choose another paper size or margin here and save for This publication only to switch formats without moving or resizing its objects. The toolbar’s single printer icon follows Print interior pages in grayscale for cheaper printing, which is enabled by default.This tab sets the default publications folder; grid, snapping, paragraph-mark, geometry-panel, and toolbar-print behavior; spelling underlining; translator choice and OpenAI key status; default rich-text and paragraph formatting; and the publication’s page format. While a document is open, choose another paper size or margin here and save for This publication only to switch formats without moving or resizing its objects. The toolbar’s single printer icon follows Print interior pages in grayscale for cheaper printing, which is enabled by default.This tab sets the default publications folder; grid, snapping, paragraph-mark, geometry-panel, and toolbar-print behavior; spelling underlining; translator choice and OpenAI key status; default rich-text and paragraph formatting; and the publication’s page format. While a document is open, choose another paper size or margin here and save for This publication only to switch formats without moving or resizing its objects. The toolbar’s single printer icon follows Print interior pages in grayscale for cheaper printing, which is enabled by default.This tab sets the default publications folder; grid, snapping, paragraph-mark, geometry-panel, and toolbar-print behavior; spelling underlining; translator choice and OpenAI key status; default rich-text and paragraph formatting; and the publication’s page format. While a document is open, choose another paper size or margin here and save for This publication only to switch formats without moving or resizing its objects. The toolbar’s single printer icon follows Print interior pages in grayscale for cheaper printing, which is enabled by default.This tab sets the default publications folder; grid, snapping, paragraph-mark, geometry-panel, and toolbar-print behavior; spelling underlining; translator choice and OpenAI key status; default rich-text and paragraph formatting; and the publication’s page format. While a document is open, choose another paper size or margin here and save for This publication only to switch formats without moving or resizing its objects. The toolbar’s single printer icon follows Print interior pages in grayscale for cheaper printing, which is enabled by default.This tab sets the default publications folder; grid, snapping, paragraph-mark, geometry-panel, and toolbar-print behavior; spelling underlining; translator choice and OpenAI key status; default rich-text and paragraph formatting; and the publication’s page format. While a document is open, choose another paper size or margin here and save for This publication only to switch formats without moving or resizing its objects. The toolbar’s single printer icon follows Print interior pages in grayscale for cheaper printing, which is enabled by default.Esta pestaña establece la carpeta predeterminada de publicaciones; el comportamiento de la cuadrícula, el ajuste, las marcas de párrafo, el panel de geometría y la impresión; el subrayado ortográfico; el traductor y el estado de la clave de OpenAI; el formato predeterminado de texto y párrafo; y el formato de página de la publicación. Mientras un documento está abierto, elija aquí otro tamaño de papel o margen y guarde para Solo esta publicación a fin de cambiar de formato sin mover ni cambiar el tamaño de sus objetos. El único icono de impresora de la barra sigue la opción Imprimir páginas interiores en escala de grises para reducir el costo, que está activada inicialmente.
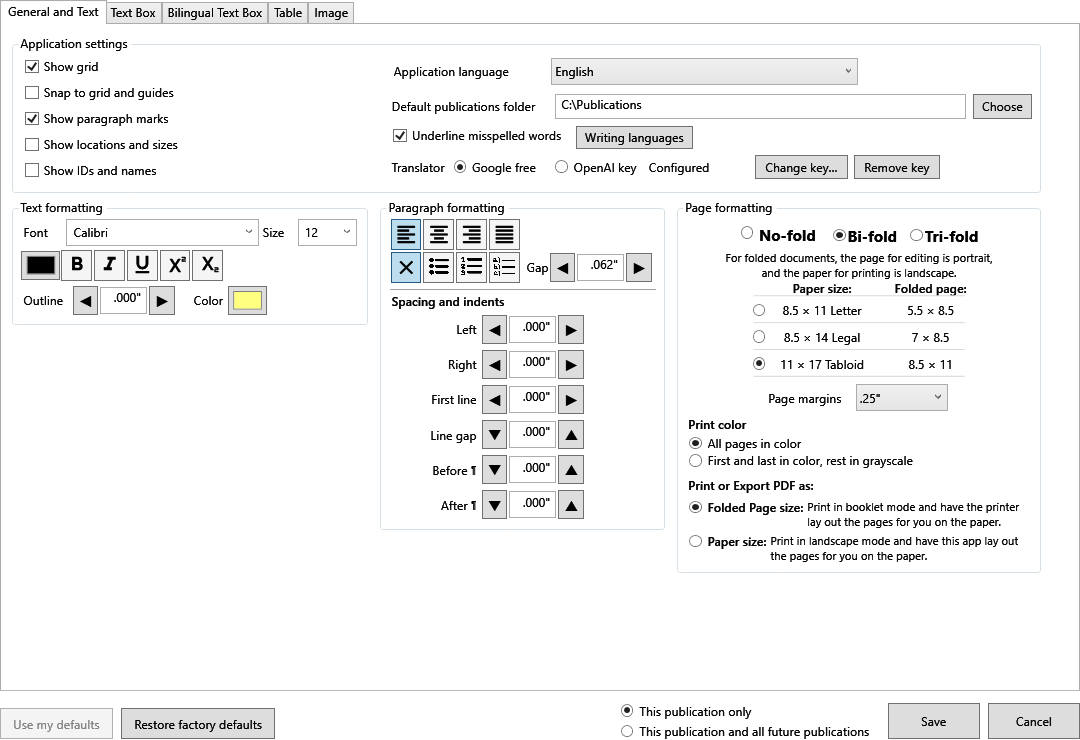
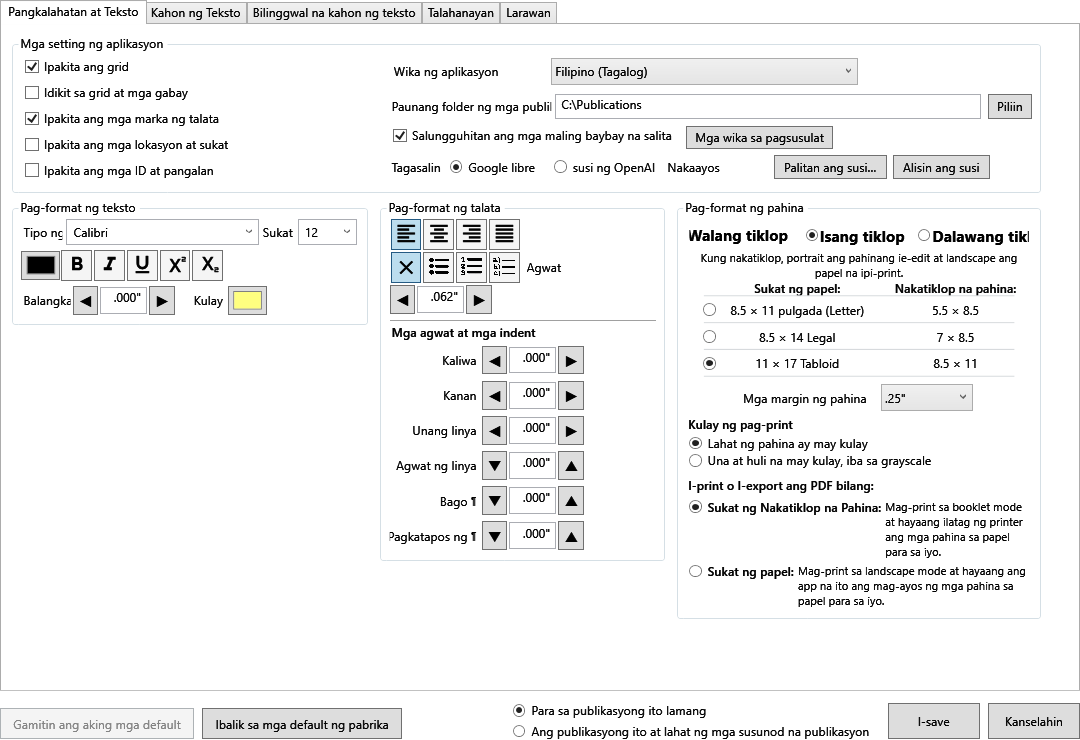
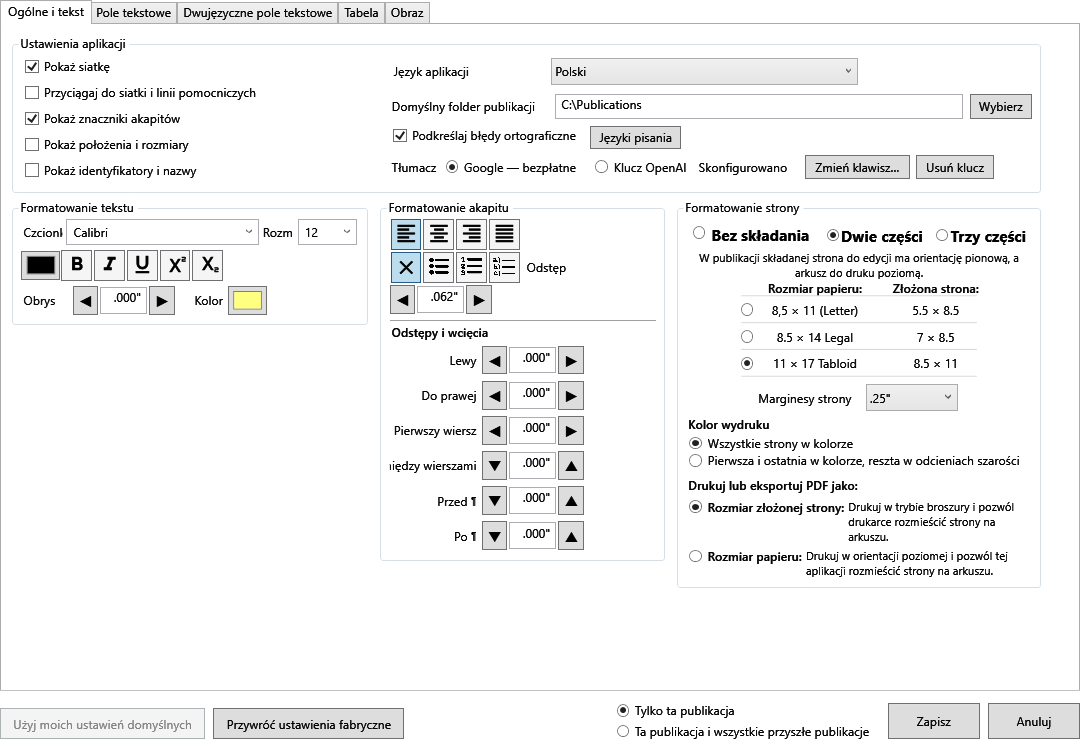
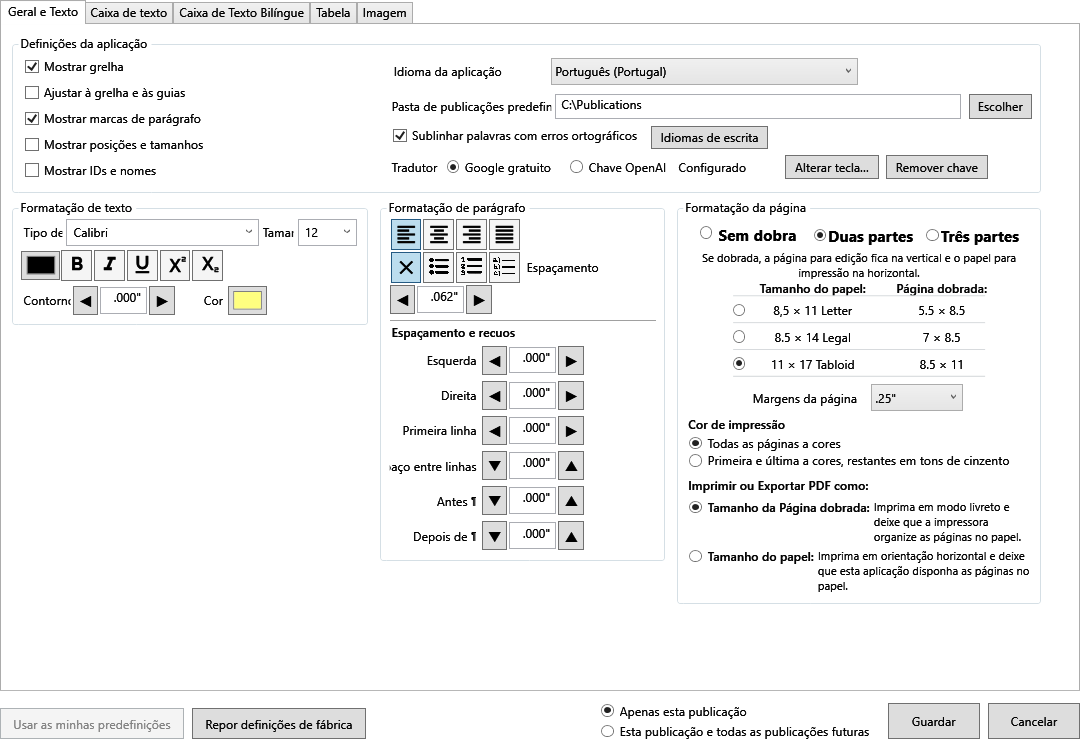
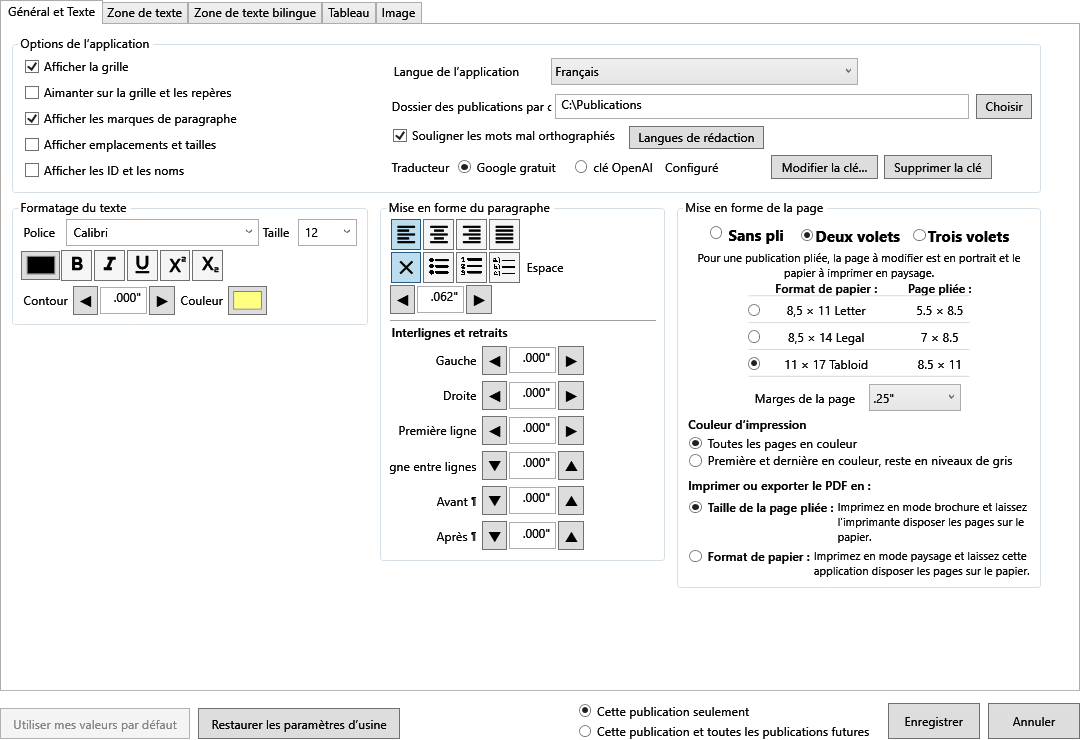
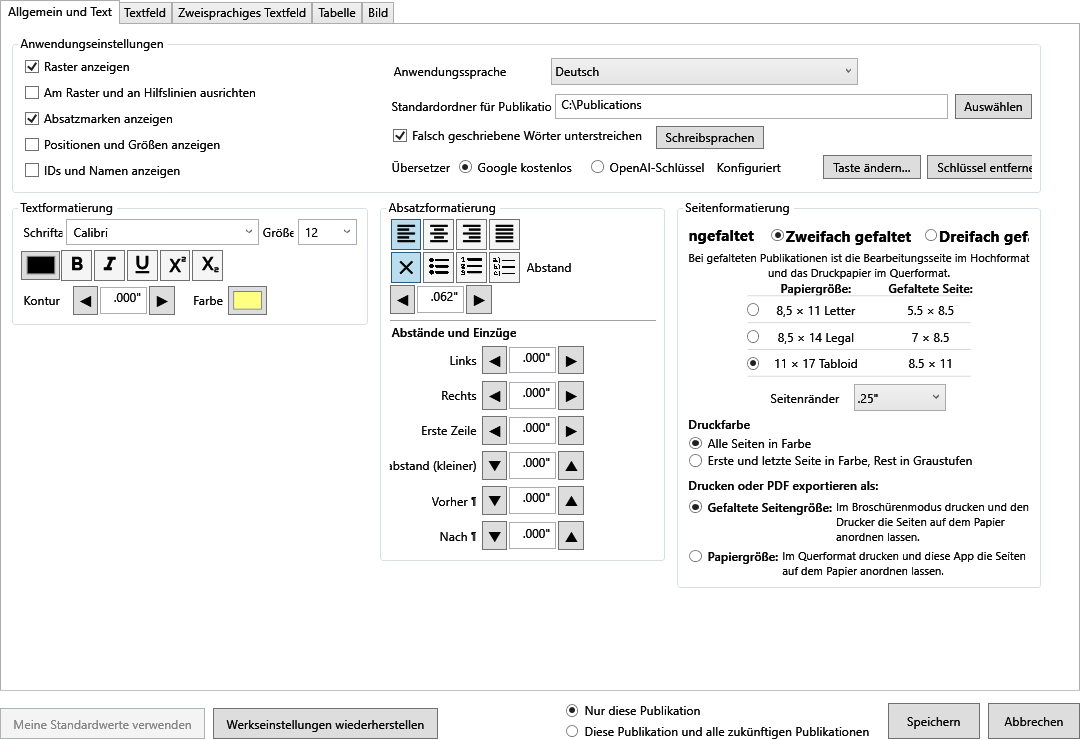
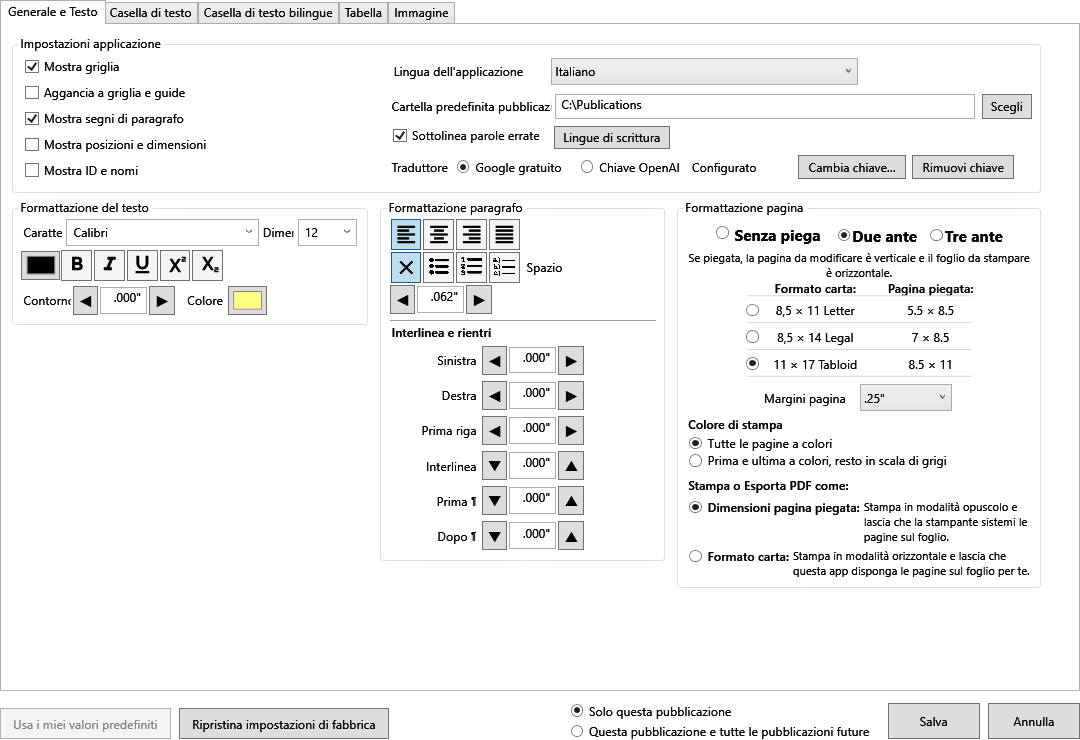
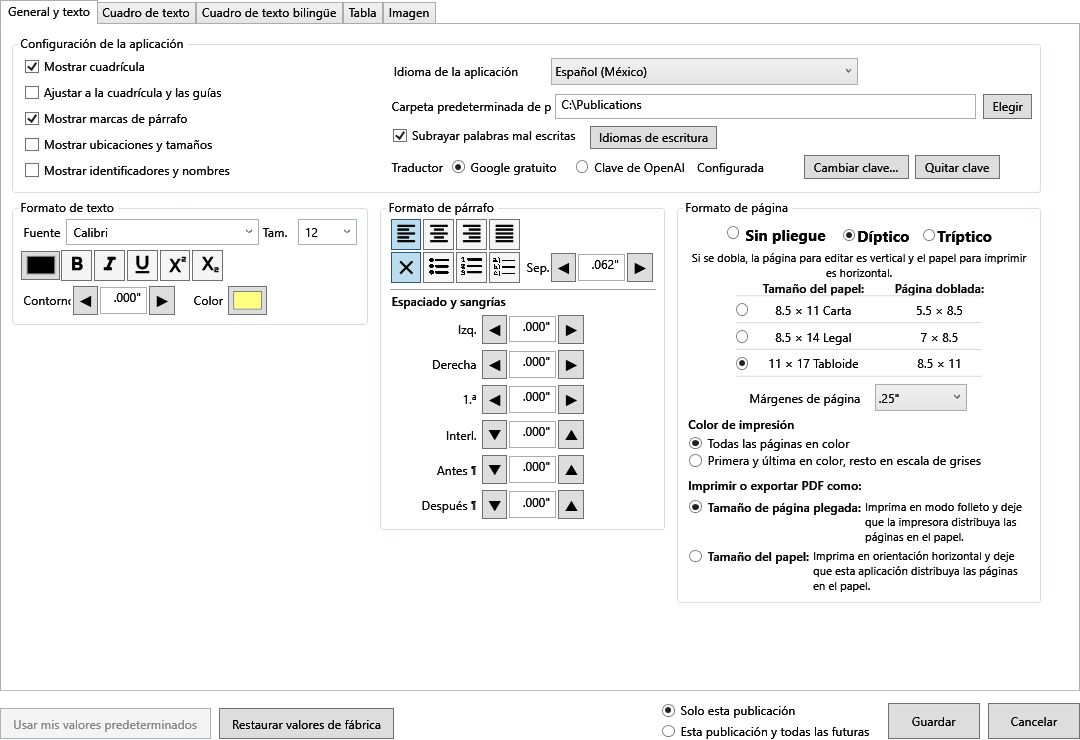
Object creation defaults
The remaining tabs define how new objects are inserted. They do not retroactively change existing objects. The screenshots show example settings; use the values appropriate for your publication.
See defaults for each object typeSee defaults for each object typeSee defaults for each object typeSee defaults for each object typeSee defaults for each object typeSee defaults for each object typeSee defaults for each object typeVer valores predeterminados de cada tipo de objeto
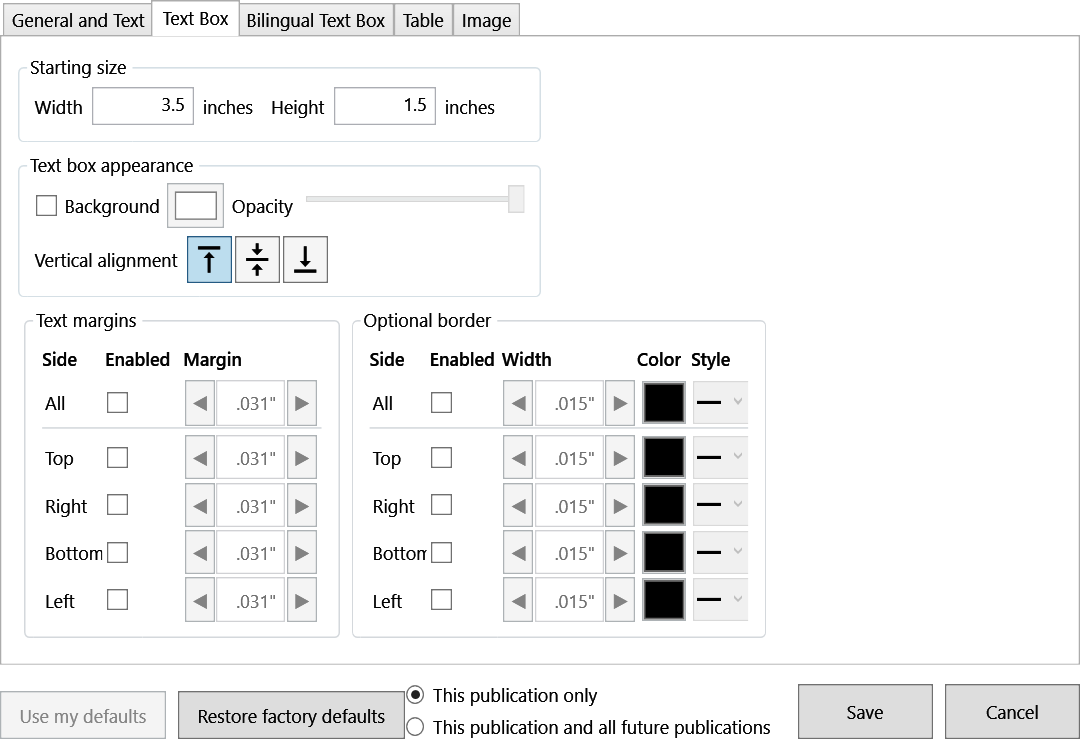
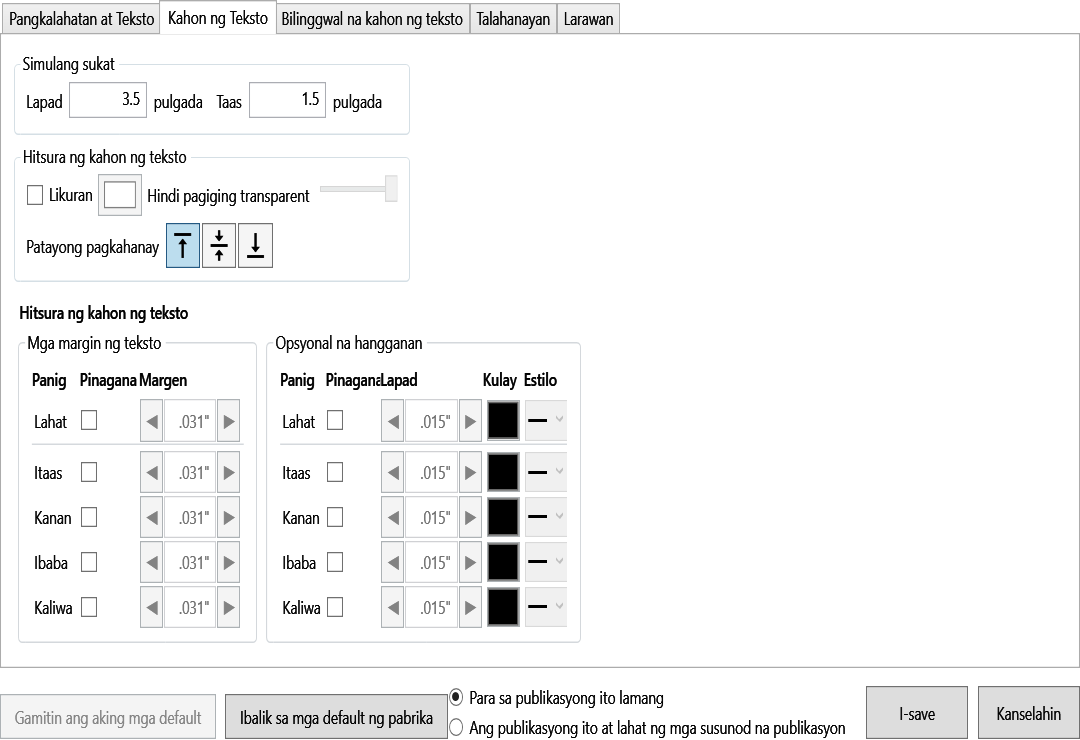
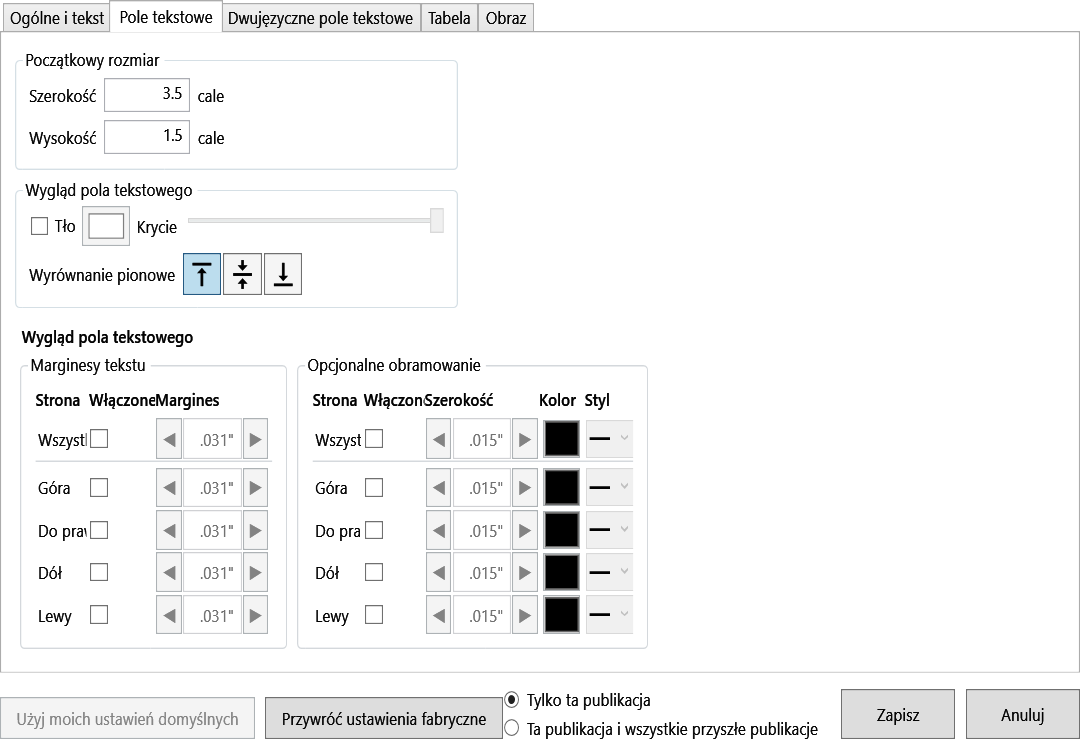
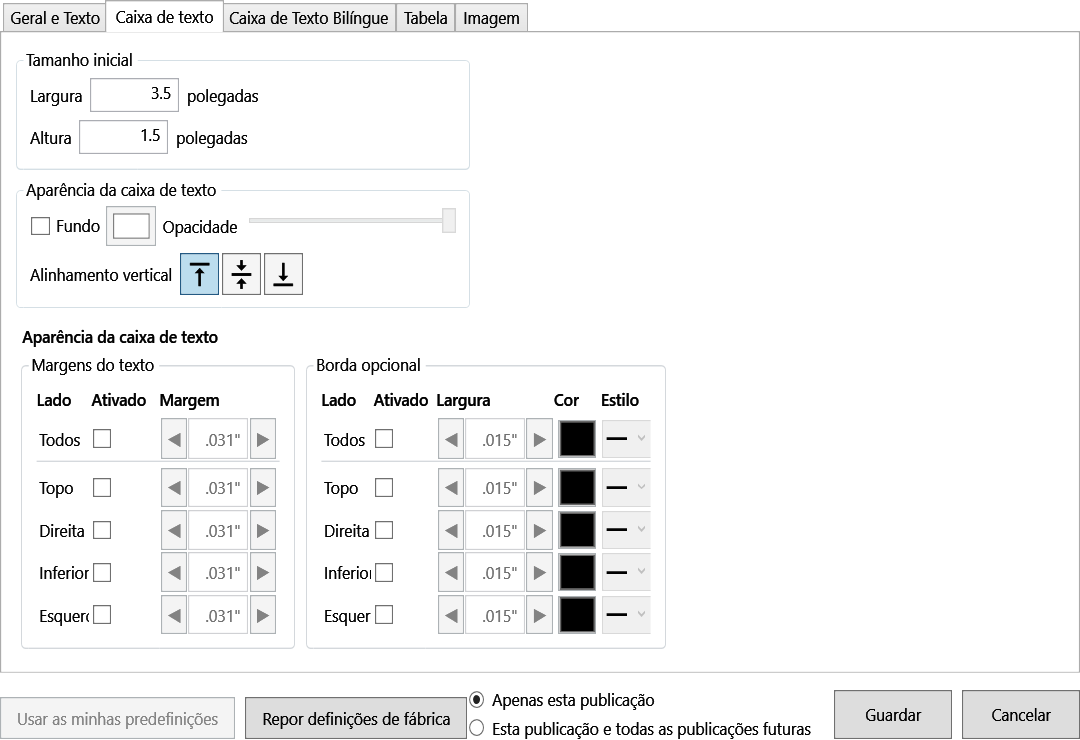
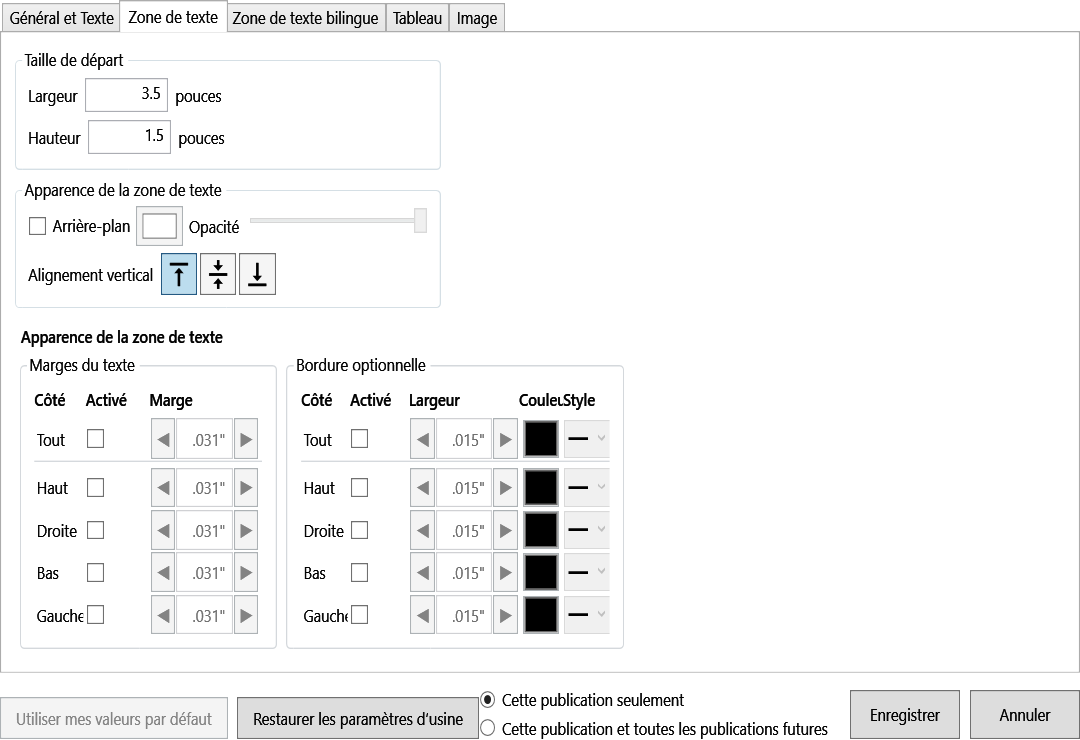
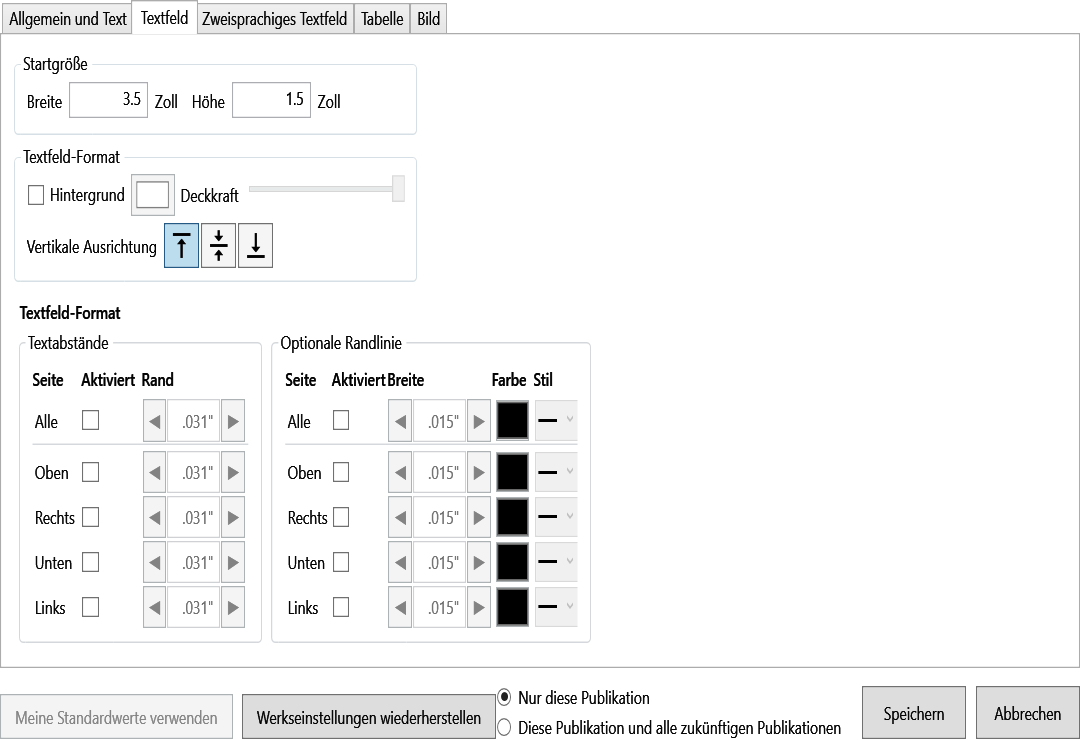
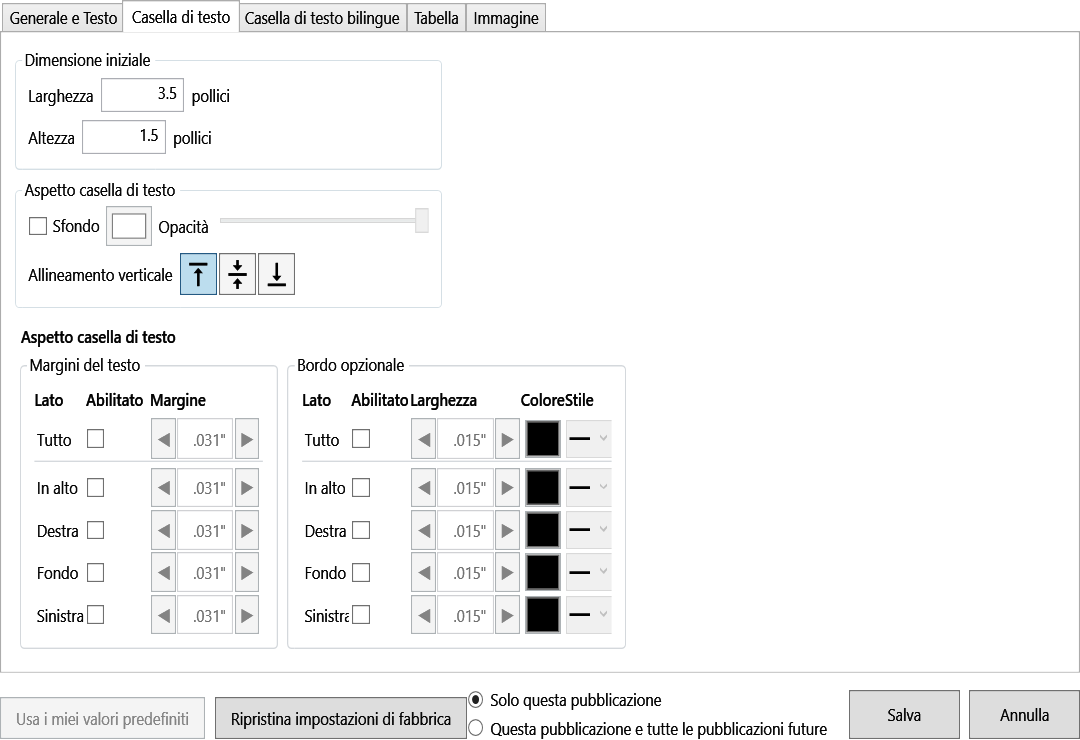
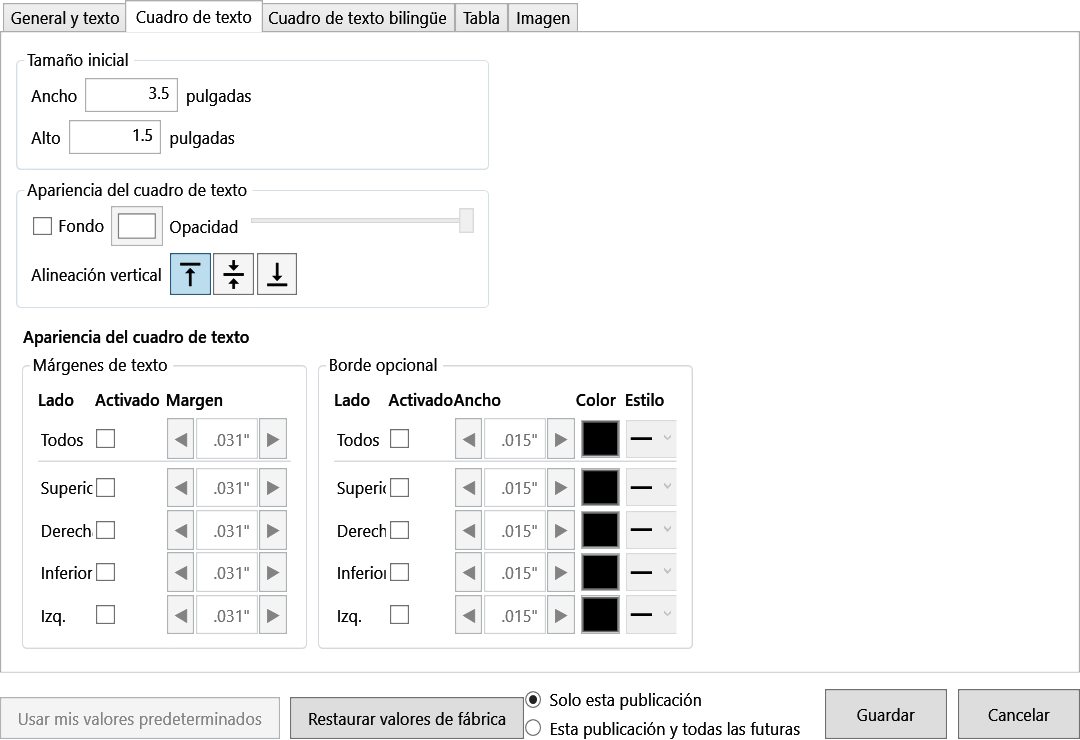
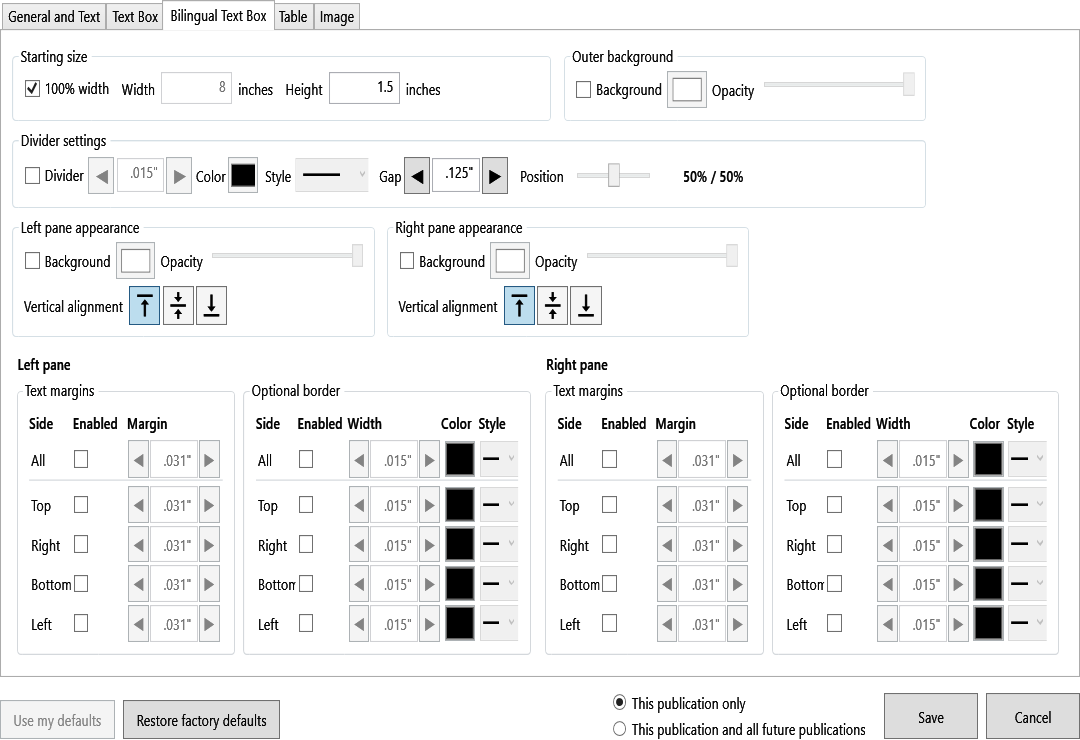
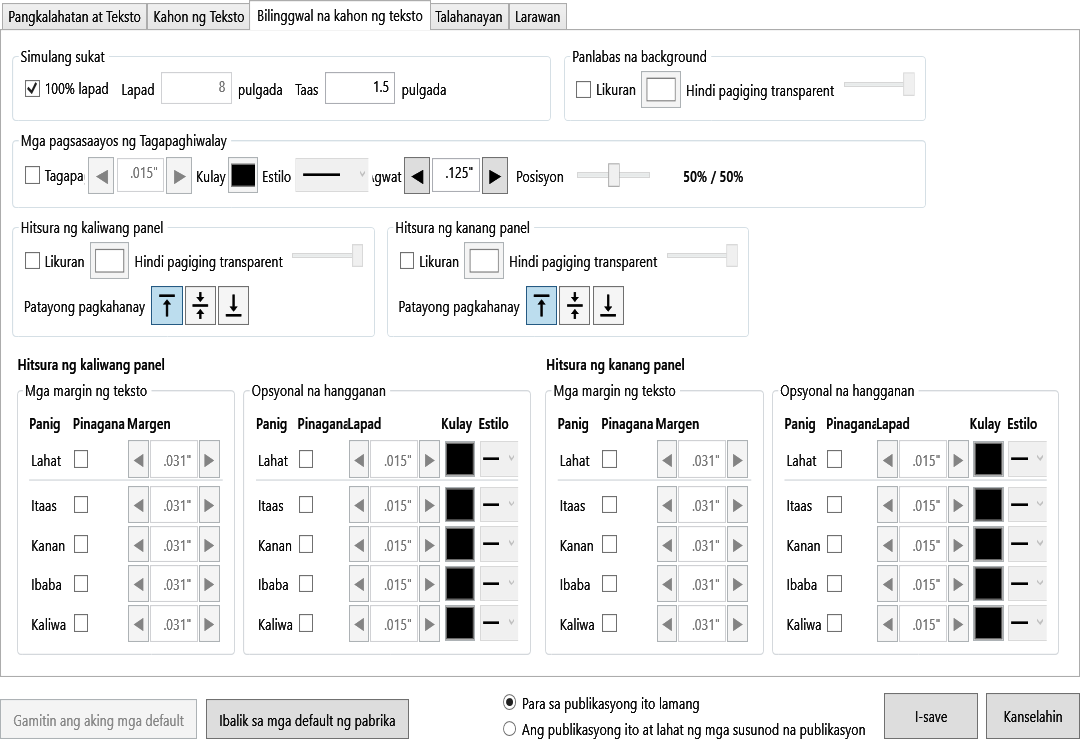
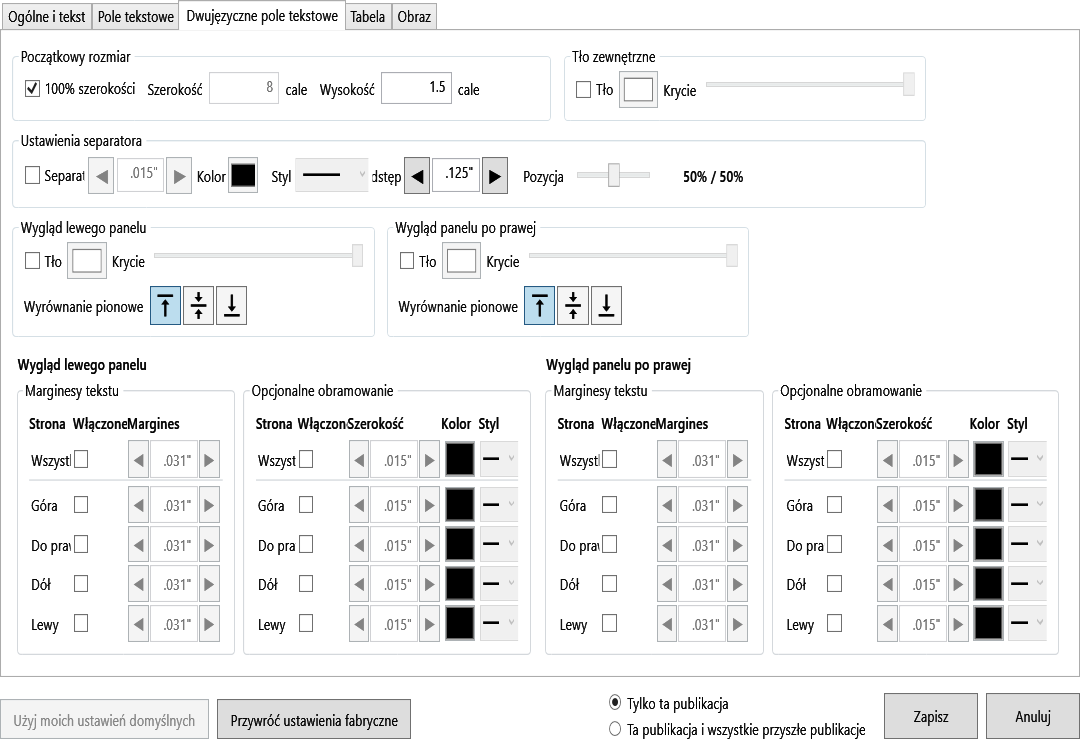
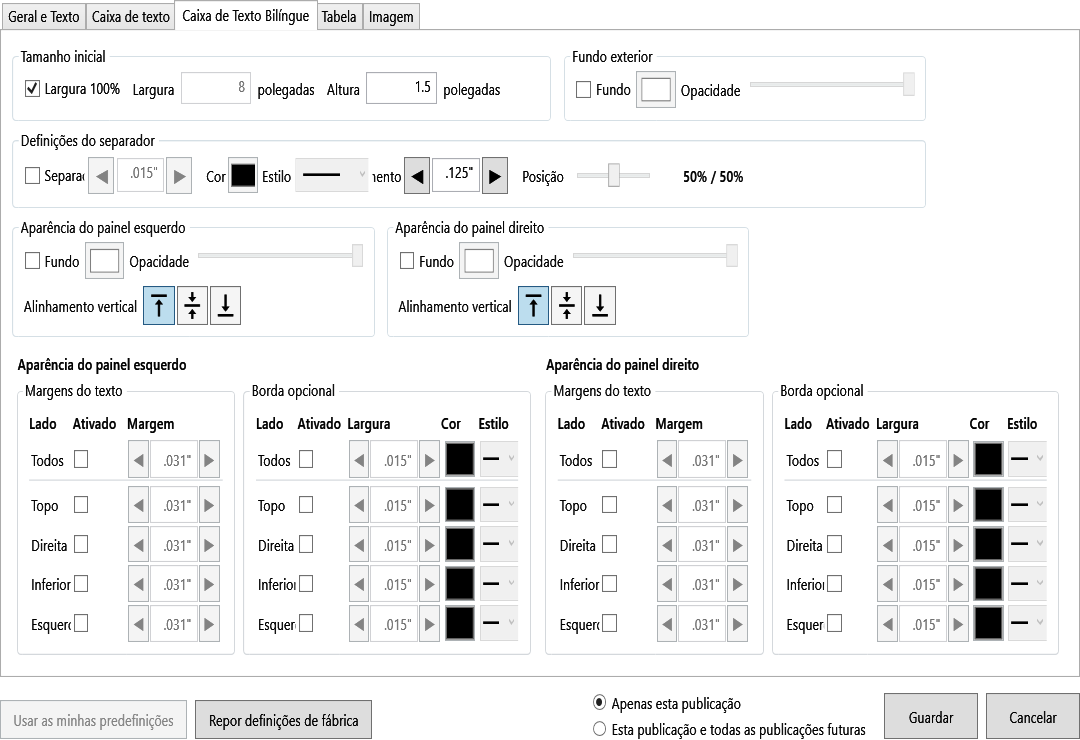
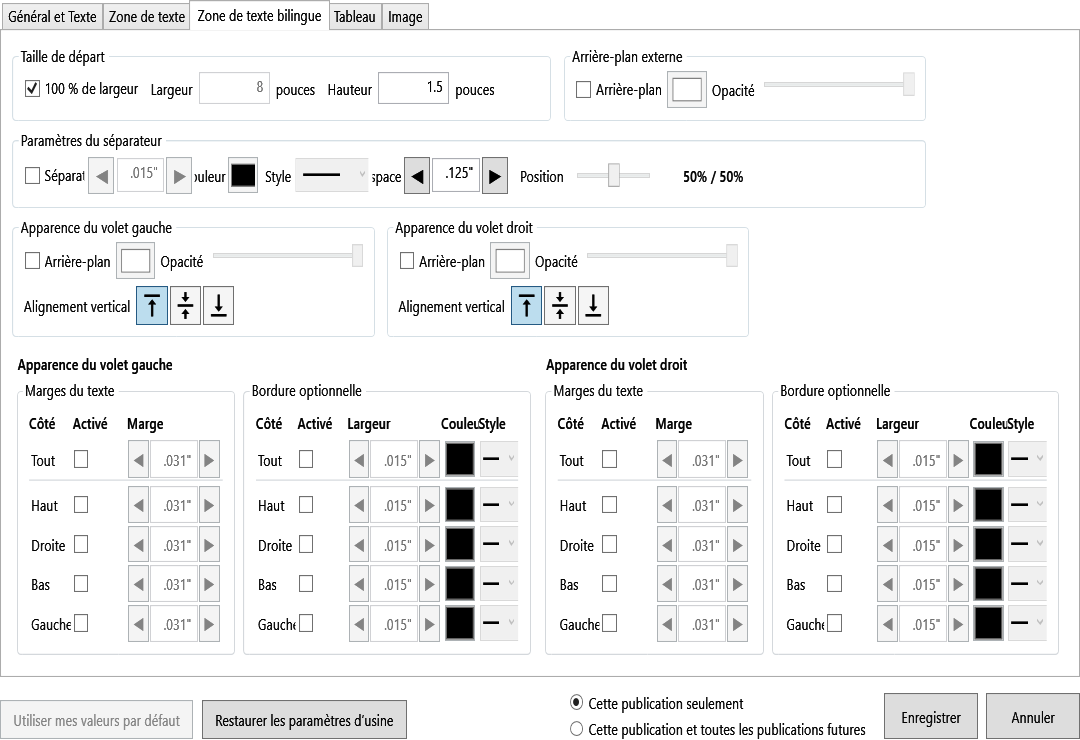
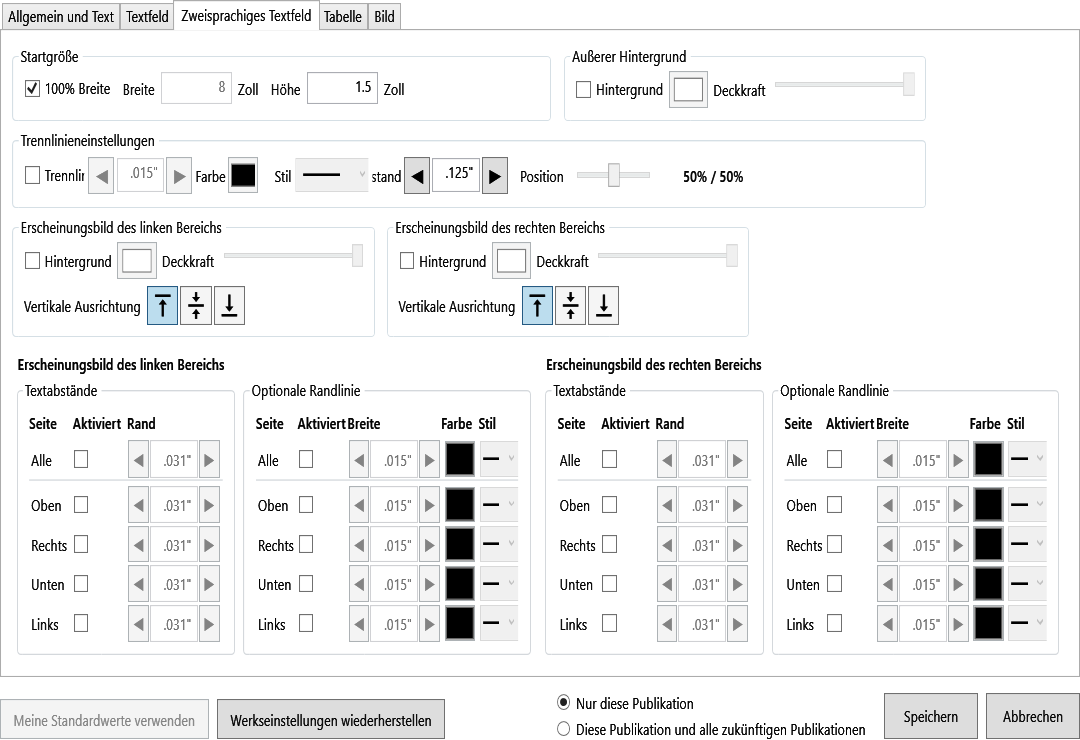
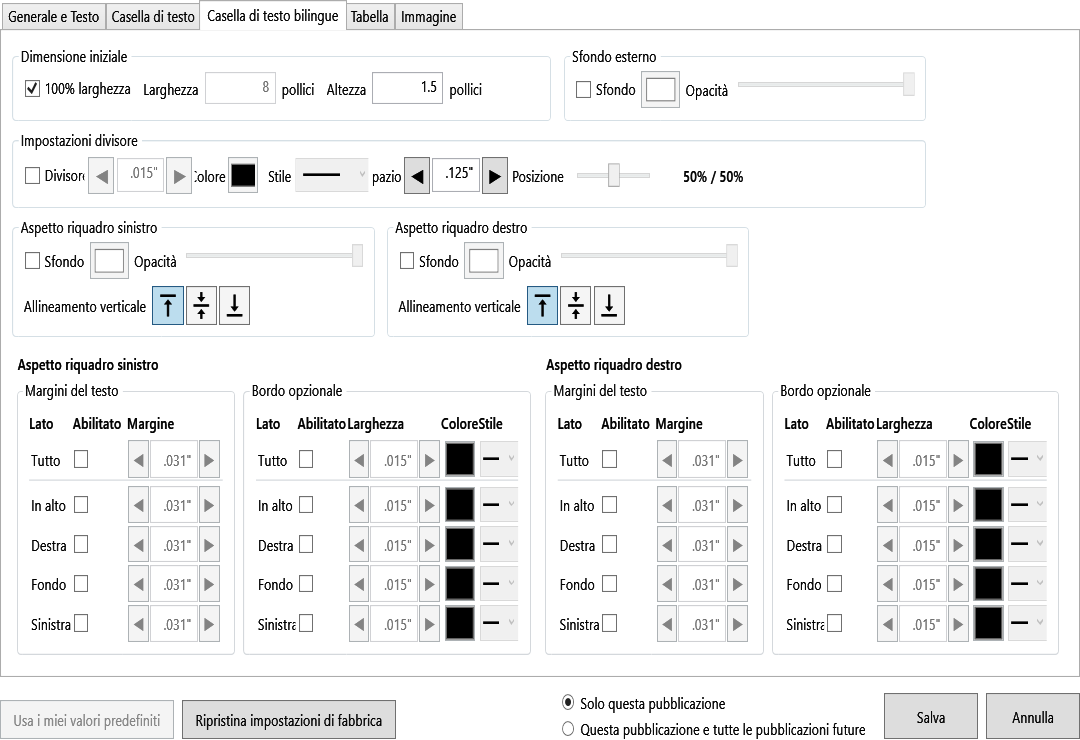
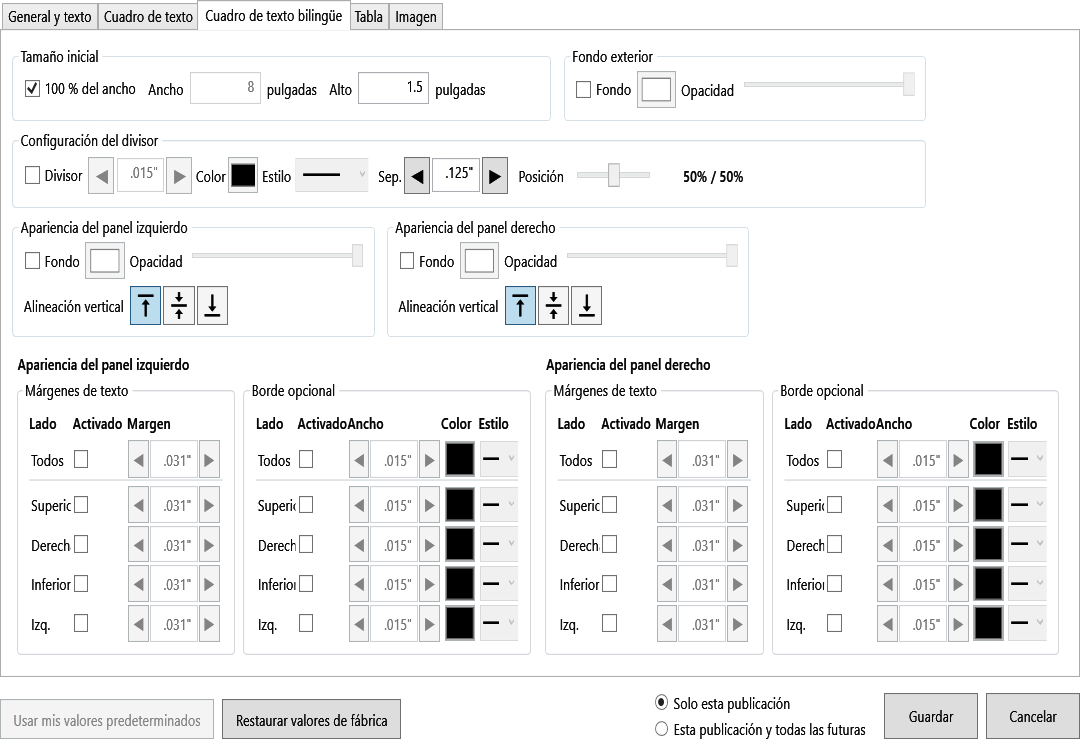
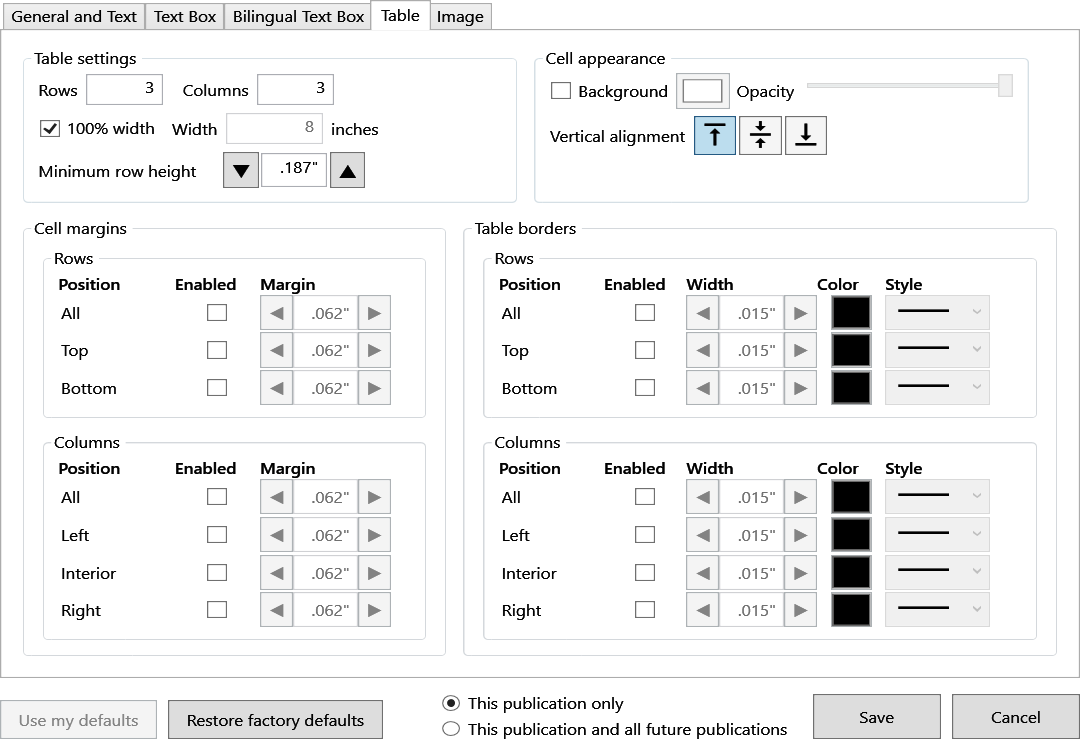
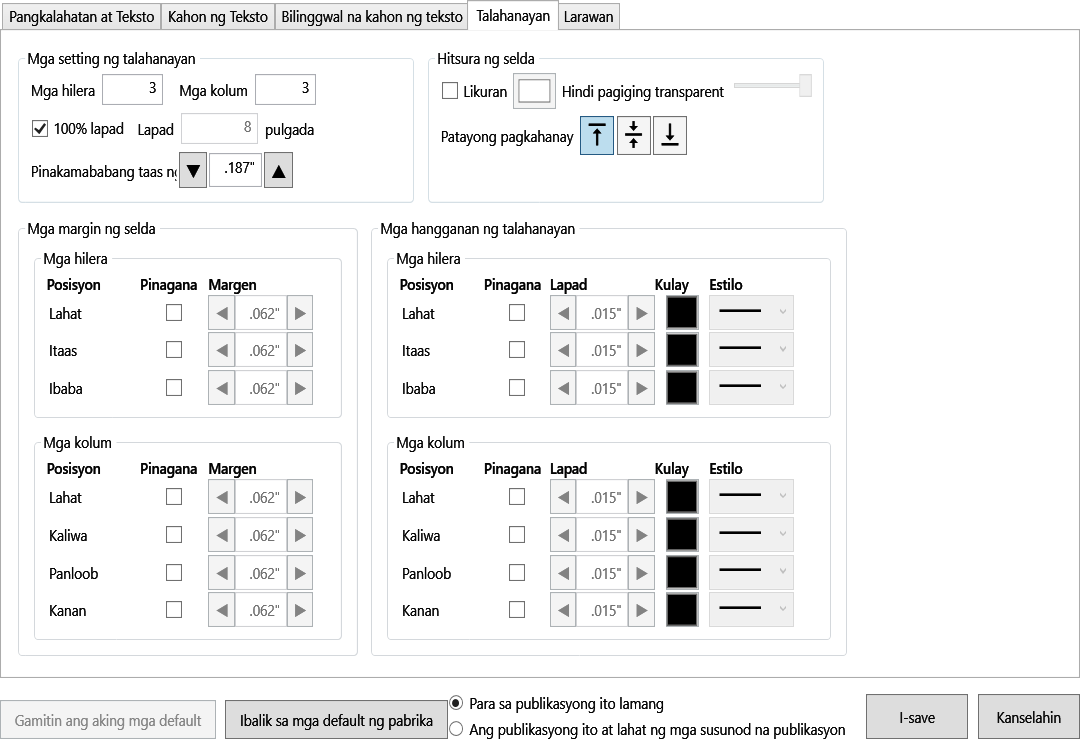
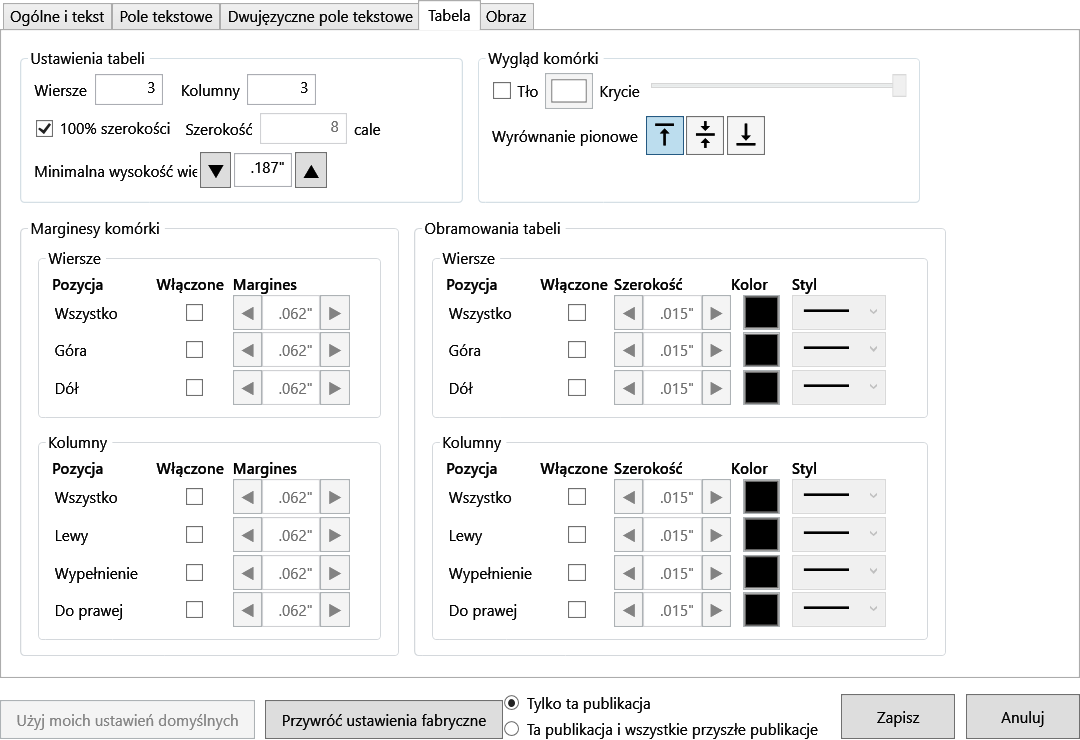
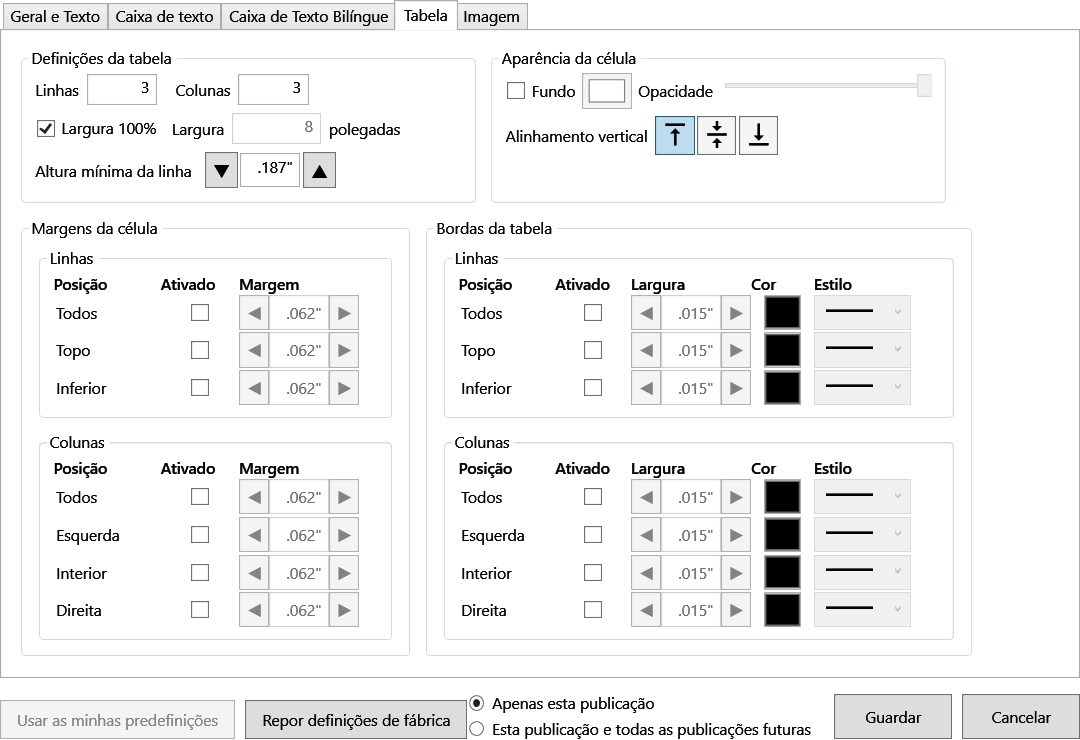
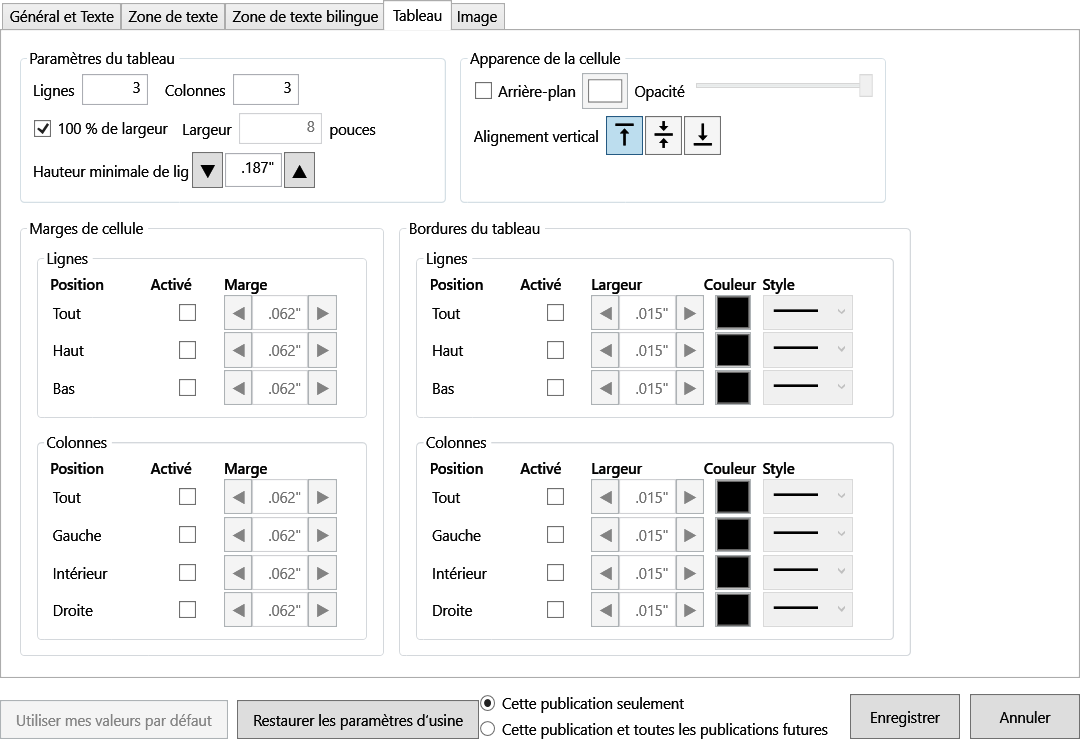
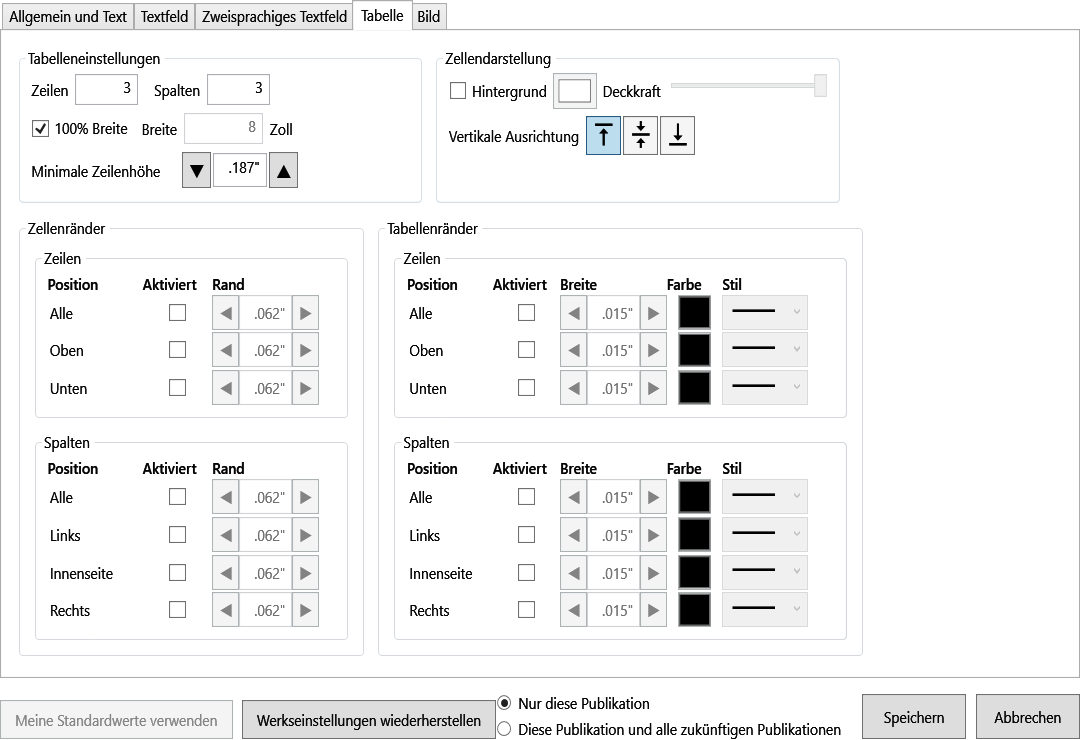
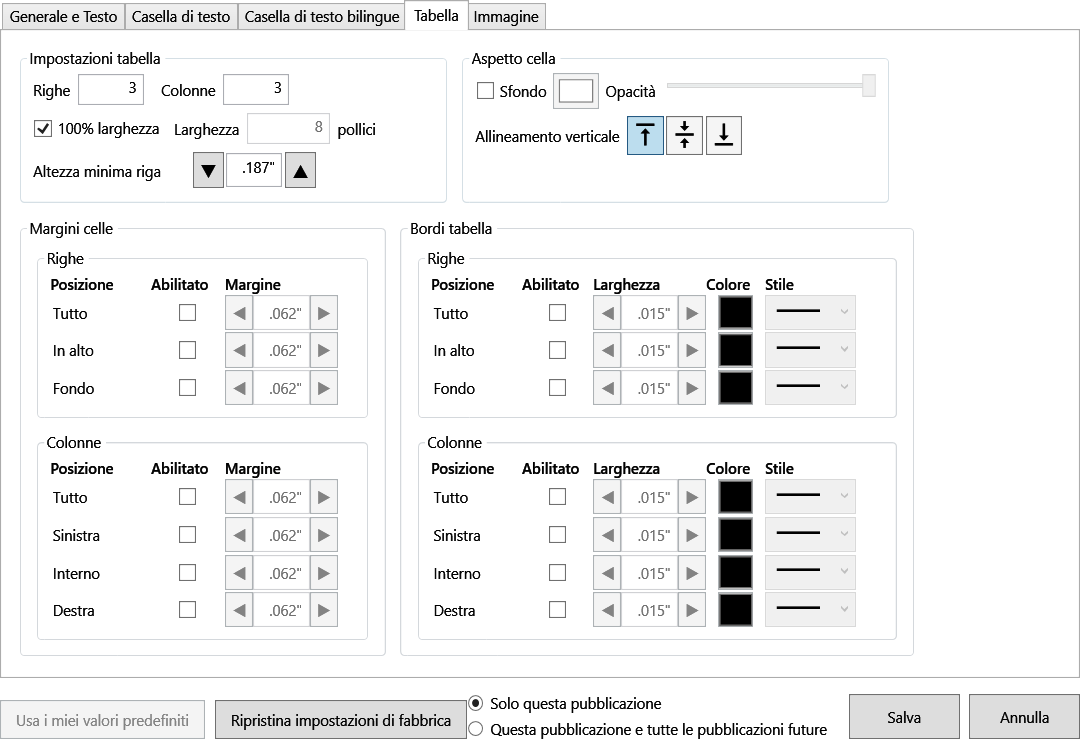
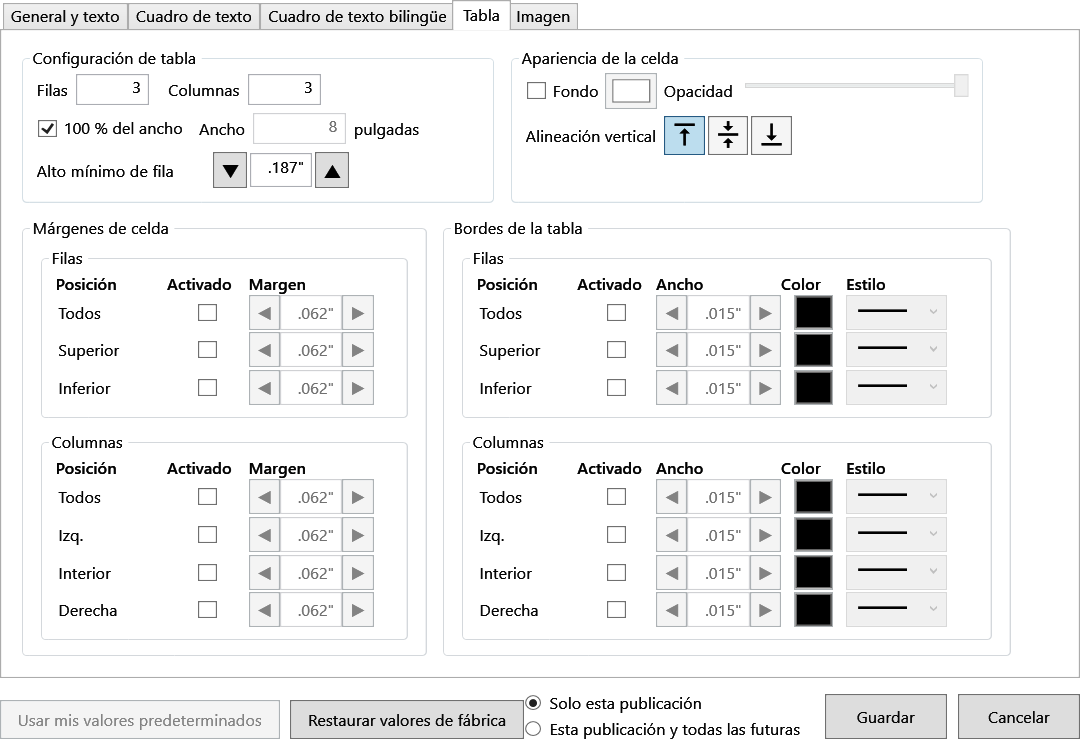
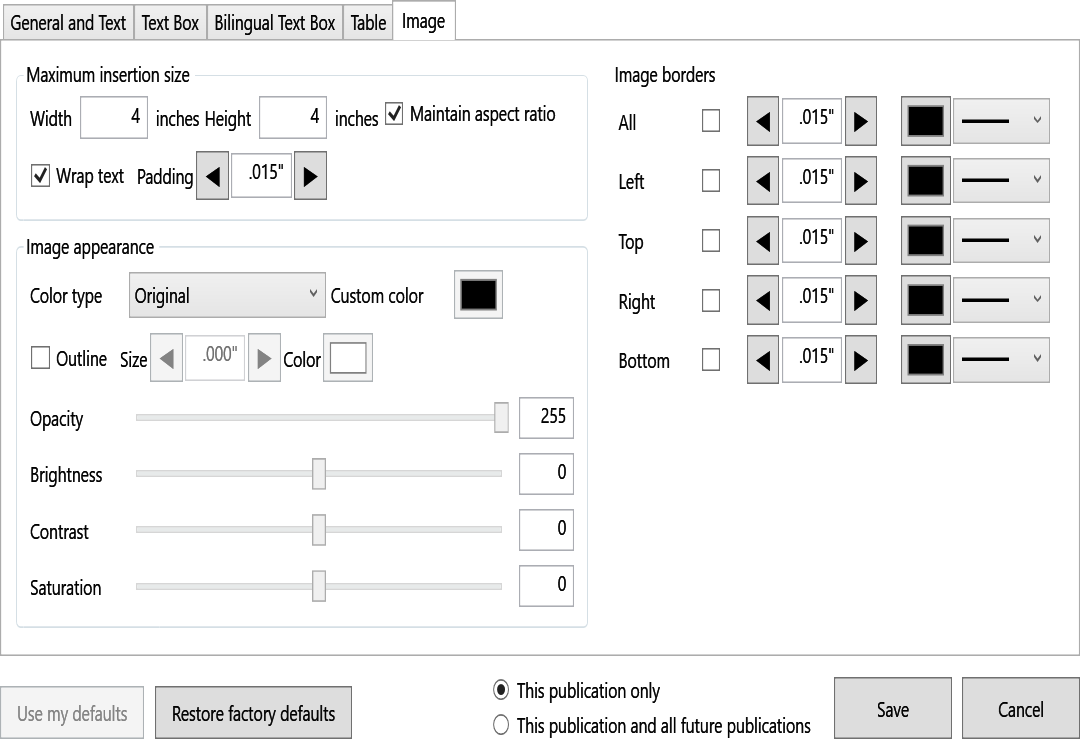
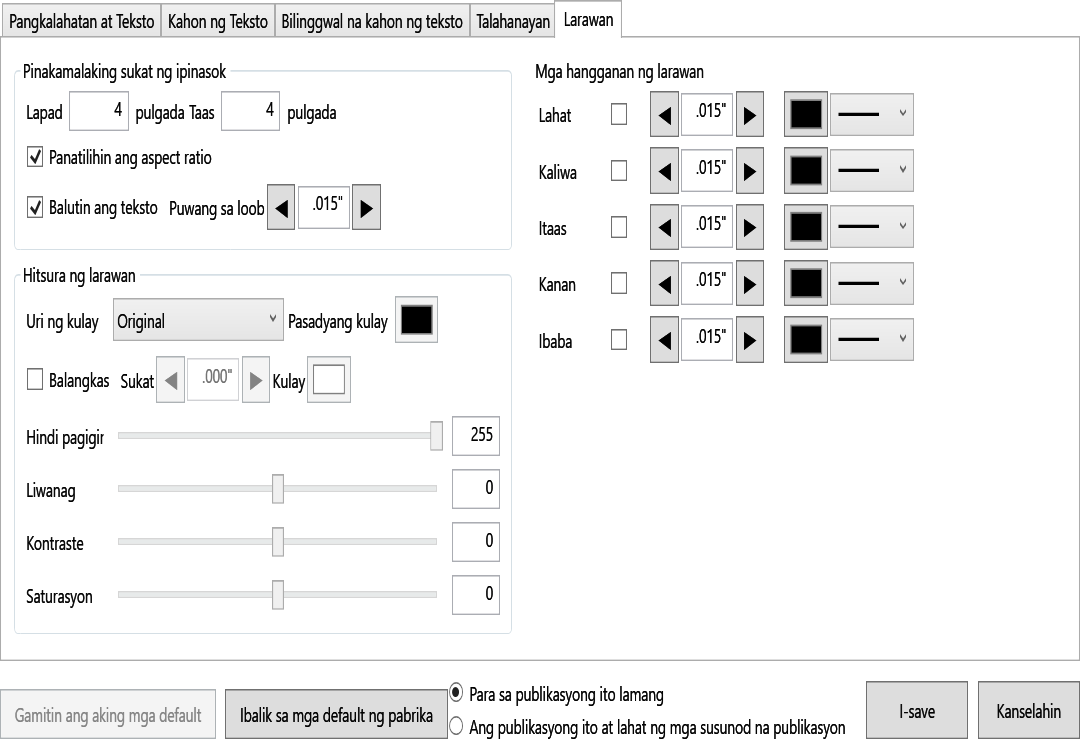
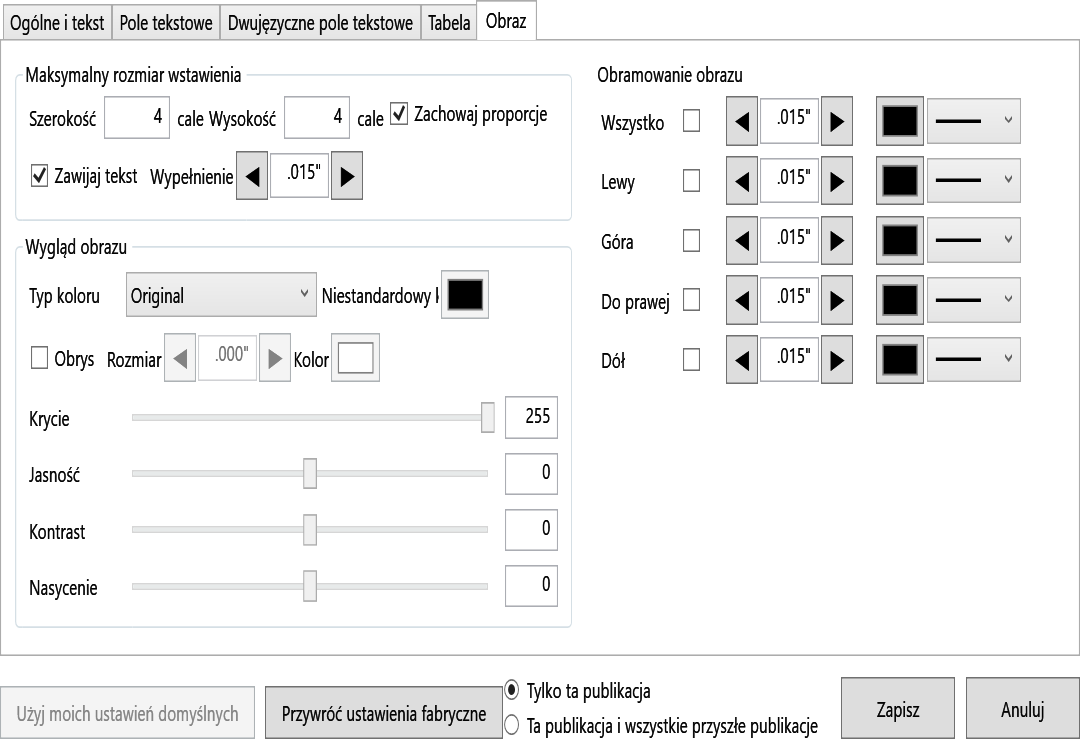
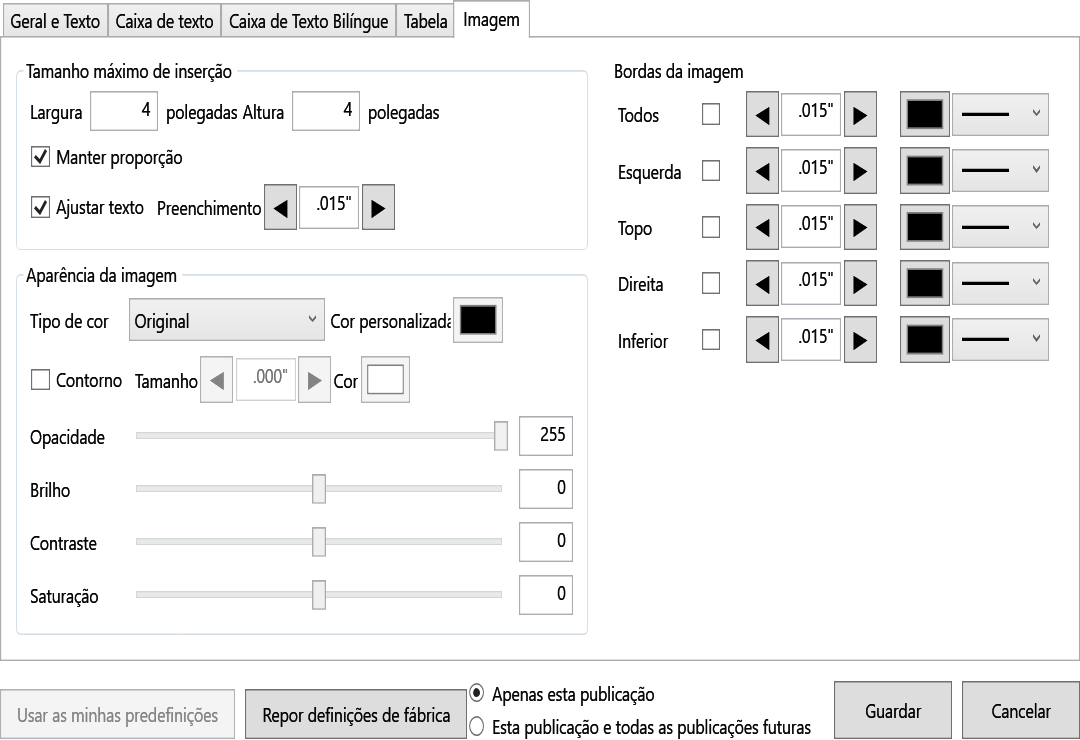
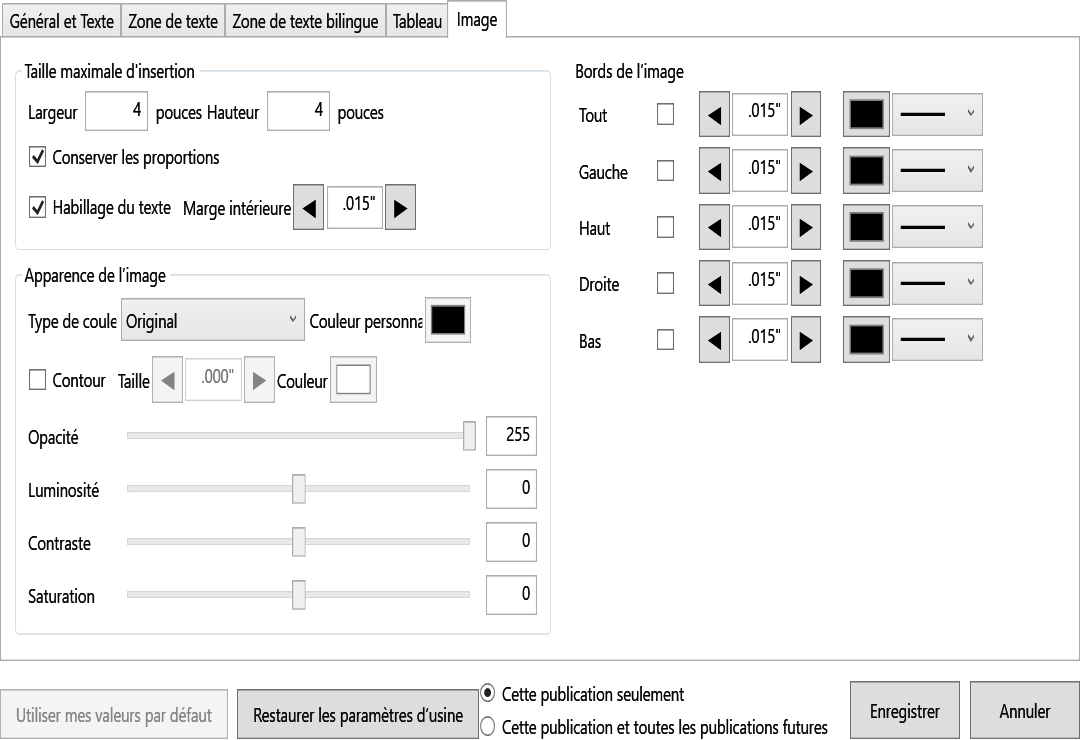
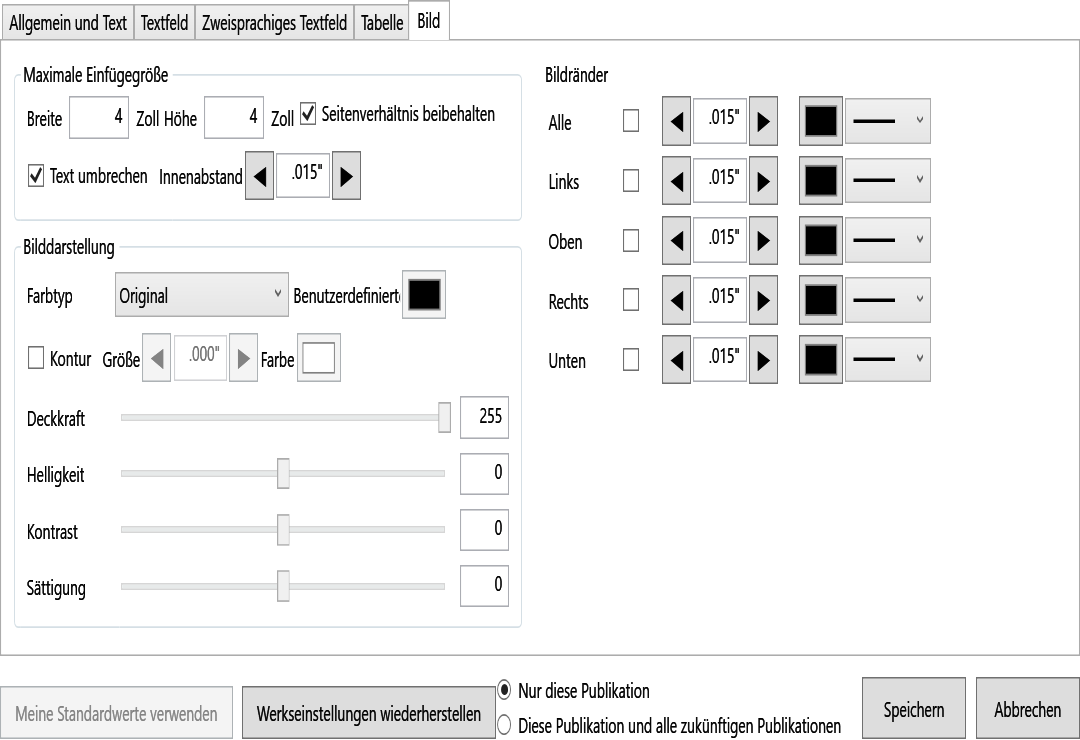
This publication only changes creation defaults in the open file. This publication and all future publications also changes the current Windows user’s defaults. With no publication open, only the global scope is available. Restore factory defaults changes the dialog’s working copy; nothing changes until you choose Save.
Complete toolbar referenceComplete toolbar referenceComplete toolbar referenceComplete toolbar referenceComplete toolbar referenceComplete toolbar referenceComplete toolbar referenceReferencia completa de la barra de herramientas
Toolbar referenceToolbar referenceToolbar referenceToolbar referenceToolbar referenceToolbar referenceToolbar referenceReferencia de la barra
The toolbar follows the order below from left to right. Separators group related actions. Hover over an icon in the app to see its name.
Use File > Make a copy when preparing the next bulletin. There is no manual Save button because named publications autosave.
04 · The Pages panelThe Pages panelThe Pages panelThe Pages panelThe Pages panelThe Pages panelThe Pages panelEl panel Páginas
The Pages panel: arrange your publicationThe Pages panel: arrange your publicationThe Pages panel: arrange your publicationThe Pages panel: arrange your publicationThe Pages panel: arrange your publicationThe Pages panel: arrange your publicationThe Pages panel: arrange your publicationEl panel Páginas: organice su publicación
The Pages panel on the left is your bulletin in reading order. Click a thumbnail to work on that page. Drag a thumbnail to its new position, or select it and use Move page up or Move page down below the thumbnails. Keep the front cover first and the back cover last.The Pages panel on the left is your bulletin in reading order. Click a thumbnail to work on that page. Drag a thumbnail to its new position, or select it and use Move page up or Move page down below the thumbnails. Keep the front cover first and the back cover last.The Pages panel on the left is your bulletin in reading order. Click a thumbnail to work on that page. Drag a thumbnail to its new position, or select it and use Move page up or Move page down below the thumbnails. Keep the front cover first and the back cover last.The Pages panel on the left is your bulletin in reading order. Click a thumbnail to work on that page. Drag a thumbnail to its new position, or select it and use Move page up or Move page down below the thumbnails. Keep the front cover first and the back cover last.The Pages panel on the left is your bulletin in reading order. Click a thumbnail to work on that page. Drag a thumbnail to its new position, or select it and use Move page up or Move page down below the thumbnails. Keep the front cover first and the back cover last.The Pages panel on the left is your bulletin in reading order. Click a thumbnail to work on that page. Drag a thumbnail to its new position, or select it and use Move page up or Move page down below the thumbnails. Keep the front cover first and the back cover last.The Pages panel on the left is your bulletin in reading order. Click a thumbnail to work on that page. Drag a thumbnail to its new position, or select it and use Move page up or Move page down below the thumbnails. Keep the front cover first and the back cover last.El panel Páginas a la izquierda muestra el boletín en orden de lectura. Haga clic en una miniatura para trabajar en esa página. Arrastre la miniatura a su nueva posición, o selecciónela y use Subir página o Bajar página debajo de las miniaturas. Mantenga la portada al principio y la contraportada al final.
The Pages panel is the publication’s exact sequence. Click a thumbnail to open it. Ctrl-click or Shift-click to select multiple pages, then move, copy, cut, paste, or delete the selection. Drag thumbnails to reorder pages, or use the arrow controls. Page numbers update immediately.
Add a page
Insert before or after the selected page. A publication can contain any number of pages in its selected Letter, Legal, or Tabloid folded format.Insert before or after the selected page. A publication can contain any number of pages in its selected Letter, Legal, or Tabloid folded format.Insert before or after the selected page. A publication can contain any number of pages in its selected Letter, Legal, or Tabloid folded format.Insert before or after the selected page. A publication can contain any number of pages in its selected Letter, Legal, or Tabloid folded format.Insert before or after the selected page. A publication can contain any number of pages in its selected Letter, Legal, or Tabloid folded format.Insert before or after the selected page. A publication can contain any number of pages in its selected Letter, Legal, or Tabloid folded format.Insert before or after the selected page. A publication can contain any number of pages in its selected Letter, Legal, or Tabloid folded format.Inserte antes o después de la página seleccionada. Una publicación puede contener cualquier cantidad de páginas en el formato plegado Carta, Legal o Tabloide que haya elegido.
Duplicate a page
Reuse a proven arrangement, then replace the content in the duplicate.
Move pages
Drag thumbnails or use the up and down controls to rotate recurring sections.
Delete carefully
Multi-selected pages can be deleted together, but every publication always retains at least one page.
For folded bulletins, the on-screen order is still ordinary reading order. Keep the front cover first and the back cover last; the printer or copier handles booklet imposition.
05 · The four objectsThe four objectsThe four objectsThe four objectsThe four objectsThe four objectsThe four objectsLos cuatro objetos
The four objectsThe four objectsThe four objectsThe four objectsThe four objectsThe four objectsThe four objectsLos cuatro objetos
Choose an item from Insert or use the corresponding toolbar icon. The right-hand Properties panel changes to show the selected object’s content identity, formatting, position, size, and specialized controls.
Text box
Double-click to edit; click once to format the object. Enter starts a paragraph; Shift+Enter adds a line break. If a red outline appears, the text does not fit: enlarge the box or use Fit height to minimum.Double-click to edit; click once to format the object. Enter starts a paragraph; Shift+Enter adds a line break. If a red outline appears, the text does not fit: enlarge the box or use Fit height to minimum.Double-click to edit; click once to format the object. Enter starts a paragraph; Shift+Enter adds a line break. If a red outline appears, the text does not fit: enlarge the box or use Fit height to minimum.Double-click to edit; click once to format the object. Enter starts a paragraph; Shift+Enter adds a line break. If a red outline appears, the text does not fit: enlarge the box or use Fit height to minimum.Double-click to edit; click once to format the object. Enter starts a paragraph; Shift+Enter adds a line break. If a red outline appears, the text does not fit: enlarge the box or use Fit height to minimum.Double-click to edit; click once to format the object. Enter starts a paragraph; Shift+Enter adds a line break. If a red outline appears, the text does not fit: enlarge the box or use Fit height to minimum.Double-click to edit; click once to format the object. Enter starts a paragraph; Shift+Enter adds a line break. If a red outline appears, the text does not fit: enlarge the box or use Fit height to minimum.Haga doble clic para editar; haga clic una vez para dar formato al objeto. Enter inicia un párrafo; Shift+Enter agrega un salto de línea. Un contorno rojo indica texto que no cabe: amplíe el cuadro o use Ajustar altura al mínimo.
Headings, articles, prayers, and notices
Text boxes support installed Windows fonts, sizes, bold, italic, underline, superscript, subscript, text color, outline, alignment, lists, indents, line and paragraph spacing, background, opacity, internal margins, and optional borders.
- Fit height to minimum resizes the box vertically to the height required by its content.
- Change width to fit is useful for short headings.
- Fit width to 100% fills the editable width of the page without changing a text object’s height.
- Make one paragraph joins paragraph content when a single flowing paragraph is needed.
- Text can wrap around overlapping images that have wrapping enabled.
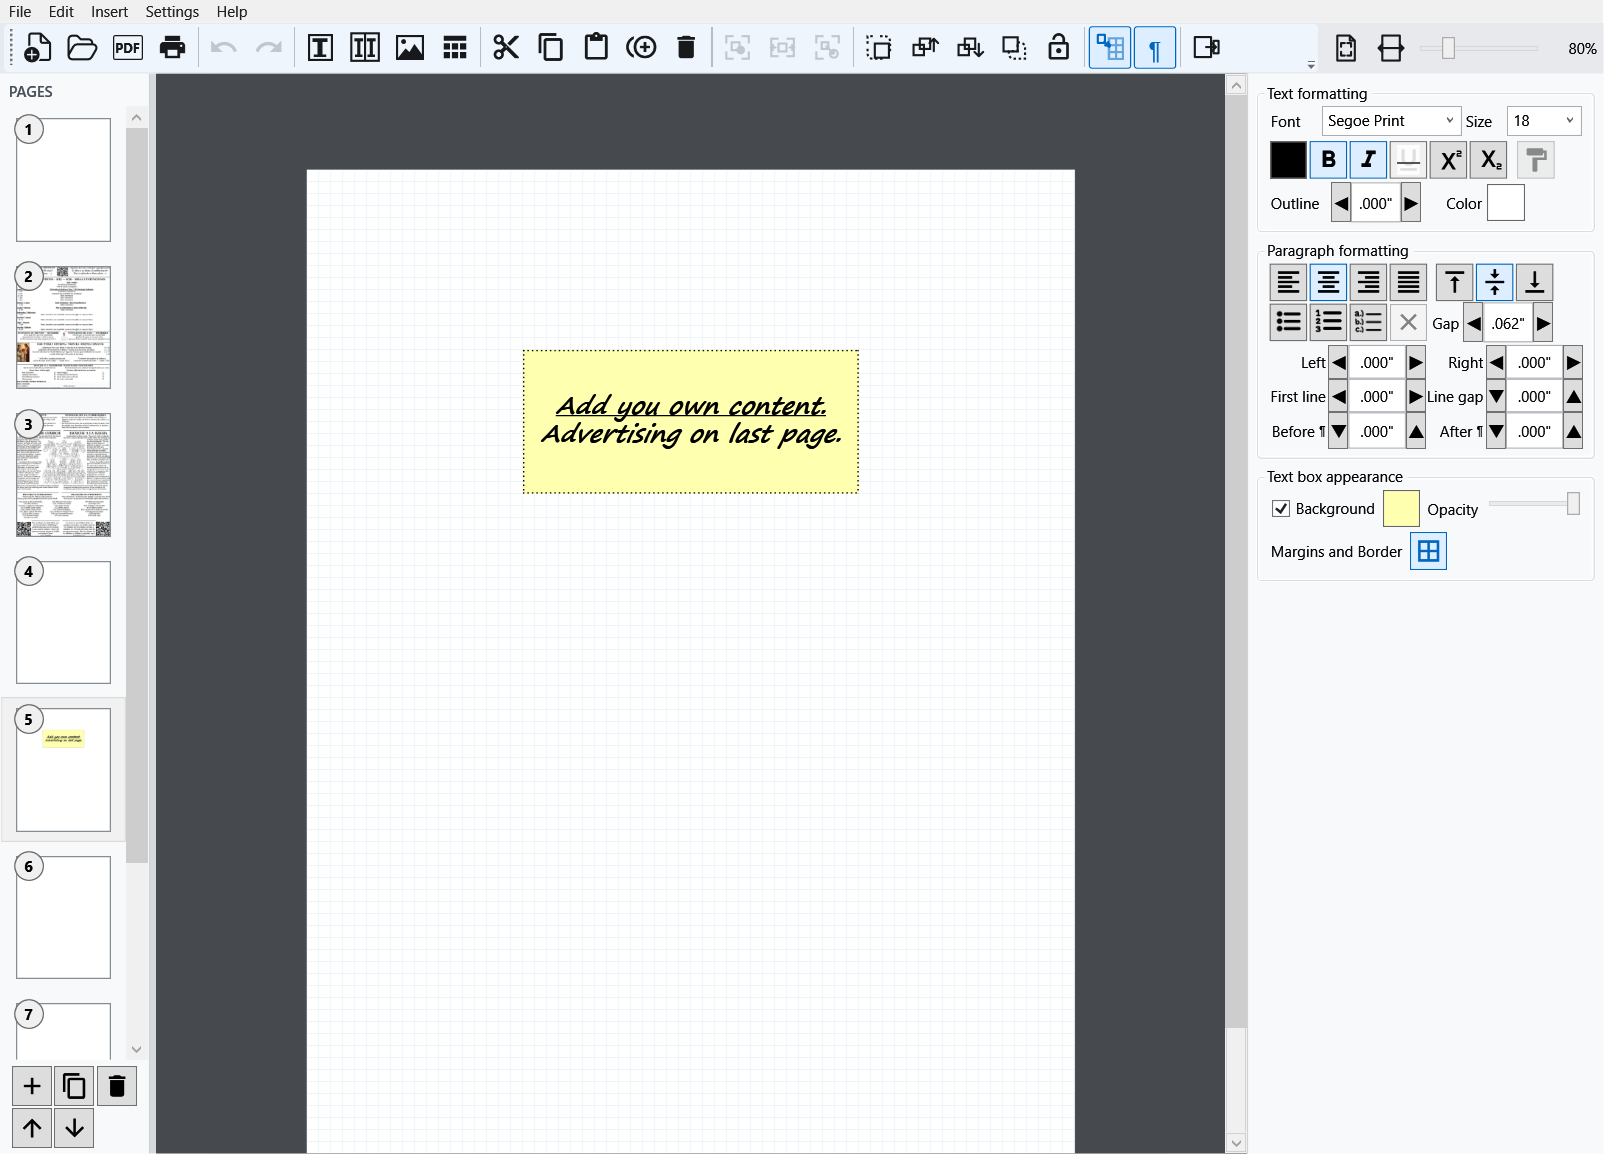
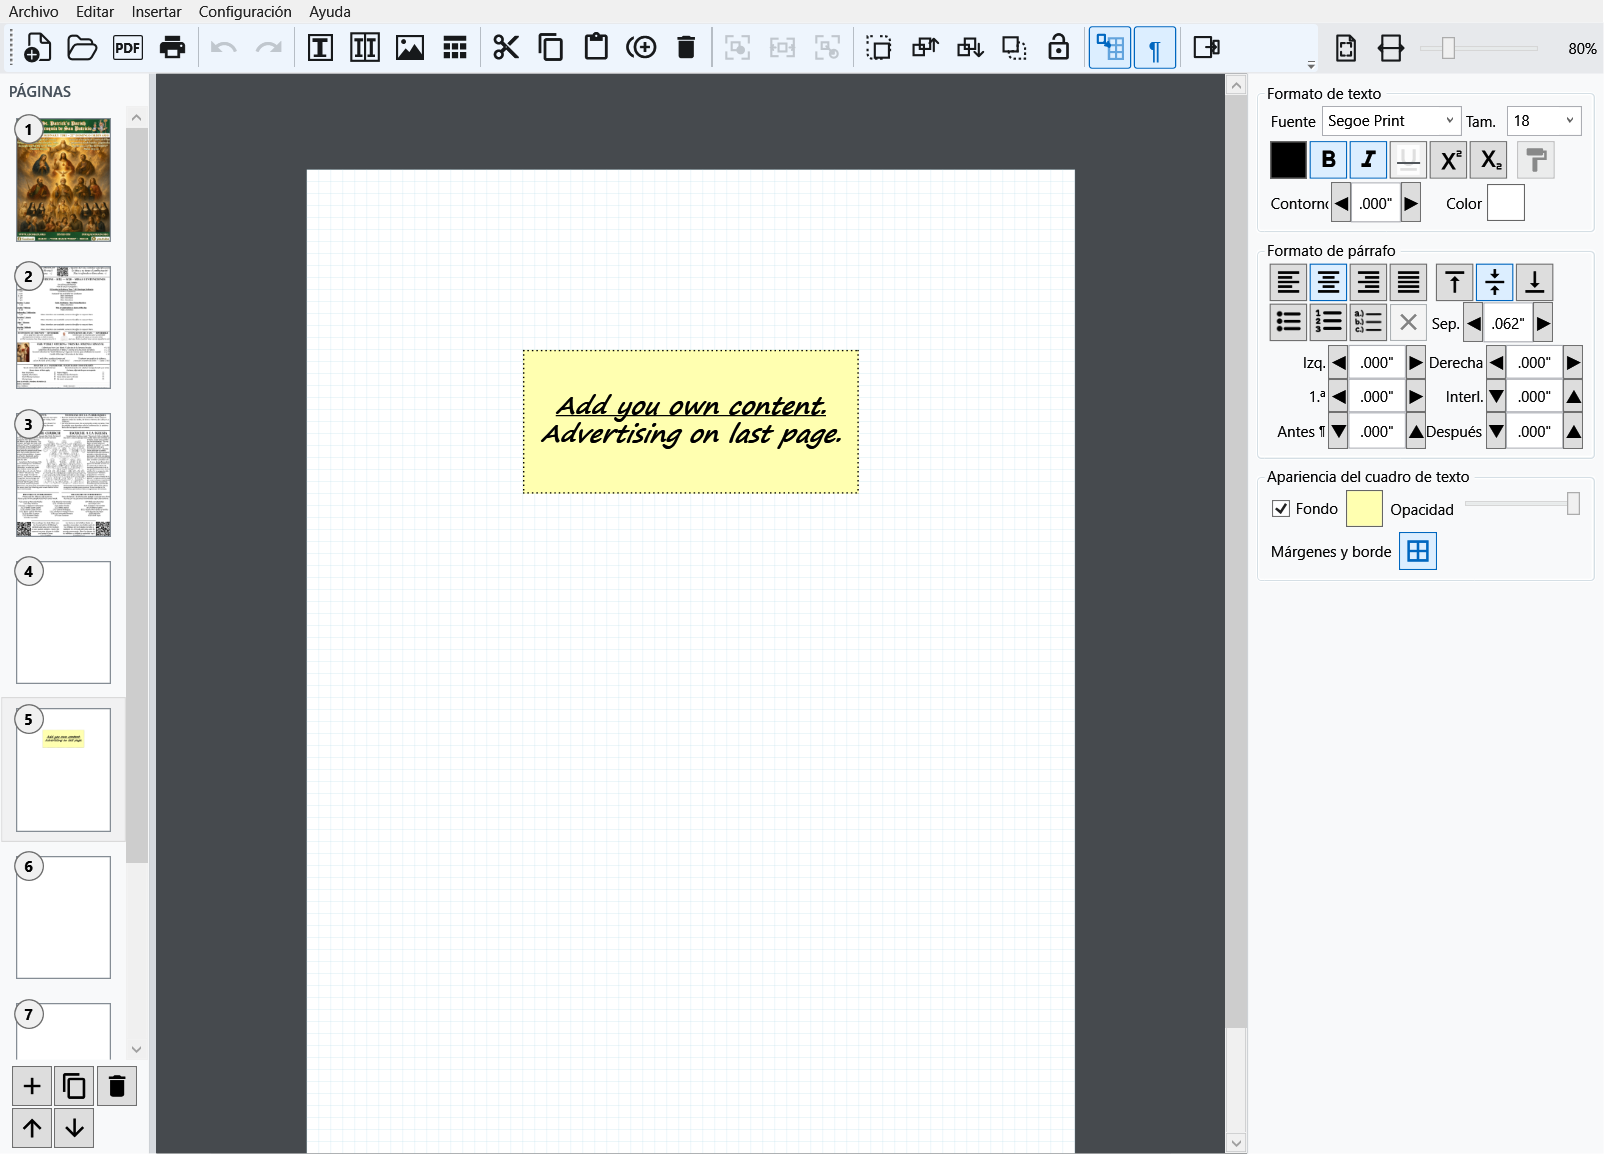
Bilingual text box
On sample page 3, edit each side of the reflection separately. Right-click while editing for translation commands, review the translated wording, then fit the box to the taller pane. Changing the application language does not translate the bulletin.On sample page 3, edit each side of the reflection separately. Right-click while editing for translation commands, review the translated wording, then fit the box to the taller pane. Changing the application language does not translate the bulletin.On sample page 3, edit each side of the reflection separately. Right-click while editing for translation commands, review the translated wording, then fit the box to the taller pane. Changing the application language does not translate the bulletin.On sample page 3, edit each side of the reflection separately. Right-click while editing for translation commands, review the translated wording, then fit the box to the taller pane. Changing the application language does not translate the bulletin.On sample page 3, edit each side of the reflection separately. Right-click while editing for translation commands, review the translated wording, then fit the box to the taller pane. Changing the application language does not translate the bulletin.On sample page 3, edit each side of the reflection separately. Right-click while editing for translation commands, review the translated wording, then fit the box to the taller pane. Changing the application language does not translate the bulletin.On sample page 3, edit each side of the reflection separately. Right-click while editing for translation commands, review the translated wording, then fit the box to the taller pane. Changing the application language does not translate the bulletin.En la página 3 de la muestra, edite cada lado de la reflexión por separado. Haga clic derecho mientras edita para ver los comandos de traducción, revise la traducción y ajuste el cuadro al panel más alto. Cambiar el idioma de la aplicación no traduce el boletín.
English and Spanish side by side
A bilingual box contains two independent rich-text panes that remain together as one layout object. Each pane has its own permanent ID, custom name, text, formatting, background, margins, and border.
- Set the split position and style the center divider’s width, gap, color, and line style.
- Translate the active side or both sides from the inline context menu.
- Fit the finished bilingual box after translation changes the amount of text.
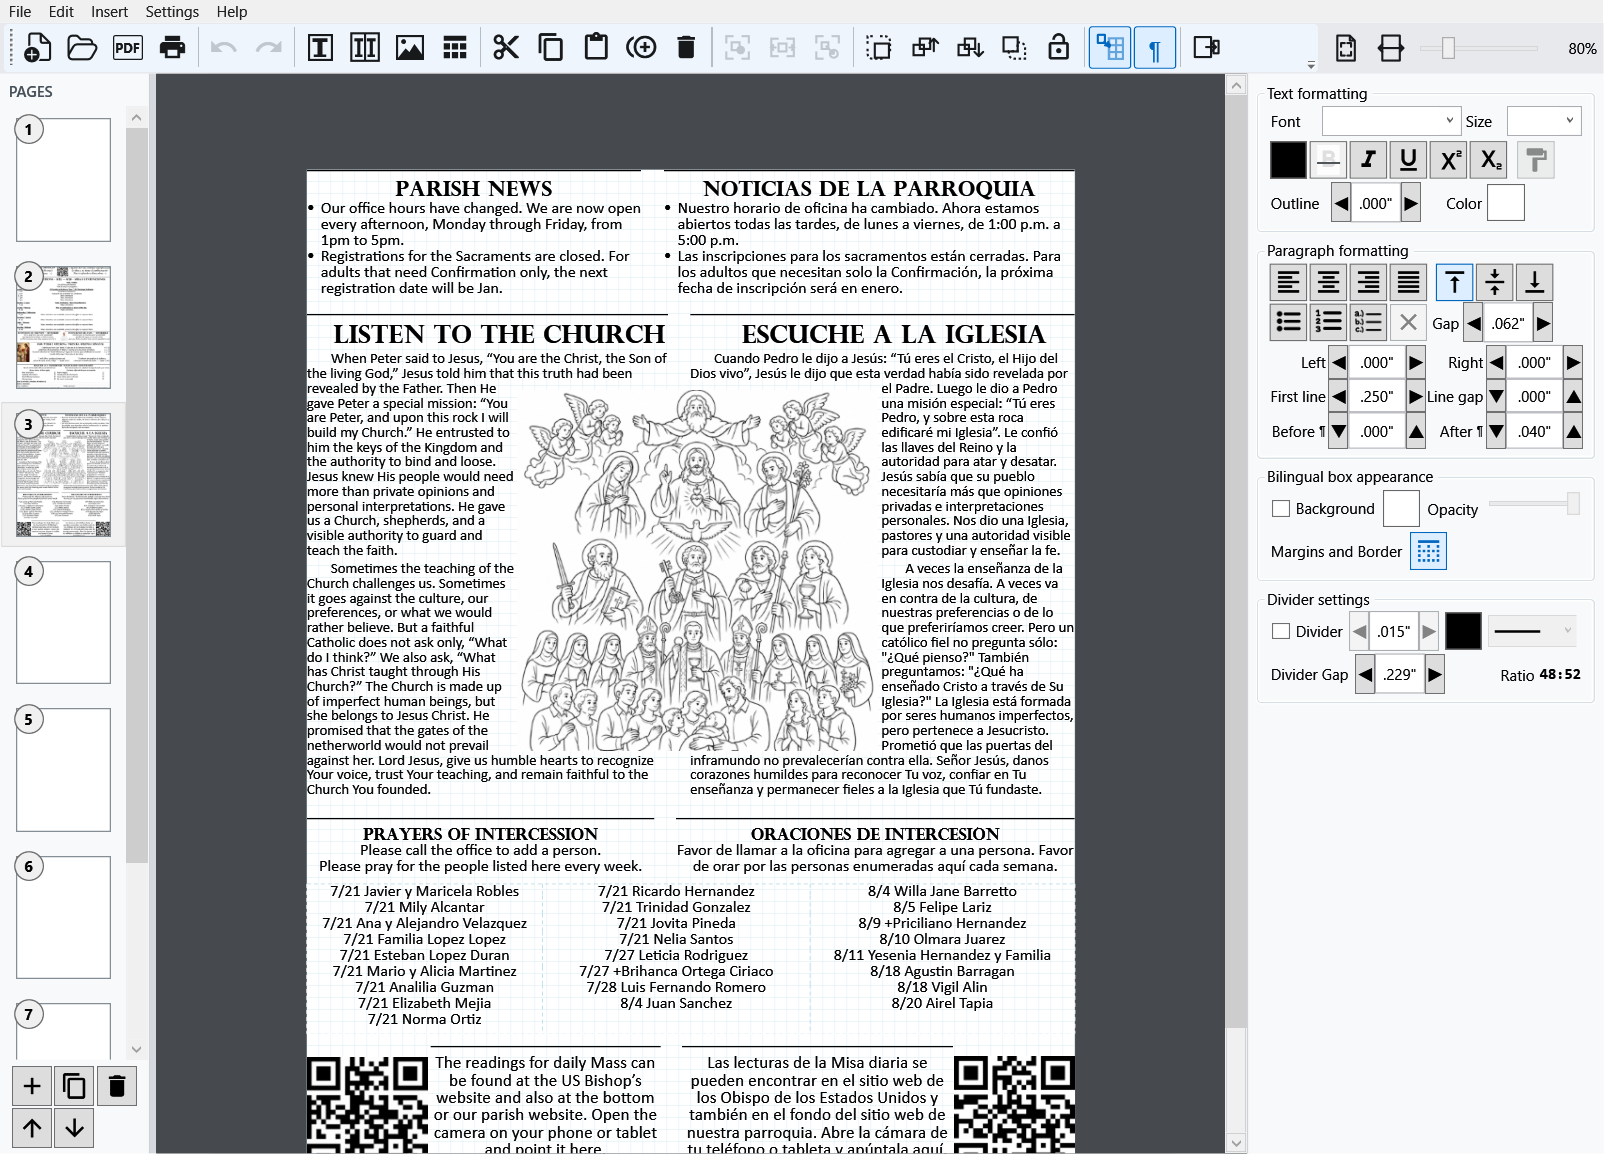
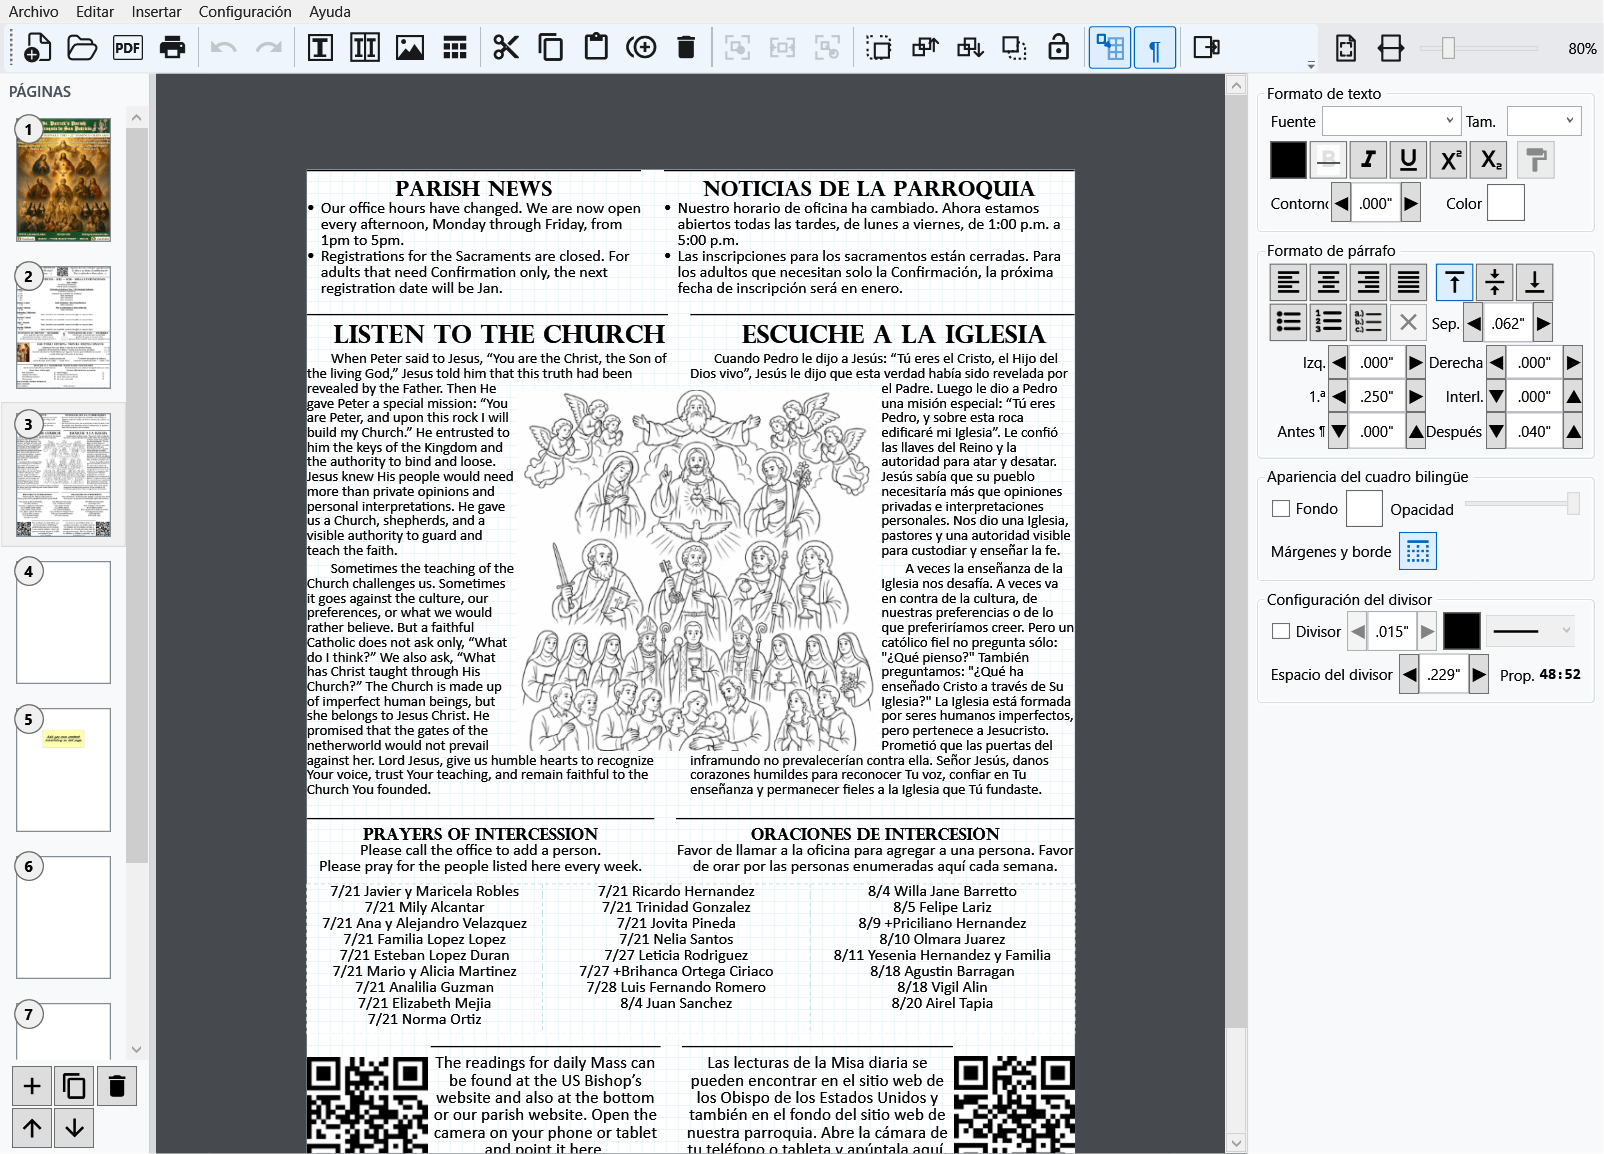
Image
Select the cover image to adjust its appearance. For new artwork, choose Insert > Image. Use Crop image to frame the part you want to keep; Enter accepts the crop and Esc cancels it. Keep Maintain aspect ratio selected to avoid stretching.Select the cover image to adjust its appearance. For new artwork, choose Insert > Image. Use Crop image to frame the part you want to keep; Enter accepts the crop and Esc cancels it. Keep Maintain aspect ratio selected to avoid stretching.Select the cover image to adjust its appearance. For new artwork, choose Insert > Image. Use Crop image to frame the part you want to keep; Enter accepts the crop and Esc cancels it. Keep Maintain aspect ratio selected to avoid stretching.Select the cover image to adjust its appearance. For new artwork, choose Insert > Image. Use Crop image to frame the part you want to keep; Enter accepts the crop and Esc cancels it. Keep Maintain aspect ratio selected to avoid stretching.Select the cover image to adjust its appearance. For new artwork, choose Insert > Image. Use Crop image to frame the part you want to keep; Enter accepts the crop and Esc cancels it. Keep Maintain aspect ratio selected to avoid stretching.Select the cover image to adjust its appearance. For new artwork, choose Insert > Image. Use Crop image to frame the part you want to keep; Enter accepts the crop and Esc cancels it. Keep Maintain aspect ratio selected to avoid stretching.Select the cover image to adjust its appearance. For new artwork, choose Insert > Image. Use Crop image to frame the part you want to keep; Enter accepts the crop and Esc cancels it. Keep Maintain aspect ratio selected to avoid stretching.Seleccione la imagen de portada para ajustar su apariencia. Para agregar arte nuevo, elija Insertar > Imagen. Use Recortar imagen para encuadrar el área que desea conservar; Enter acepta el recorte y Esc lo cancela. Mantenga activada Conservar proporción para evitar deformaciones.
Cover art, photographs, QR codes, and advertisements
Catholic Publisher embeds PNG, JPEG, GIF, and BMP source data in the .cpub, so moving the original file later does not break the publication. The canvas previews at 144 DPI; PDF and print use the embedded source at output resolution.
- Crop nondestructively, maintain the source aspect ratio, or reset to the original placement and appearance.
- Choose Erase background to preview a threshold and crop the matching background, make it transparent, or do both in one undoable operation.
- Choose Make the background to fill the page with the image, send it behind the other objects, and lock its position and size.
- Adjust brightness, contrast, saturation, opacity, outline, and exterior borders.
- Choose Full color, Grayscale, Black and white, or Custom color treatment.
- Enable text wrapping and set padding around the image.
Table
On sample page 2, double-click a Mass intention cell to edit its text. Right-click the table to insert a row before or after an existing row. Fit height to minimum adjusts the targeted rows after you finish.On sample page 2, double-click a Mass intention cell to edit its text. Right-click the table to insert a row before or after an existing row. Fit height to minimum adjusts the targeted rows after you finish.On sample page 2, double-click a Mass intention cell to edit its text. Right-click the table to insert a row before or after an existing row. Fit height to minimum adjusts the targeted rows after you finish.On sample page 2, double-click a Mass intention cell to edit its text. Right-click the table to insert a row before or after an existing row. Fit height to minimum adjusts the targeted rows after you finish.On sample page 2, double-click a Mass intention cell to edit its text. Right-click the table to insert a row before or after an existing row. Fit height to minimum adjusts the targeted rows after you finish.On sample page 2, double-click a Mass intention cell to edit its text. Right-click the table to insert a row before or after an existing row. Fit height to minimum adjusts the targeted rows after you finish.On sample page 2, double-click a Mass intention cell to edit its text. Right-click the table to insert a row before or after an existing row. Fit height to minimum adjusts the targeted rows after you finish.En la página 2 de la muestra, haga doble clic en una celda de intenciones de Misa para editar su texto. Haga clic derecho en la tabla para insertar una fila antes o después de una existente. Ajustar altura al mínimo ajusta las filas elegidas al terminar.
Mass intentions, schedules, forms, personnel, and sponsors
Tables combine structured rows and columns with rich text in every cell. Each cell can have its own ID, name, formatting, background, vertical alignment, margins, and borders.
- Use 1–70 physical rows and 1–8 grid columns.
- Insert or delete rows and columns, merge and split cells, or split a table.
- Fit height to minimum fits the targeted rows to their visible content and the table’s minimum row height.
- Select cells like a spreadsheet; Shift selects a rectangle and Ctrl toggles logical cells.
- Lay out multiple selected tables with a controlled gap, merge compatible tables, or sort prayer names.
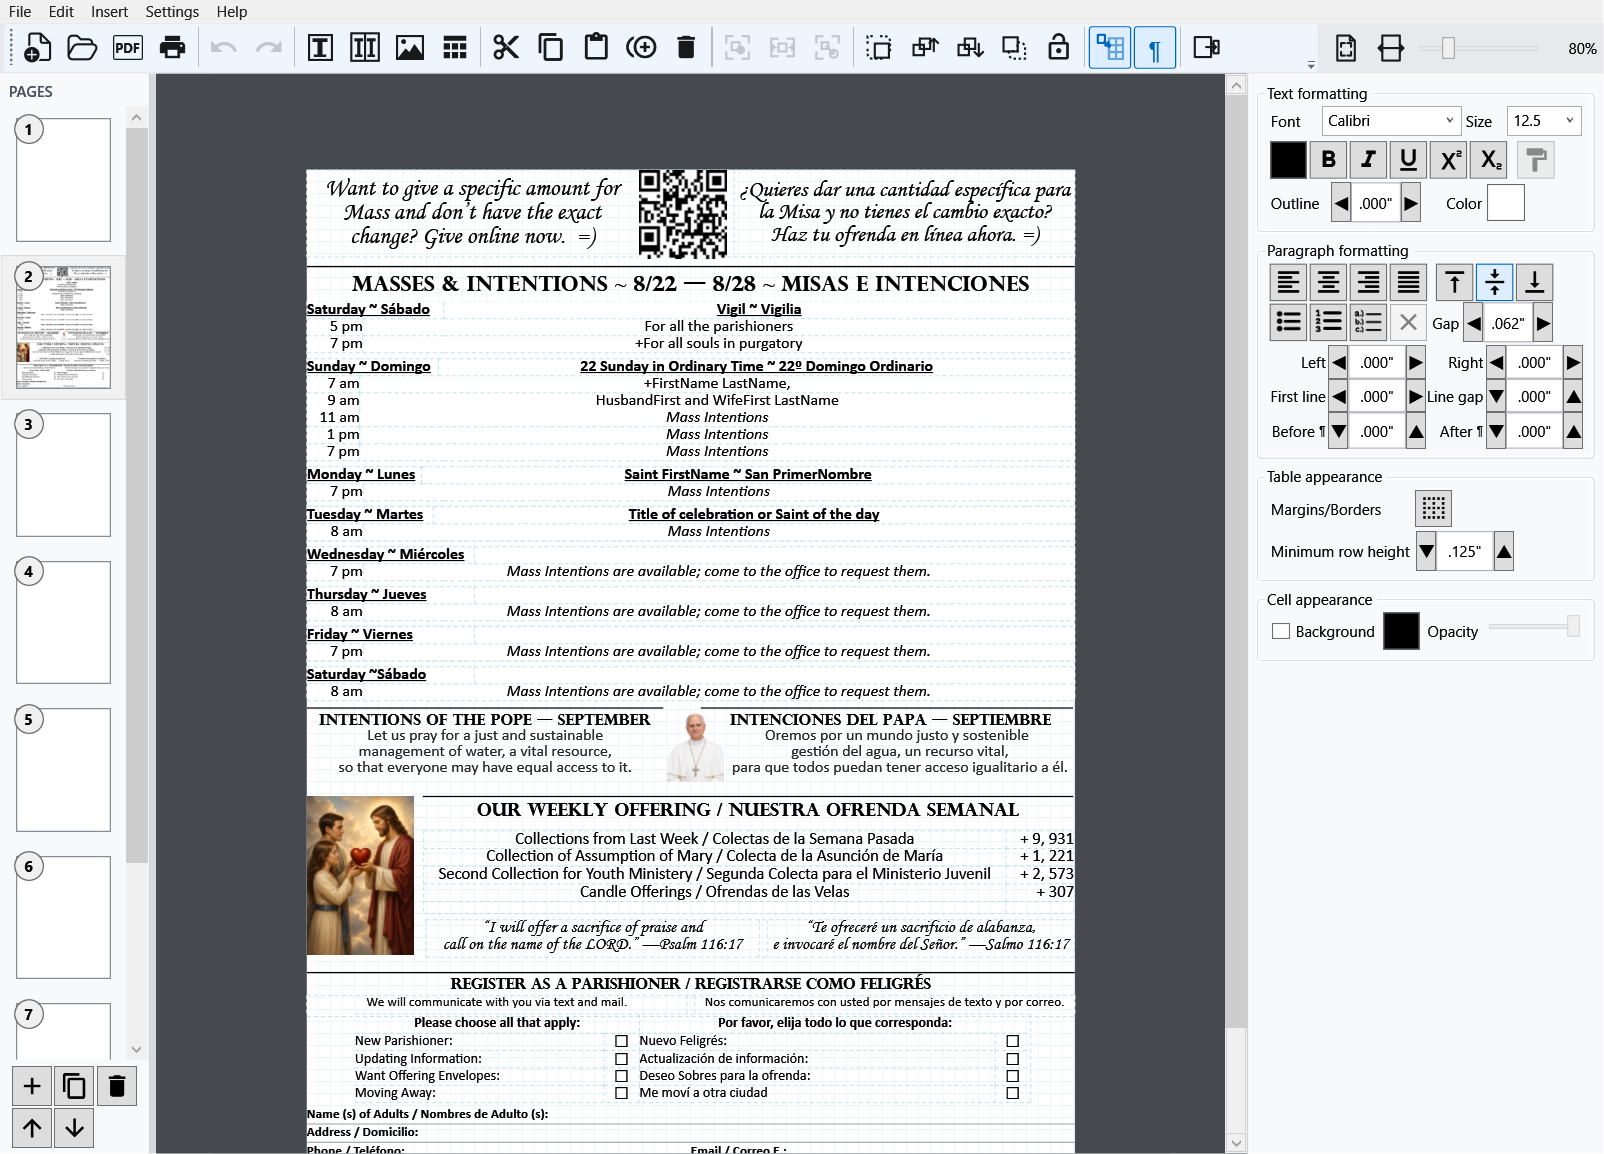
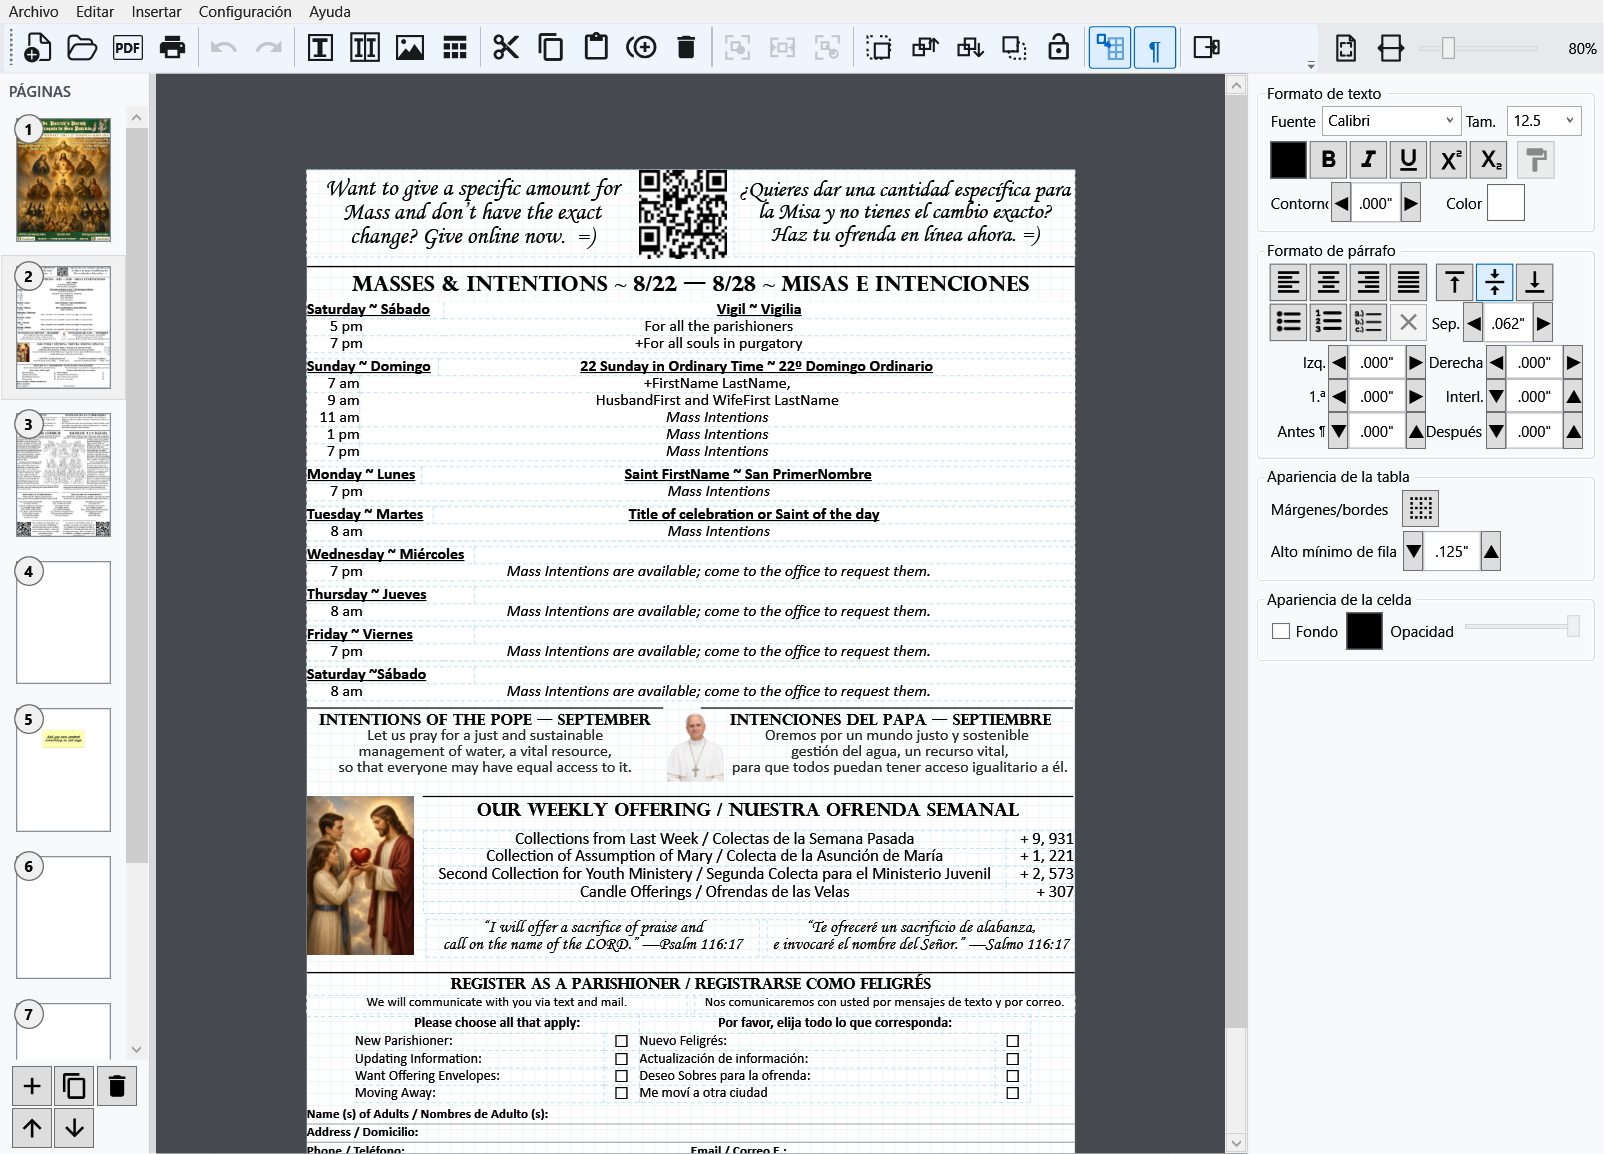
Fit and restructure tables
Right-click inside a table to insert or delete rows and columns, merge or split cells, fit row height to the visible content and minimum row height, split the table, select the complete table, or sort prayer names. When several tables are selected, Catholic Publisher can lay them out consistently or merge compatible structures.
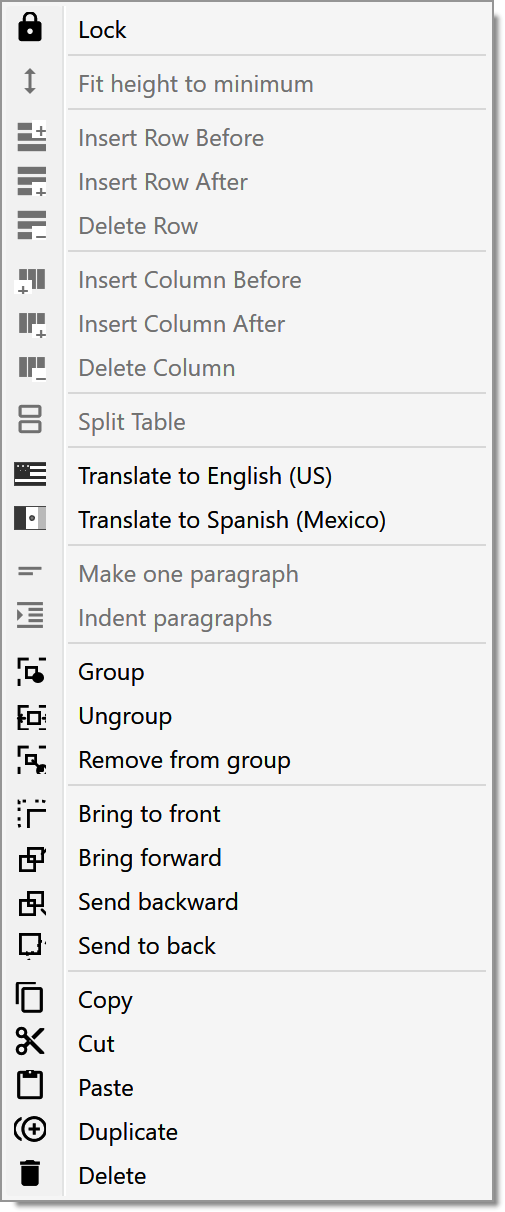
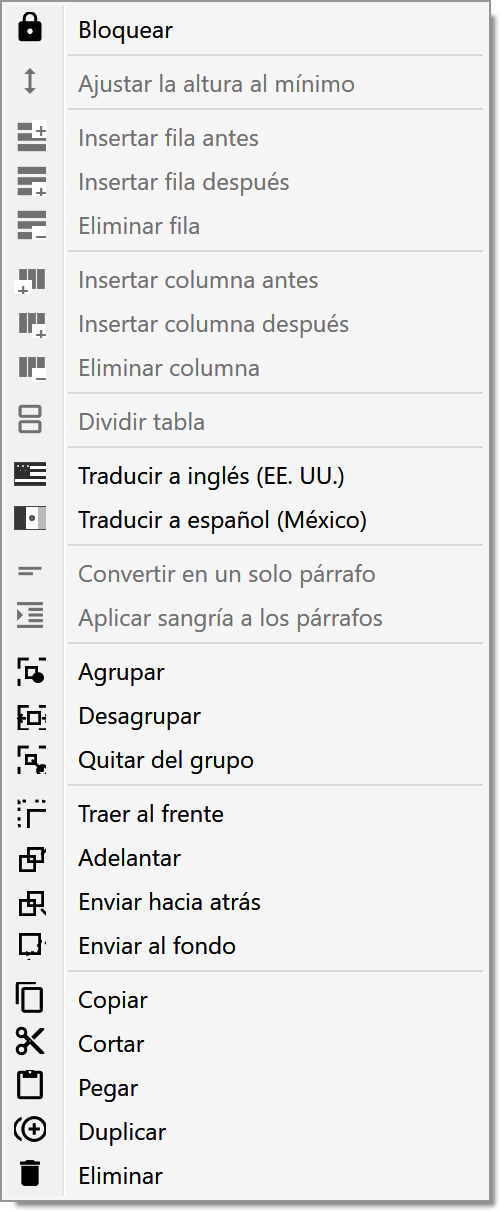
06 · Move, group, and order objectsMove, group, and order objectsMove, group, and order objectsMove, group, and order objectsMove, group, and order objectsMove, group, and order objectsMove, group, and order objectsMover, agrupar y ordenar objetos
Move, group, and order objectsMove, group, and order objectsMove, group, and order objectsMove, group, and order objectsMove, group, and order objectsMove, group, and order objectsMove, group, and order objectsMueva, agrupe y ordene objetos
Select, move, and resizeSelect, move, and resizeSelect, move, and resizeSelect, move, and resizeSelect, move, and resizeSelect, move, and resizeSelect, move, and resizeSeleccione, mueva y cambie el tamaño
Click an object to select it. Ctrl-click adds or removes objects from a selection. Drag an empty part of the canvas to select objects; Shift-drag selects only objects completely enclosed. Drag objects or their handles to move and resize them. Arrow keys nudge; Shift+arrow nudges by 0.1 inch.
Select several objects with Ctrl-click or Shift-click. Drag one selected object to move the selection together. Use side or corner handles to resize. If movement is blocked, unlock position and size first.Select several objects with Ctrl-click or Shift-click. Drag one selected object to move the selection together. Use side or corner handles to resize. If movement is blocked, unlock position and size first.Select several objects with Ctrl-click or Shift-click. Drag one selected object to move the selection together. Use side or corner handles to resize. If movement is blocked, unlock position and size first.Select several objects with Ctrl-click or Shift-click. Drag one selected object to move the selection together. Use side or corner handles to resize. If movement is blocked, unlock position and size first.Select several objects with Ctrl-click or Shift-click. Drag one selected object to move the selection together. Use side or corner handles to resize. If movement is blocked, unlock position and size first.Select several objects with Ctrl-click or Shift-click. Drag one selected object to move the selection together. Use side or corner handles to resize. If movement is blocked, unlock position and size first.Select several objects with Ctrl-click or Shift-click. Drag one selected object to move the selection together. Use side or corner handles to resize. If movement is blocked, unlock position and size first.Seleccione varios objetos con Ctrl-clic o Shift-clic. Arrastre un objeto seleccionado para mover todo el conjunto. Use los tiradores laterales o de esquina para cambiar el tamaño. Si no puede moverlo, desbloquee primero la posición y el tamaño.
Keep related objects togetherKeep related objects togetherKeep related objects togetherKeep related objects togetherKeep related objects togetherKeep related objects togetherKeep related objects togetherMantenga juntos los objetos relacionados
Select the objects, then choose Group objects. The group moves and resizes together while its text, images, and tables remain editable. Double-click text inside a group to edit it without ungrouping. Use Ungroup objects to separate the members, or Remove from group for a selected child.Select the objects, then choose Group objects. The group moves and resizes together while its text, images, and tables remain editable. Double-click text inside a group to edit it without ungrouping. Use Ungroup objects to separate the members, or Remove from group for a selected child.Select the objects, then choose Group objects. The group moves and resizes together while its text, images, and tables remain editable. Double-click text inside a group to edit it without ungrouping. Use Ungroup objects to separate the members, or Remove from group for a selected child.Select the objects, then choose Group objects. The group moves and resizes together while its text, images, and tables remain editable. Double-click text inside a group to edit it without ungrouping. Use Ungroup objects to separate the members, or Remove from group for a selected child.Select the objects, then choose Group objects. The group moves and resizes together while its text, images, and tables remain editable. Double-click text inside a group to edit it without ungrouping. Use Ungroup objects to separate the members, or Remove from group for a selected child.Select the objects, then choose Group objects. The group moves and resizes together while its text, images, and tables remain editable. Double-click text inside a group to edit it without ungrouping. Use Ungroup objects to separate the members, or Remove from group for a selected child.Select the objects, then choose Group objects. The group moves and resizes together while its text, images, and tables remain editable. Double-click text inside a group to edit it without ungrouping. Use Ungroup objects to separate the members, or Remove from group for a selected child.Seleccione los objetos y elija Agrupar objetos. El grupo se mueve y cambia de tamaño como una unidad, pero conserva editables el texto, las imágenes y las tablas. Haga doble clic en el texto de un grupo para editarlo sin desagrupar. Use Desagrupar objetos para separar sus miembros o Quitar del grupo para un elemento seleccionado.
Choose what appears in frontChoose what appears in frontChoose what appears in frontChoose what appears in frontChoose what appears in frontChoose what appears in frontChoose what appears in frontElija qué aparece delante
When objects overlap, use Bring to front or Send to back to move the selection to the top or bottom of the stack. Bring forward and Send backward move it one layer at a time. These commands change the overlap order, not the position on the page.When objects overlap, use Bring to front or Send to back to move the selection to the top or bottom of the stack. Bring forward and Send backward move it one layer at a time. These commands change the overlap order, not the position on the page.When objects overlap, use Bring to front or Send to back to move the selection to the top or bottom of the stack. Bring forward and Send backward move it one layer at a time. These commands change the overlap order, not the position on the page.When objects overlap, use Bring to front or Send to back to move the selection to the top or bottom of the stack. Bring forward and Send backward move it one layer at a time. These commands change the overlap order, not the position on the page.When objects overlap, use Bring to front or Send to back to move the selection to the top or bottom of the stack. Bring forward and Send backward move it one layer at a time. These commands change the overlap order, not the position on the page.When objects overlap, use Bring to front or Send to back to move the selection to the top or bottom of the stack. Bring forward and Send backward move it one layer at a time. These commands change the overlap order, not the position on the page.When objects overlap, use Bring to front or Send to back to move the selection to the top or bottom of the stack. Bring forward and Send backward move it one layer at a time. These commands change the overlap order, not the position on the page.Cuando los objetos se superponen, use Traer al frente o Enviar al fondo para llevar la selección al principio o al final de las capas. Traer adelante y Enviar atrás la mueven una capa a la vez. Estos comandos cambian el orden de superposición, no la posición en la página.
Right-click menus for every object
Right-click the selected object to see the commands that apply to that object type. Commands that need another selection or an active table cell remain visible but unavailable until they can be used.
See the right-click menusSee the right-click menusSee the right-click menusSee the right-click menusSee the right-click menusSee the right-click menusSee the right-click menusVer los menús contextuales
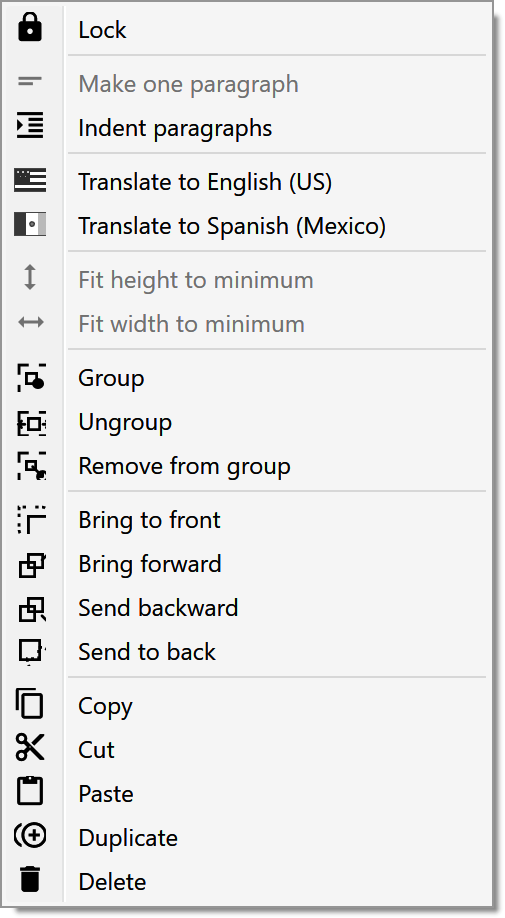
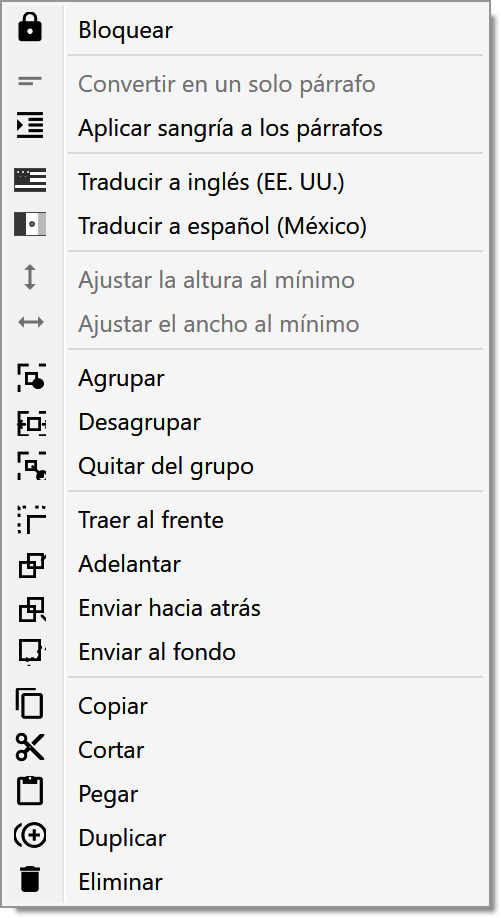
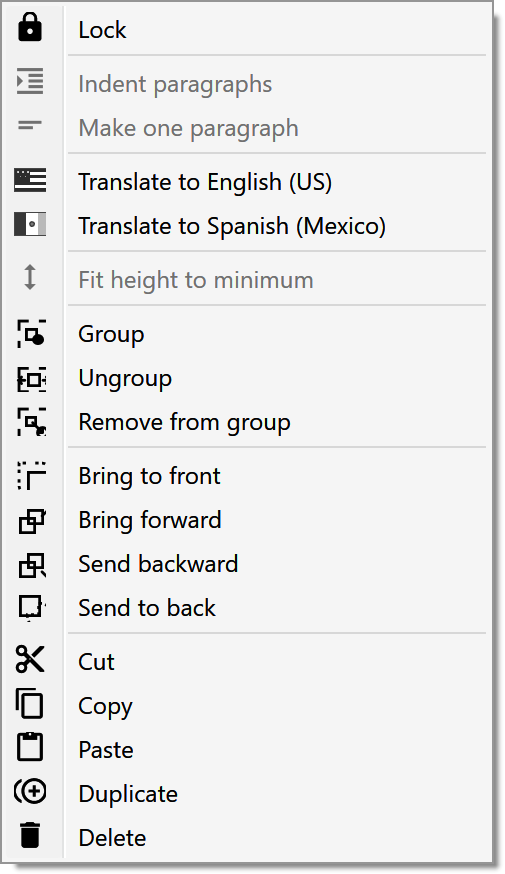
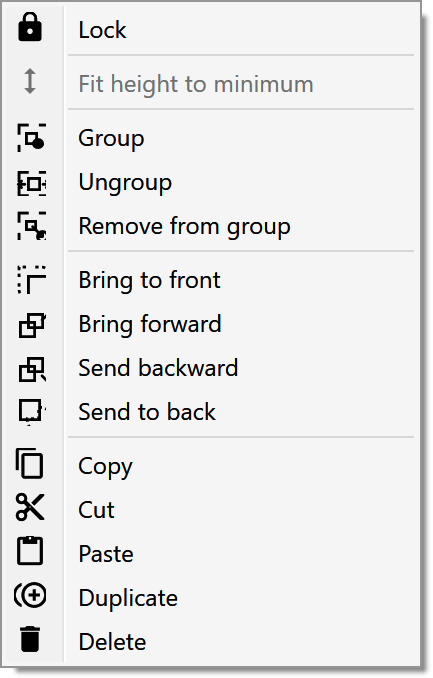
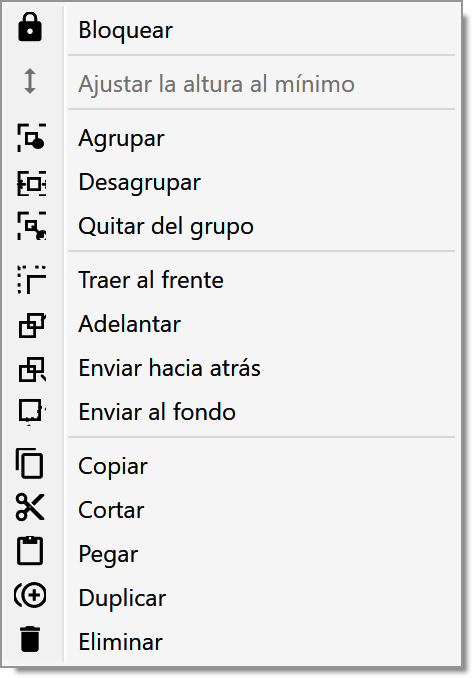
Group without flattening
Grouped text, images, and tables retain their own type, content, formatting, identity, and relative position. Enter the group to edit children.
Lock geometry
Lock protects position and size only. You can still correct text or other content without first unlocking a finished layout.
Layer precisely
Bring to front, bring forward, send backward, and send to back resolve overlaps without disturbing page geometry.
Snap after the drag
Objects move freely while dragging, then snap on release to the grid, page guides, or nearby object edges and centers.
Copy complete formatting
With same-type objects selected, right-click the source and choose Copy formatting…. Content, IDs, names, position, and image assets are not replaced.
Show exact geometry
Enable Settings > Show locations and sizes to edit X, Y, Width, and Height in decimal inches.
Pan a zoomed page
Hold Ctrl and drag from empty white or gray workspace to move around without changing the selection.
Show IDs and names
Enable Settings > Show IDs and names when you need the identity card for AI-assisted editing or a precisely named object.
07 · Working with AIWorking with AIWorking with AIWorking with AIWorking with AIWorking with AIWorking with AITrabajar con IA
Work with AI toolsWork with AI toolsWork with AI toolsWork with AI toolsWork with AI toolsWork with AI toolsWork with AI toolsTrabaje con herramientas de IA
An AI assistant can help revise an article, translate a reflection, or update recurring text in your CPUB. Give it a copy of the publication, the AI editing instructions below, and a precise request identifying what should change. Reopen the result in Catholic Publisher and check the wording and fit before using it.An AI assistant can help revise an article, translate a reflection, or update recurring text in your CPUB. Give it a copy of the publication, the AI editing instructions below, and a precise request identifying what should change. Reopen the result in Catholic Publisher and check the wording and fit before using it.An AI assistant can help revise an article, translate a reflection, or update recurring text in your CPUB. Give it a copy of the publication, the AI editing instructions below, and a precise request identifying what should change. Reopen the result in Catholic Publisher and check the wording and fit before using it.An AI assistant can help revise an article, translate a reflection, or update recurring text in your CPUB. Give it a copy of the publication, the AI editing instructions below, and a precise request identifying what should change. Reopen the result in Catholic Publisher and check the wording and fit before using it.An AI assistant can help revise an article, translate a reflection, or update recurring text in your CPUB. Give it a copy of the publication, the AI editing instructions below, and a precise request identifying what should change. Reopen the result in Catholic Publisher and check the wording and fit before using it.An AI assistant can help revise an article, translate a reflection, or update recurring text in your CPUB. Give it a copy of the publication, the AI editing instructions below, and a precise request identifying what should change. Reopen the result in Catholic Publisher and check the wording and fit before using it.An AI assistant can help revise an article, translate a reflection, or update recurring text in your CPUB. Give it a copy of the publication, the AI editing instructions below, and a precise request identifying what should change. Reopen the result in Catholic Publisher and check the wording and fit before using it.Un asistente de IA puede ayudar a revisar un artículo, traducir una reflexión o actualizar texto recurrente del CPUB. Entréguele una copia de la publicación, las instrucciones de edición con IA que aparecen abajo y una solicitud precisa que indique qué debe cambiar. Abra el resultado en Catholic Publisher y revise el texto y su ajuste antes de usarlo.
Catholic Publisher includes cpub.exe beside the main application so an AI tool or script can safely update text without editing the internal CPUB package. Use cpub list to locate a text box, bilingual pane, or table cell; use cpub export to create ordinary HTML; edit that HTML; and use cpub replace to create the updated publication.Catholic Publisher includes cpub.exe beside the main application so an AI tool or script can safely update text without editing the internal CPUB package. Use cpub list to locate a text box, bilingual pane, or table cell; use cpub export to create ordinary HTML; edit that HTML; and use cpub replace to create the updated publication.Catholic Publisher includes cpub.exe beside the main application so an AI tool or script can safely update text without editing the internal CPUB package. Use cpub list to locate a text box, bilingual pane, or table cell; use cpub export to create ordinary HTML; edit that HTML; and use cpub replace to create the updated publication.Catholic Publisher includes cpub.exe beside the main application so an AI tool or script can safely update text without editing the internal CPUB package. Use cpub list to locate a text box, bilingual pane, or table cell; use cpub export to create ordinary HTML; edit that HTML; and use cpub replace to create the updated publication.Catholic Publisher includes cpub.exe beside the main application so an AI tool or script can safely update text without editing the internal CPUB package. Use cpub list to locate a text box, bilingual pane, or table cell; use cpub export to create ordinary HTML; edit that HTML; and use cpub replace to create the updated publication.Catholic Publisher includes cpub.exe beside the main application so an AI tool or script can safely update text without editing the internal CPUB package. Use cpub list to locate a text box, bilingual pane, or table cell; use cpub export to create ordinary HTML; edit that HTML; and use cpub replace to create the updated publication.Catholic Publisher includes cpub.exe beside the main application so an AI tool or script can safely update text without editing the internal CPUB package. Use cpub list to locate a text box, bilingual pane, or table cell; use cpub export to create ordinary HTML; edit that HTML; and use cpub replace to create the updated publication.Catholic Publisher incluye cpub.exe junto a la aplicación principal para que una herramienta de IA o un script pueda actualizar texto de forma segura sin editar el paquete CPUB interno. Use cpub list para localizar un cuadro de texto, panel bilingüe o celda; use cpub export para crear HTML común; edite ese HTML; y use cpub replace para crear la publicación actualizada.
cpub list "Bulletin YYYY-MM-DD.cpub"
cpub export "Bulletin YYYY-MM-DD.cpub" --name weekly-article -o article.html
cpub replace "Bulletin YYYY-MM-DD.cpub" --html article.html -o "Bulletin updated.cpub"
Every editable text target has a permanent, unique four-character ID and an optional custom name. Click the ID in Properties to copy it. Names such as MassIntentions or PastorReflectionSpanish are easier for people and AI tools to recognize, but names do not have to be unique; use the exact ID when only one target must change.Every editable text target has a permanent, unique four-character ID and an optional custom name. Click the ID in Properties to copy it. Names such as MassIntentions or PastorReflectionSpanish are easier for people and AI tools to recognize, but names do not have to be unique; use the exact ID when only one target must change.Every editable text target has a permanent, unique four-character ID and an optional custom name. Click the ID in Properties to copy it. Names such as MassIntentions or PastorReflectionSpanish are easier for people and AI tools to recognize, but names do not have to be unique; use the exact ID when only one target must change.Every editable text target has a permanent, unique four-character ID and an optional custom name. Click the ID in Properties to copy it. Names such as MassIntentions or PastorReflectionSpanish are easier for people and AI tools to recognize, but names do not have to be unique; use the exact ID when only one target must change.Every editable text target has a permanent, unique four-character ID and an optional custom name. Click the ID in Properties to copy it. Names such as MassIntentions or PastorReflectionSpanish are easier for people and AI tools to recognize, but names do not have to be unique; use the exact ID when only one target must change.Every editable text target has a permanent, unique four-character ID and an optional custom name. Click the ID in Properties to copy it. Names such as MassIntentions or PastorReflectionSpanish are easier for people and AI tools to recognize, but names do not have to be unique; use the exact ID when only one target must change.Every editable text target has a permanent, unique four-character ID and an optional custom name. Click the ID in Properties to copy it. Names such as MassIntentions or PastorReflectionSpanish are easier for people and AI tools to recognize, but names do not have to be unique; use the exact ID when only one target must change.Cada destino de texto editable tiene un ID permanente y único de cuatro caracteres y un nombre personalizado opcional. Haga clic en el ID en Propiedades para copiarlo. Los nombres como MassIntentions o PastorReflectionSpanish son más fáciles de reconocer, pero no tienen que ser únicos; use el ID exacto cuando solo deba cambiar un destino.
The HTML can replace the complete target with any number of paragraphs and can include familiar character formatting, alignment, indents, spacing, and bullet or numbered lists. Omitted formatting inherits from the existing publication. Only the selected text changes; positions, sizes, IDs, images, table structure, and unrelated settings remain untouched.The HTML can replace the complete target with any number of paragraphs and can include familiar character formatting, alignment, indents, spacing, and bullet or numbered lists. Omitted formatting inherits from the existing publication. Only the selected text changes; positions, sizes, IDs, images, table structure, and unrelated settings remain untouched.The HTML can replace the complete target with any number of paragraphs and can include familiar character formatting, alignment, indents, spacing, and bullet or numbered lists. Omitted formatting inherits from the existing publication. Only the selected text changes; positions, sizes, IDs, images, table structure, and unrelated settings remain untouched.The HTML can replace the complete target with any number of paragraphs and can include familiar character formatting, alignment, indents, spacing, and bullet or numbered lists. Omitted formatting inherits from the existing publication. Only the selected text changes; positions, sizes, IDs, images, table structure, and unrelated settings remain untouched.The HTML can replace the complete target with any number of paragraphs and can include familiar character formatting, alignment, indents, spacing, and bullet or numbered lists. Omitted formatting inherits from the existing publication. Only the selected text changes; positions, sizes, IDs, images, table structure, and unrelated settings remain untouched.The HTML can replace the complete target with any number of paragraphs and can include familiar character formatting, alignment, indents, spacing, and bullet or numbered lists. Omitted formatting inherits from the existing publication. Only the selected text changes; positions, sizes, IDs, images, table structure, and unrelated settings remain untouched.The HTML can replace the complete target with any number of paragraphs and can include familiar character formatting, alignment, indents, spacing, and bullet or numbered lists. Omitted formatting inherits from the existing publication. Only the selected text changes; positions, sizes, IDs, images, table structure, and unrelated settings remain untouched.El HTML puede reemplazar el destino completo con cualquier cantidad de párrafos y puede incluir formato de caracteres conocido, alineación, sangrías, espaciado y listas con viñetas o números. El formato omitido se hereda de la publicación existente. Solo cambia el texto seleccionado; las posiciones, tamaños, IDs, imágenes, estructura de tabla y configuraciones no relacionadas permanecen intactos.
Give the downloaded file to the AI. It explains where to find cpub.exe, the exact commands and HTML format, supported formatting, file locking, and safe replacement rules.Give the downloaded file to the AI. It explains where to find cpub.exe, the exact commands and HTML format, supported formatting, file locking, and safe replacement rules.Give the downloaded file to the AI. It explains where to find cpub.exe, the exact commands and HTML format, supported formatting, file locking, and safe replacement rules.Give the downloaded file to the AI. It explains where to find cpub.exe, the exact commands and HTML format, supported formatting, file locking, and safe replacement rules.Give the downloaded file to the AI. It explains where to find cpub.exe, the exact commands and HTML format, supported formatting, file locking, and safe replacement rules.Give the downloaded file to the AI. It explains where to find cpub.exe, the exact commands and HTML format, supported formatting, file locking, and safe replacement rules.Give the downloaded file to the AI. It explains where to find cpub.exe, the exact commands and HTML format, supported formatting, file locking, and safe replacement rules.Entregue el archivo descargado a la IA. Explica dónde encontrar cpub.exe, los comandos y el formato HTML exactos, el formato admitido, el bloqueo de archivos y las reglas de reemplazo seguro.
08 · Enjoy and keep in touchEnjoy and keep in touchEnjoy and keep in touchEnjoy and keep in touchEnjoy and keep in touchEnjoy and keep in touchEnjoy and keep in touchDisfrute y manténgase en contacto
Enjoy Catholic Publisher
I hope Catholic Publisher helps you serve your parish community. Please send descriptions of anything obviously wrong to jason@capps.church, including a screenshot and the CPUB file. Please send requests for new features as well.I hope Catholic Publisher helps you serve your parish community. Please send descriptions of anything obviously wrong to jason@capps.church, including a screenshot and the CPUB file. Please send requests for new features as well.I hope Catholic Publisher helps you serve your parish community. Please send descriptions of anything obviously wrong to jason@capps.church, including a screenshot and the CPUB file. Please send requests for new features as well.I hope Catholic Publisher helps you serve your parish community. Please send descriptions of anything obviously wrong to jason@capps.church, including a screenshot and the CPUB file. Please send requests for new features as well.I hope Catholic Publisher helps you serve your parish community. Please send descriptions of anything obviously wrong to jason@capps.church, including a screenshot and the CPUB file. Please send requests for new features as well.I hope Catholic Publisher helps you serve your parish community. Please send descriptions of anything obviously wrong to jason@capps.church, including a screenshot and the CPUB file. Please send requests for new features as well.I hope Catholic Publisher helps you serve your parish community. Please send descriptions of anything obviously wrong to jason@capps.church, including a screenshot and the CPUB file. Please send requests for new features as well.Espero que Catholic Publisher le ayude a servir a su comunidad parroquial. Envíe descripciones de cualquier problema evidente a jason@capps.church e incluya una captura de pantalla y el archivo CPUB. También puede enviar solicitudes de nuevas funciones.